Flat roofs get a bad reputation in this country, and honestly, most of it is earned by poor material choices and shoddy installation. Done right, though, a flat roof on an extension or outbuilding can last decades without a single leak. The key is picking the right system for the job. There are three flat roofing systems that dominate the UK market right now: EPDM rubber, GRP fibreglass, and torch-on felt. Each one has its place. Each one has its limits. Here’s a straight-talking breakdown of all three so you can spec the job properly and not have a phone call from an unhappy client six months later.
Why Flat Roof Material Choice Matters More in the UK
The UK climate is genuinely brutal on flat roofs. We don’t get the scorching summers that crack membranes, but we do get relentless rain, standing water, UV exposure in summer, and freeze-thaw cycles every winter that exploit any weakness in a join or seam. The Met Office records show average annual rainfall across England and Wales sitting around 885mm, and in the north and west it’s considerably more. Whatever system you put down has to cope with that, week in, week out, year after year.
So let’s go through each system on its own terms.
EPDM Rubber Roofing: The Tradesman’s Favourite Right Now
EPDM (ethylene propylene diene monomer) has quietly become the go-to flat roofing system for extensions and outbuildings among UK tradesmen over the past decade. It’s a synthetic rubber membrane, typically 1.2mm or 1.5mm thick, supplied in large single-piece sheets that eliminate most of the seams where leaks tend to start.
EPDM Cost per Square Metre
Materials typically run between £15 and £25 per m², depending on thickness and supplier. Installed, you’re looking at £40 to £75 per m² for a straightforward flat roof. A standard single-storey extension roof of around 20m² might cost the client £800 to £1,500 in materials alone, with labour on top. It’s not the cheapest option, but it’s not far off torch-on felt when you factor in longevity.
Installation Complexity
This is where EPDM earns points. No open flame, no hot bitumen, no specialist welding kit. The membrane bonds to the deck using water-based or solvent-based contact adhesive. Experienced hands can lay a clean sheet on a simple rectangular roof in a morning. Detailing around edges, upstands, and penetrations takes care and the right flashing tapes, but it’s well within the capabilities of a competent roofer. The lack of hot works makes it suitable for jobs where fire risk is a concern, attached garages for example.
Lifespan and Warranty
Properly installed EPDM should last 40 to 50 years. Many manufacturers back this with 20-year product warranties, and some extend to 25 years when installed by certified contractors. The rubber handles UV, ozone, and freeze-thaw very well. It stays flexible at temperatures down to around -45°C, so winter cracking simply isn’t an issue.
GRP Fibreglass Roofing: The Rigid, Premium Option
GRP (glass reinforced plastic) roofing has been popular on residential extensions across the UK for well over 20 years. It’s a laminated system: fibreglass matting saturated with polyester resin, topped with a coloured gelcoat. When it’s cured, you’ve got a hard, seamless surface.
GRP Cost per Square Metre
Expect to pay £20 to £35 per m² in materials. Installed, GRP typically costs £50 to £90 per m², making it the most expensive of the three flat roofing systems here. The premium reflects the skill involved and the quality of the finished product. On a 20m² roof, total installed cost could easily reach £1,000 to £1,800 in materials, plus labour.
Installation Complexity
GRP is more demanding than EPDM. The resin must be mixed accurately and laid in appropriate temperature conditions, typically above 5°C and below 25°C, with humidity factored in. Laying it in a British winter requires care and sometimes temporary shelter. The upside is that once it cures, it’s genuinely rigid and seamless across the whole surface. There are no joints for water to find. Detailing into gutters and upstands is done as part of the laminate, not with separate flashing.
Lifespan and Warranty
GRP done properly lasts 25 to 40 years. Many GRP systems come with 20-year product guarantees. The rigid nature means it resists foot traffic well, useful if the roof needs periodic access for maintenance. It can crack under severe point loading or if the underlying deck isn’t solid, which is why a good quality OSB3 or marine ply deck is non-negotiable beneath it.
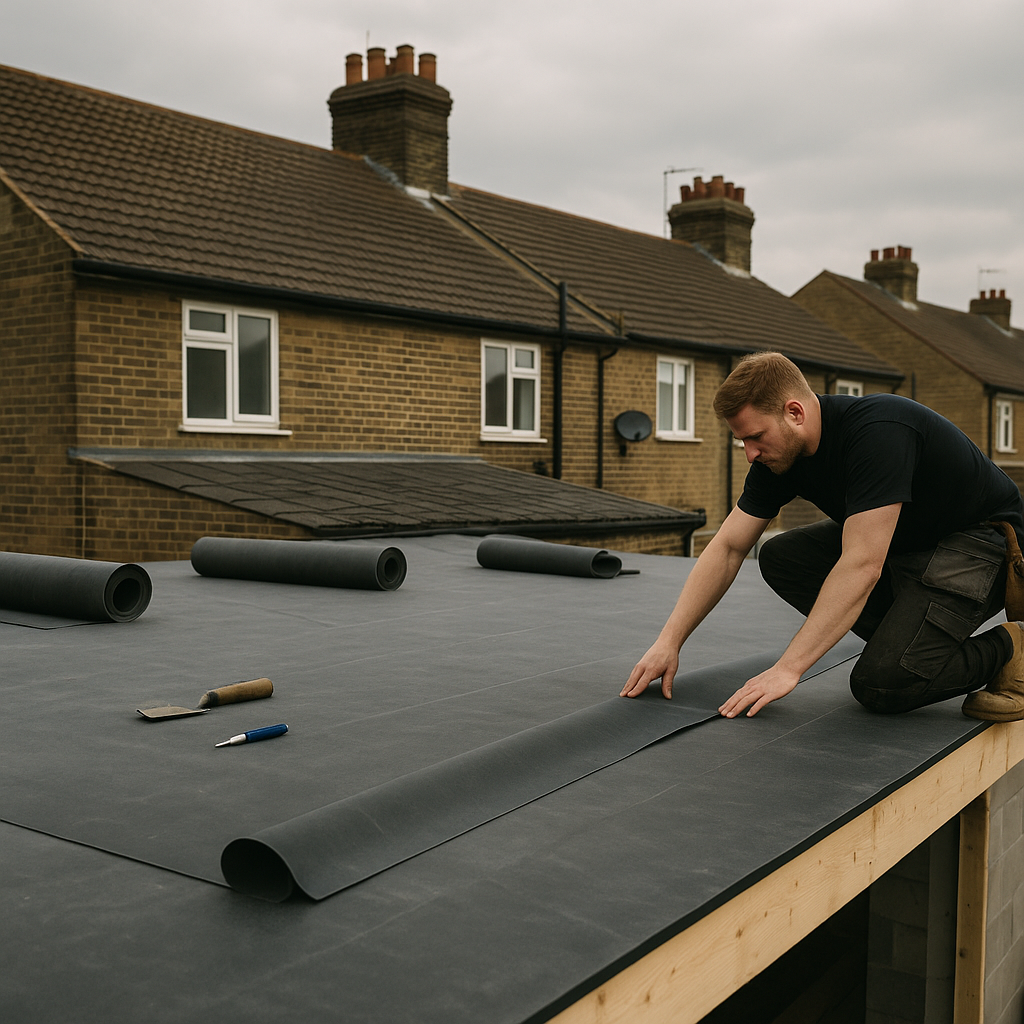
Torch-On Felt: The Traditional System That Still Has a Place
Torch-on (also called torched felt or SBS modified bitumen) is the modern evolution of the old three-layer felt systems. Using a propane torch, rolls of bitumen-modified felt are bonded together and to the deck in overlapping layers. Done to a professional standard with two or three layers, it’s a solid system. Done badly, it’s a maintenance nightmare.
Torch-On Cost per Square Metre
This is the most affordable of the three flat roofing systems on upfront cost. Materials run roughly £8 to £18 per m², and installed costs typically sit between £30 and £60 per m². On a 20m² roof, you could be looking at £160 to £360 in materials. The lower cost makes it attractive for budget-conscious clients, but make sure they understand the trade-off.
Installation Complexity
Torch-on requires hot works, which means a Gas Safe-registered operative and hot works permits on many commercial or managed sites. The skill is in the torching: too much heat and you risk burning through; too little and the bond is weak. Seam overlaps are critical. A competent roofer can work quickly, but it demands consistent technique across the whole surface. Cold weather slows the work and affects adhesion if you’re not careful.
Lifespan and Warranty
A well-installed two-layer torch-on system typically lasts 15 to 20 years. A three-layer system with a quality mineral cap sheet can push to 25 years. Warranties from manufacturers usually run 10 to 15 years, shorter than EPDM or GRP. The seams remain the vulnerability, and any movement in the deck beneath can open them over time. In the UK’s freeze-thaw cycle, seam integrity matters a great deal.
Side-by-Side: Which Flat Roofing System Should You Specify?
For most residential extensions and outbuildings in the UK in 2026, EPDM is the default sensible choice. It’s cost-effective, durable, doesn’t require hot works, and the large single sheets handle our wet climate brilliantly. If the client wants a premium finish with zero flex underfoot, GRP is worth the extra cost, especially on warm roofs with habitable space below. Torch-on still makes sense for straightforward re-roofing jobs where budget is tight and the client understands the lifespan trade-off.
One practical note for anyone running a trade business: having a clean, professional online presence helps you win these kinds of mid-to-large jobs. There are tools out there that can get you started without a huge outlay, including Free Websites for tradesmen just getting set up online.
Whatever system you install, make sure the deck is right, the falls are right (minimum 1:80 is the Building Regulations requirement for flat roofs in England), and the detailing at upstands and penetrations is done properly. That’s where 90% of flat roof failures start. The membrane matters, but the prep and the details matter just as much.
Quick Summary Table
- EPDM: £40-£75/m² installed, 40-50 year lifespan, 20-25 year warranty, no hot works, excellent in wet and freeze-thaw conditions.
- GRP Fibreglass: £50-£90/m² installed, 25-40 year lifespan, 20 year warranty, rigid and seamless, temperature-sensitive to install.
- Torch-On Felt: £30-£60/m² installed, 15-25 year lifespan, 10-15 year warranty, lowest upfront cost, requires hot works.
Pick the right flat roofing system for the right job, install it correctly, and a flat roof doesn’t have to be a problem. That’s the whole story.
Frequently Asked Questions
Which flat roofing system lasts the longest in the UK?
EPDM rubber currently offers the longest expected lifespan of the three main systems, typically 40 to 50 years when properly installed. GRP fibreglass comes second at 25 to 40 years, while torch-on felt typically lasts 15 to 25 years depending on the number of layers and installation quality.
How much does a flat roof cost per square metre in the UK?
Installed costs vary by system: EPDM runs roughly £40 to £75 per m², GRP fibreglass is £50 to £90 per m², and torch-on felt is the most affordable at £30 to £60 per m². These figures include materials and labour but exclude any deck replacement or structural work underneath.
Is EPDM or GRP better for a house extension?
Both are excellent choices for extensions, and it largely depends on budget and use. EPDM is more forgiving to install and performs brilliantly in wet UK conditions, making it ideal for most standard extensions. GRP is better where the roof will see regular foot traffic or where a harder, more premium finish is required.
Do flat roofing systems need planning permission in the UK?
Flat roof replacements on existing structures generally fall under permitted development and don’t require planning permission. However, if you’re adding a new extension or significantly raising a roof height, permitted development rules apply and you should check with your local planning authority. Building Regulations approval is required for new flat roofs regardless.
What is the minimum fall required for a flat roof under UK Building Regulations?
UK Building Regulations require a minimum fall of 1:80 for flat roofs, though most roofing manufacturers and the NHBC recommend a design fall of 1:40 to allow for any deflection in the deck. Insufficient fall leads to ponding water, which accelerates deterioration in all three flat roofing systems.