
External wall insulation has gone from a niche retrofit solution to one of the most commonly specified upgrades on British housing stock, and with good reason. Solid-wall properties, which make up a significant chunk of pre-1920s terraced and semi-detached housing across England and Wales, have nowhere near enough thermal resistance in the fabric alone. The problem is that EWI has also attracted a lot of rushed, under-specified work, and the failures I’ve seen on sites around the country are entirely avoidable if you understand the system properly from the start.
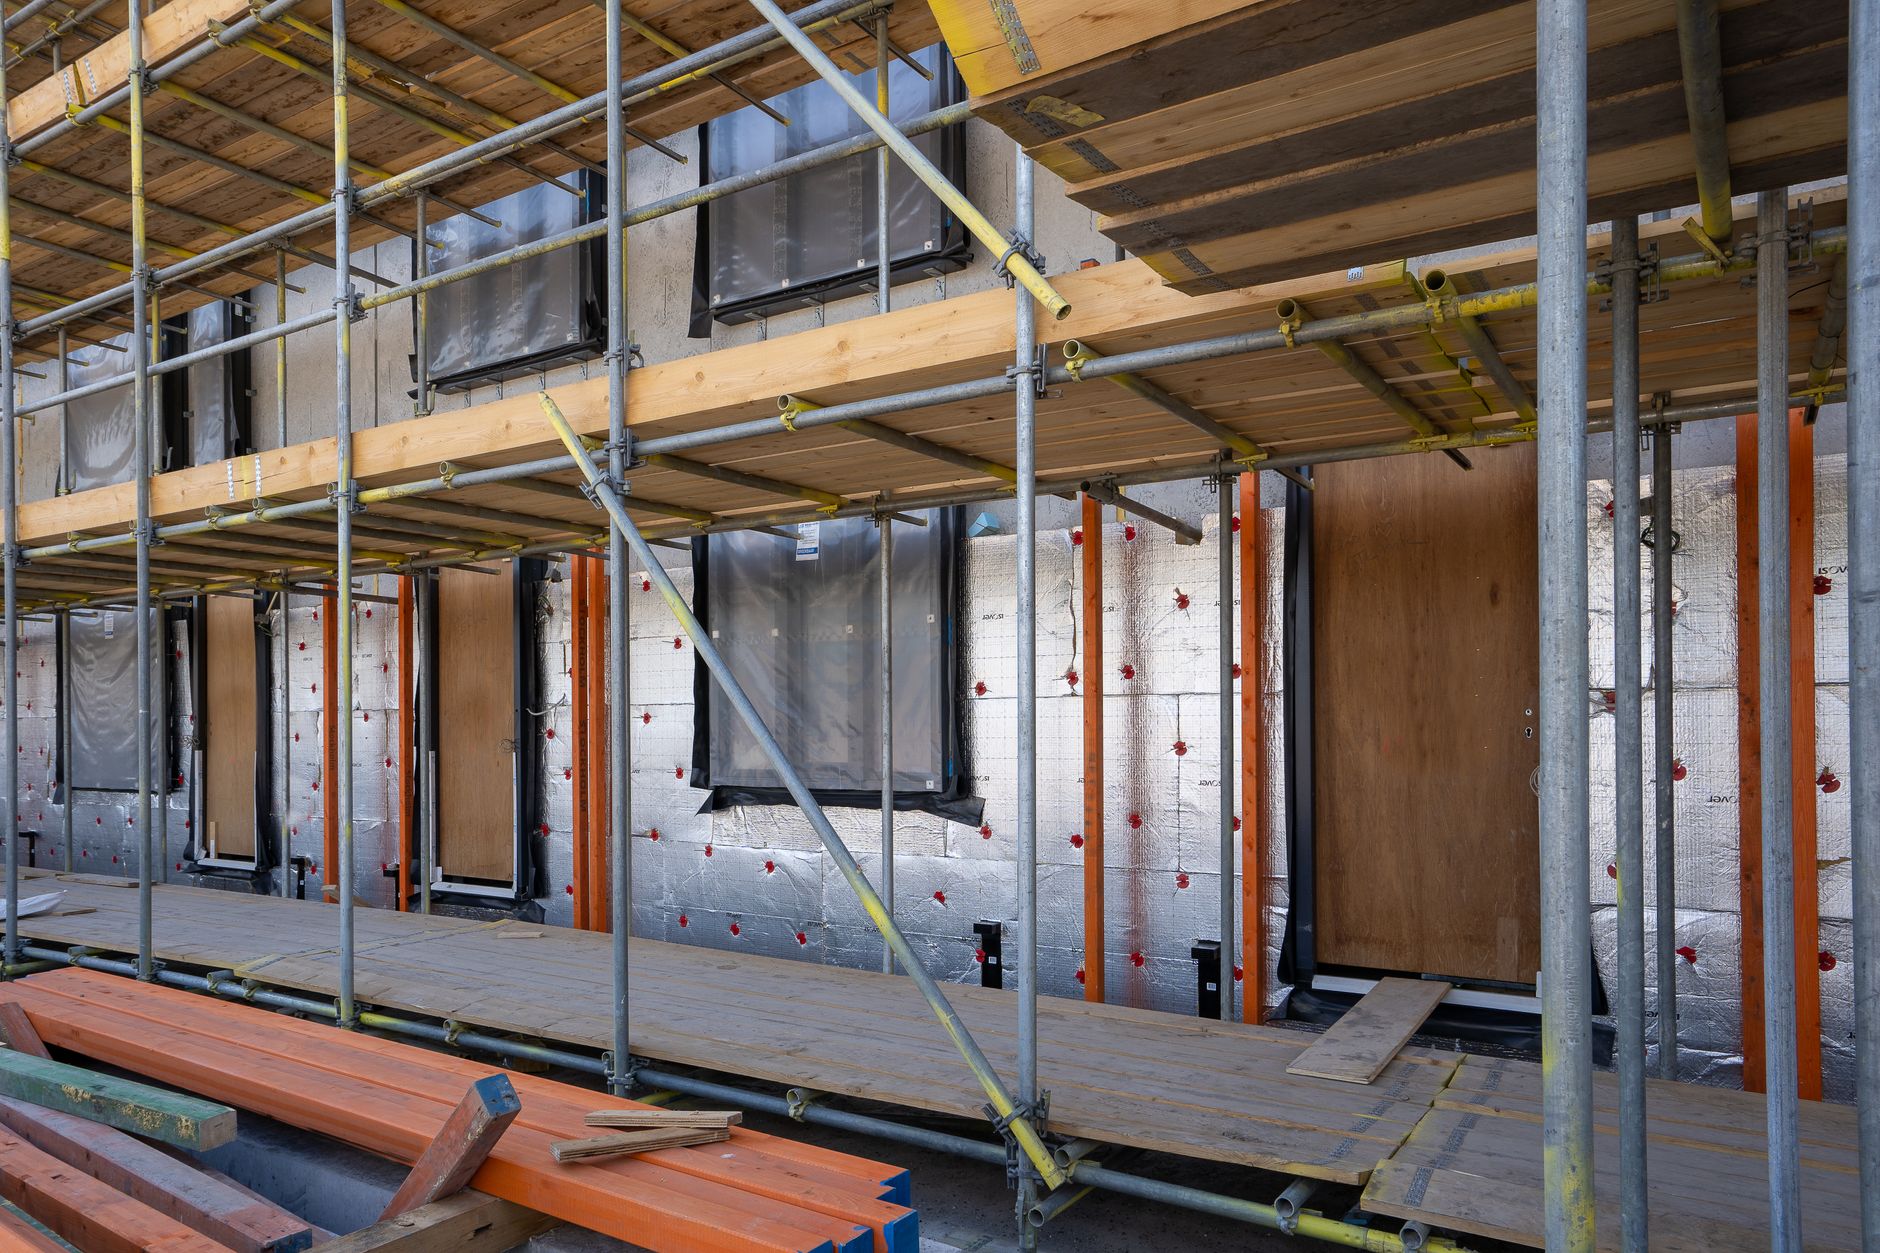
This guide covers how external wall insulation systems are put together, how you specify and fix them correctly for both masonry and timber-frame substrates, how to detail around openings, and what corners get cut by installers who don’t really know what they’re doing. If you’re quoting EWI work, taking on a retrofit job, or just want to understand what you’re specifying, read on.
What an EWI system actually consists of
A proper external wall insulation system isn’t just a board stuck to a wall with some render on top. It’s a layered system, and every layer matters. From the substrate outwards, you’ve got adhesive mortar, the insulation board (typically expanded polystyrene, mineral wool or phenolic foam), mechanical fixings, a base coat render, reinforcing mesh embedded into that base coat, a primer, and then the finish coat render. Each component is usually specified together from a single manufacturer’s system, and that matters for warranty, performance and Building Regulations compliance.
The two most common board types you’ll encounter are EPS (expanded polystyrene) and mineral wool. EPS is cheaper, water-resistant and easier to cut and handle. Mineral wool boards are more fire-resistant, which can make them the right call on taller buildings or where the fire strategy demands it. Phenolic foam boards give the best thermal performance by thickness, which is useful when you’re constrained on reveals around windows. The choice feeds directly into your U-value calculation, which ties back into the EPC rating improvements the client may be targeting or the building regulations requirement you’re working to.
Substrate assessment before you spec anything
The single biggest mistake I see on EWI jobs is skipping a proper substrate assessment. You cannot slap an EWI system onto a wall that has underlying moisture problems and expect it to perform. If there’s penetrating damp coming through failed pointing, render or window flashings, you’re trapping that moisture into the wall once you cover it over. Any rising or penetrating damp has to be identified and dealt with before a single board goes up.
For masonry substrates, check the wall is sound, free from loose render, and that any existing cracked or hollow sections are cut back and repaired. Mortar joints that are soft or recessed need raking out and repointing first. On timber-frame construction, the assessment gets more involved; you need to check that the sheathing board is in good condition, that the existing breather membrane hasn’t failed, and that the timber studwork isn’t compromised by rot or movement. Pull-out tests for mechanical fixings are worth doing on unfamiliar substrates, particularly on aerated blockwork, which can give you a nasty surprise when the EPS board tries to come off in a gale.
Fixing methods for masonry and timber frame
On solid masonry, the standard approach is adhesive and mechanical fixing combined. The adhesive mortar goes on in a continuous perimeter bead plus dabs to the face of the board, giving a minimum of 40% coverage (some manufacturers specify 60% on exposed sites). Once the adhesive has cured sufficiently, you go back with hammer-in or screw-in fixings, typically five or six per board depending on the zone. The fixing count goes up at corners and perimeter areas because wind uplift loads are highest there. Use the manufacturer’s fixing design tables, not guesswork.
Fixing length matters too. The fix needs to achieve a minimum embedment depth into sound masonry, usually 25mm minimum for brick and block, more for lightweight materials. If you’re going through existing render layers to get to solid masonry, account for that in your fixing length. Thermal bridging through metal fixings is a real issue, so specify plastic-headed fixings wherever possible; the insulation cap over the fixing head isn’t just cosmetic.
Timber-frame substrates are a different approach. Here the boards are typically fixed mechanically through to the studs using longer fixings, with adhesive used as a temporary hold rather than a structural bond. Get your stud centres marked out accurately before the boards go up, and don’t rely on fixing into sheathing board alone. On any job that goes above two storeys, check whether you need a structural engineer’s sign-off on the fixing design.
Detailing around windows and doors
This is where a lot of EWI installs fall apart. The openings are the most thermally critical and the most vulnerable to water ingress, and poor detailing here is one of the main causes of system failure. A few things that have to be right:
The window reveal is where you deal with the thermal bridge. Depending on the existing window position within the wall, you may be able to wrap insulation around the reveal and maintain a reasonable sill width. Where reveals are tight, thinner boards (phenolic or PIR) make sense. Every reveal needs proper starter track or bead, and the junction between the EWI system and the window frame needs to be sealed with an expanding foam sealant strip, not just render butted up to the frame. Render butted to a frame will crack; it’s not if, it’s when.
Window cills need extending or replacing to account for the new wall thickness. This is a conversation to have with the client before work starts because it adds cost, and it’s something the better EWI installers price in from day one. Drip edges matter too; without a proper drip detail at sill level, water tracks back under the cill and starts working into the system.
Above every opening, flashings and window head details need to direct water out and away. If the property has existing lintels that aren’t carrying adequate overhang, address this now. And check the eaves; the system needs to terminate cleanly at soffit level without leaving gaps that birds or insects can get into. Starlings, in my experience, are remarkably good at finding any gap around an EWI soffit detail.
The render system and mesh reinforcement
Once the boards are fixed and the detailing is done, the base coat render goes on with the reinforcing mesh fully embedded, not just laid on top. The mesh has to be lapped at joints by at least 100mm, and it needs to run continuously into all corner beads and around all openings. The mesh is what gives the render layer its crack resistance; skip it or do it badly and the finish coat will crack, usually within a couple of winters in a British climate.
Let the base coat cure properly before the finish coat goes on. Manufacturers specify minimum cure times and they’re based on chemistry, not impatience. On silicone render finishes, the product goes on thinly; it’s not a levelling coat, so the base coat has to be flat before you get there. Coloured silicone renders have become the most popular finish on residential EWI in the UK because they’re flexible, water-repellent and don’t need painting, but they do show any underlying movement.
What goes wrong when corners are cut
On any retrofit job involving a scaffold, there’s cost pressure to get off-hire quickly, and EWI is an area where that pressure gets people into trouble. I’ve pulled boards off walls that were fixed adhesive-only with no mechanical fixings, on exposed gable walls, on three-storey terrace ends. That’s a safety issue, not just a performance one. The Building Regulations and the manufacturer’s system approval require both adhesive and mechanical fixing in most situations; you can’t just pick one because it’s quicker.
I’ve also seen jobs where the reinforcing mesh was trowelled in dry, straight over a thin skim of base coat, with the boards behind not properly adhered. Wind gets behind it, the system moves, the render cracks and lets water in, and within two years you’re looking at a refit. And once water gets behind an EWI system, you’ve got a real problem to unpick.
On external services, it’s easy to miss things during the survey. Boiler flues, outside taps, electricity meter boxes, TV Aerials and satellite brackets all need accounting for before the scaffold goes up. Cutting around them after the fact is where the messy details come from. Get every external penetration logged at survey, agree how each one gets dealt with, and make sure it’s in the specification.
EWI done properly is one of the highest-impact fabric upgrades you can carry out on a solid-wall property. The margin is decent, the demand is there, and if you’re already doing extension or retrofit work, the skills transfer directly. If you’re also handling internal wall partitions and layout changes as part of a wider retrofit, have a look at how stud wall and blockwork partition choices interact with your thermal strategy. Get the spec right, detail around the openings properly, and don’t let anyone rush the mesh and render stages. That’s where the failures live.