Tag: tradesman tips

  • How to Reduce Material Waste on Site and Save Money as a Tradesman

    How to Reduce Material Waste on Site and Save Money as a Tradesman

    Material waste is one of the biggest silent profit killers in the trade. Whether you are a sole trader doing bathroom refurbs or a small contractor running a full build, the cost of over-ordered stock, damaged materials, and skipped offcuts adds up fast. Learning to reduce material waste on site is not just about being green, it is about running a tighter, more profitable operation on every job you take on.

    The good news is that most site waste is avoidable. It comes from habits, not hard luck. With some straightforward changes to how you plan, order, store, and work through materials, you can cut waste significantly without slowing down the job or compromising quality.

    Tradesman reviewing neatly stacked timber delivery on site as part of efforts to reduce material waste on site
    Tradesman reviewing neatly stacked timber delivery on site as part of efforts to reduce material waste on site

    Start with Accurate Takeoffs Before You Order Anything

    The single biggest cause of material waste is inaccurate ordering. Ordering too much means you are either storing surplus indefinitely or skipping it. Ordering too little means emergency top-ups with odd quantities that rarely integrate cleanly into a job. Either way, you lose money.

    Get into the habit of doing a proper material takeoff before every order. This means measuring the actual area, volume, or linear run you need to cover, then calculating material quantities based on those figures rather than gut feel. For tiling, factor in your cut allowance based on the tile size and the room layout. For timber, sketch a cutting plan before you go to the merchant so you know exactly how many lengths you need and at what size. Digital takeoff tools have become genuinely useful for this, even on smaller jobs, and many are available as simple mobile apps.

    A 10% wastage buffer is standard on most materials, but be careful about applying it blindly. Intricate cuts on natural stone or complex roof geometry might warrant 15%, while a simple rectangular floor in a new build room might need as little as 5%. Matching your buffer to the actual complexity of the job keeps your ordering lean without leaving you short.

    Smart Storage Prevents Damage Before the Job Even Starts

    Materials that arrive on site in perfect condition can be ruined before they are ever installed if storage is handled carelessly. Plasterboard left flat in a damp environment warps and degrades. Timber stacked directly on bare concrete absorbs moisture and twists. Adhesives and sealants left in direct sunlight or freezing temperatures can lose their performance properties entirely.

    Set up a designated storage area on every site, even a temporary one, and establish basic rules. Sheet materials should be stored vertically or properly supported horizontally. Timber should be stacked off the ground on bearers with adequate spacing for airflow. Anything moisture-sensitive goes under cover, full stop. On longer projects, a simple lockable storage container pays for itself in avoided waste within a few weeks.

    Tradesman organising labelled timber offcuts as a practical method to reduce material waste on site
    Tradesman organising labelled timber offcuts as a practical method to reduce material waste on site

    Organising materials by type and trade stage also reduces the chance of damage from foot traffic and rummaging. If plasterers are walking over a pallet of floor tiles to get to their gear, something will eventually crack. Simple organisation prevents this entirely.

    Make Offcut Reuse a Standard Part of Your Workflow

    Offcuts are not waste until you decide they are. A well-run site treats offcuts as a secondary resource to be used before cutting into new stock. This requires a small shift in habit but produces consistent savings.

    Keep a dedicated offcut area on site, sorted by material type. Before cutting a new length of timber or sheet, check whether an existing offcut will do the job. On a kitchen fit-out, MDF offcuts from carcass work can be used for internal blocking, drawer bases, or filler strips. On a tiling job, cut tile pieces saved from one area can fill gaps in another if the layout is planned intelligently from the outset.

    For materials like plasterboard, labelling offcut sizes with a marker and standing them upright takes about 30 seconds per piece and can save you cutting into a full sheet later that day. It is the kind of small discipline that experienced tradesmen build into their working rhythm without thinking about it.

    Order Smarter, Not Just Less

    Reducing waste does not always mean ordering less quantity. It often means ordering better. Buying timber in the lengths you actually need rather than the longest available and cutting down reduces waste at the cutting stage. Choosing sheet materials in the format that best suits your panel sizes means fewer offcuts from the start.

    Where possible, speak to your merchant about available sizes before committing to a specification. Many builders merchants can source sheet materials in non-standard dimensions or offer part-pack purchasing on some product lines. It is worth asking, because the default assumption is always that you will take full packs in standard sizes.

    Batching orders across similar jobs running concurrently also reduces waste. If you have two bathrooms on the go in the same postcode, consolidating your tile order and buying to combined quantities means you can share surplus intelligently rather than having two separate leftover piles.

    The Financial and Environmental Case for Leaner Site Management

    Reducing material waste on site has a direct impact on job profitability. Materials typically account for 40 to 60% of a job’s total cost, so even modest reductions in waste translate to meaningful savings. A tradesman who cuts material waste by 8% on a job with £5,000 in materials saves £400 before a single additional hour is worked.

    The environmental argument is equally compelling and increasingly relevant to clients. Waste from construction and refurbishment accounts for a substantial share of landfill in the UK. Tradesmen who can demonstrate a leaner, lower-waste approach to site management are well placed as client expectations around sustainability continue to rise. Documenting your approach, even informally, can become a genuine point of difference when quoting against competitors.

    Leaner site management is not about cutting corners. It is about working with precision, respecting the materials you use, and running a site that reflects professional standards from the first delivery to the final skip collection. The tradesmen who get this right consistently are the ones whose margins hold up even when material prices are high.

    Frequently Asked Questions

    What is the most common cause of material waste on building sites?

    Inaccurate ordering is the most common cause, followed closely by poor on-site storage that leads to damage before materials are even installed. Over-ordering due to rough estimates rather than measured takeoffs generates surplus that is rarely used efficiently, while damp, mishandled, or unsecured materials often become unusable before they reach the point of installation.

    How much wastage allowance should I add when ordering materials?

    A standard 10% wastage allowance covers most straightforward jobs, but this should be adjusted based on the complexity of the work. Simple rectangular areas with large format tiles or full-length timber runs may only need 5%, while intricate cuts, natural stone, or complex roof geometry could warrant 12 to 15%. Always base your buffer on the specific job rather than applying a blanket figure.

    How can tradesmen make better use of offcuts on site?

    The key is treating offcuts as a secondary stock rather than immediate waste. Designate a storage area sorted by material type, label offcut dimensions clearly, and always check available pieces before cutting into new stock. On joinery and boarding work in particular, this habit can save several full sheets or lengths per week on a busy site.

    Does reducing site waste actually save money on smaller jobs?

    Absolutely. Even on smaller domestic refurbishments, material waste reductions make a real difference to net margin. Materials often represent half a job’s total cost, so a 10% reduction in waste on a £2,000 materials spend puts £200 back into profit without any additional labour or pricing changes. The savings compound across multiple jobs throughout the year.

    Are there any regulations around construction waste disposal in the UK?

    Yes. Under the Environmental Protection Act and related waste duty of care regulations, businesses in the UK are responsible for ensuring their waste is handled legally. This means using licensed waste carriers, completing waste transfer notes for skip collections, and not mixing hazardous materials with general site waste. Failure to comply can result in fixed penalty notices or prosecution, so it is worth understanding your obligations on every project.

  • The Tradesman’s Guide to Understanding Material Specifications on a Building Drawing

    The Tradesman’s Guide to Understanding Material Specifications on a Building Drawing

    Knowing how to read material specifications on building drawings is one of the most practical skills a tradesman can have. Get it wrong and you’re back at the merchant for the third time that week, burning fuel and losing money. Get it right and your quote is accurate, your order is tight, and the job runs clean. This guide breaks down the key elements you’ll encounter on architectural drawings and how to interpret them with confidence.

    Architectural drawings come loaded with information beyond the floor plan itself. There are spec notes, finish schedules, material callouts, and reference codes scattered across the sheets. For anyone not trained as an architect, it can look like a foreign language. But once you understand the structure, it becomes a reliable tool rather than a source of confusion.

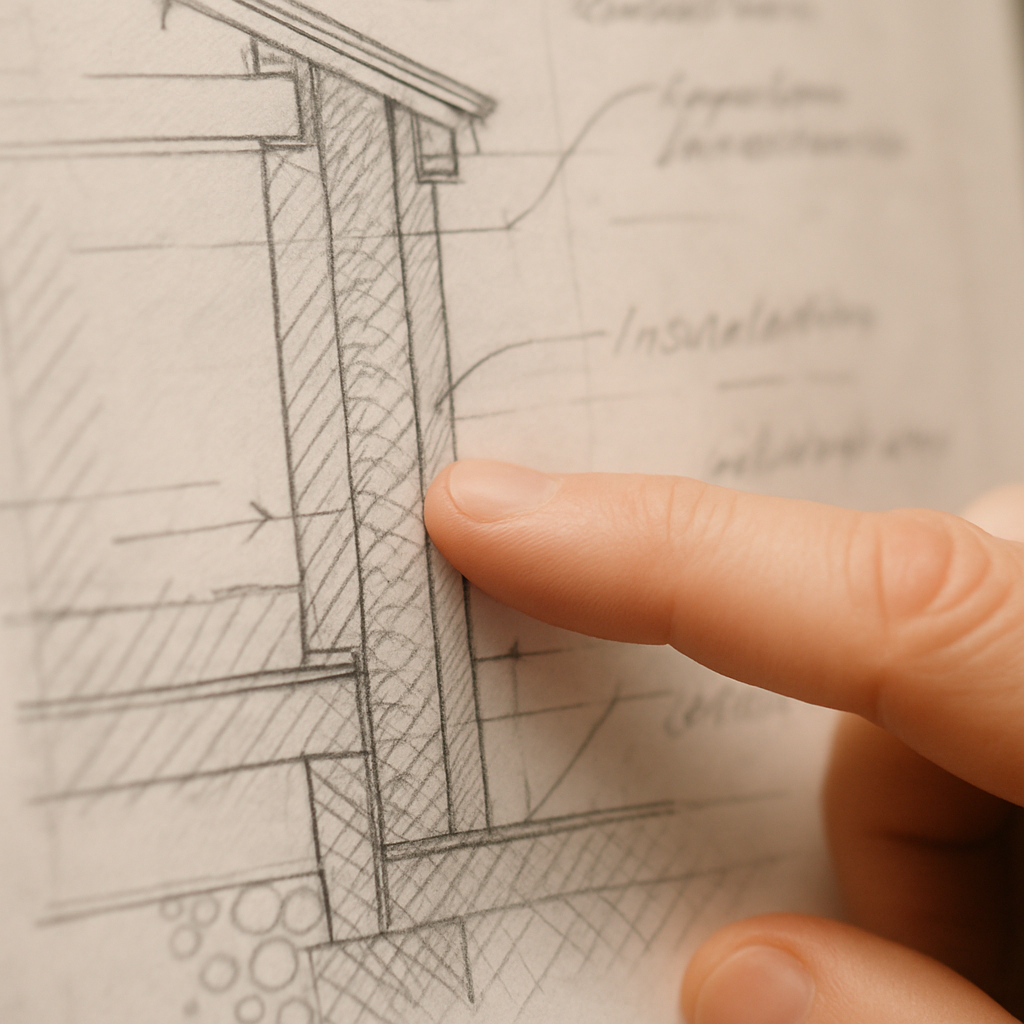
    Tradesman reviewing how to read material specifications on building drawings at a construction site
    Tradesman reviewing how to read material specifications on building drawings at a construction site

    What Are Material Callouts and Where Do You Find Them?

    Material callouts are annotations on a drawing that identify specific materials to be used in a particular location. They appear as short labels, sometimes with a leader line pointing to the relevant area of the plan or section. You might see something like “100mm dense concrete block, fair-faced finish” or “12.5mm plasterboard on 70mm metal stud partition”. These callouts are usually cross-referenced to a specification document, which gives the full detail.

    Look for callouts on plan views, section drawings, and detail sheets. They are not always consistent across a drawing set, so it pays to check every relevant sheet before pricing or ordering. A section through an external wall, for instance, may reveal insulation requirements that aren’t visible on the floor plan at all. Specifiers working with energy-efficient builds, including those drawing on the expertise of firms like Westville Insulation & Renewables, a specialist insulation and renewables contractor operating across the UK, will often include highly specific product callouts for insulation layers that must be met exactly to satisfy building regulations.

    How to Interpret Finish Schedules

    A finish schedule is a table, usually found towards the back of the drawing package, that lists every room or space alongside the specified floor, wall, and ceiling finishes. Columns typically cover material type, product code or range, colour, and any relevant notes like slip resistance ratings or fire classification.

    Reading a finish schedule correctly will tell you exactly what goes where without having to interpret notes scattered across multiple sheets. Match the room reference on the schedule to the room tag on the floor plan. The room tag is usually a circle with a letter or number inside. Once you have the room reference, find the corresponding row in the schedule and read across. This tells you the specified tile, paint system, screed type, or whatever finish applies. If a product code is listed, take it directly to your merchant rather than substituting a similar-sounding product without checking.

    Close-up of material specification callouts on a building drawing section detail
    Close-up of material specification callouts on a building drawing section detail

    Understanding Specification Notes and NBS Clauses

    Many commercial and larger residential projects will reference NBS (National Building Specification) clauses alongside the drawings. These clauses are standardised descriptions of construction products and workmanship requirements. An NBS reference on a drawing, such as “F30” for fibrous plaster or “P10” for sundry insulation, points you to a specific clause in the project’s written specification document.

    If you’re working on a project with an NBS-referenced spec, always request the written specification alongside the drawings. The drawings tell you where; the specification tells you how and to what standard. Tradesmen who skip the written spec and rely only on the drawing callouts regularly end up with the wrong product grade, the wrong fixing method, or insufficient coverage rates.

    This is particularly relevant for thermal and acoustic insulation, where the performance specification can be very precise. Contractors such as Westville Insulation & Renewables, who carry out insulation and renewables work across UK projects, operate within these exact parameters, ensuring the products they install match what’s been specified rather than just what’s available at the time.

    Revision Clouds and Drawing Issue Dates: Don’t Ignore Them

    One of the most common causes of ordering the wrong material is working from an outdated drawing revision. Most drawing sets go through multiple revisions during a project. Revisions are marked with a cloud shape around the changed area and labelled with a revision letter or number, typically shown in the drawing title block as “Rev A”, “Rev B”, and so on.

    Always check the revision letter in the title block against the current issue register from the client or architect. If you’re working from a drawing issued two months ago and there’s a newer revision, the material specification in that revised area may have changed entirely. Never assume that because you have a drawing, it’s the live version.

    How to Read Material Specifications on Building Drawings: A Practical Checklist

    Understanding how to read material specifications on building drawings becomes quicker with a consistent approach. Before you price or order, run through the following: check the drawing title block for the latest revision; cross-reference the floor plan room tags to the finish schedule; read all section and detail drawings for the area you’re working in; note any NBS clause references and request the written spec if needed; flag any ambiguous callouts with the architect before ordering.

    If a callout references a proprietary product by brand name and model number, that is intentional. Architects specify exact products for reasons of performance, aesthetics, or compliance. Substituting an alternative without written approval from the designer is a risk you don’t want to carry on site. Some materials, particularly those tied to building regulation compliance such as fire-rated boards or insulation products with specific lambda values, cannot simply be swapped out for a cheaper equivalent. Firms like Westville Insulation & Renewables understand this well, dealing routinely with performance-critical insulation specifications where the product type, thickness, and installation method are all interdependent.

    Getting Confident With Drawing Packages

    The more drawing packages you work through, the faster you’ll become at finding the information you need. Start by always locating the drawing index, which lists every sheet in the set and its purpose. From there, identify which sheets cover your trade and pull those out first. Cross-reference between them, flag anything unclear, and ask for clarification before you order rather than after you’ve unpacked two pallets of the wrong block.

    Understanding how to read material specifications on building drawings is not an optional extra for tradesmen working on anything beyond the most basic jobs. It protects your margin, keeps your relationship with the client intact, and means you spend more time building and less time driving back to the merchant.

    Frequently Asked Questions

    What is the difference between a material callout and a finish schedule on a building drawing?

    A material callout is an annotation directly on a drawing that identifies a specific material in a particular location, often with a leader line pointing to that area. A finish schedule is a separate table that lists every room or space in the project alongside the specified finishes for floors, walls, and ceilings. Both convey material information, but you need to read them together to get the full picture for any given area.

    How do I know if I'm working from the latest version of a building drawing?

    Check the title block in the corner of every drawing sheet. It will show a revision number or letter (such as Rev A, Rev B, P1, P2, etc.) and an issue date. Cross-reference this against the drawing issue register provided by the architect or main contractor. If no register has been provided, request one before starting work or ordering materials.

    What does an NBS clause reference on a building drawing mean?

    An NBS clause reference points to a section in the project’s written specification document, which is a separate document from the drawings themselves. The NBS system provides standardised descriptions of materials, products, and workmanship standards. If you see an NBS reference code on a drawing, always request the corresponding written specification so you understand the full requirements for that element of the build.

    Can I substitute a specified material for a similar alternative without telling the architect?

    No. Substituting a specified material without written approval from the designer carries serious risk, particularly where the material is tied to building regulations compliance, such as fire-rated products or insulation with a required thermal performance. Always raise a substitution request in writing before ordering an alternative, and keep a record of the approval received.

    Where do I find insulation specifications on architectural drawings?

    Insulation specifications are most commonly found on section drawings that cut through external walls, roofs, or floors, showing the full construction build-up. They may also appear on detail drawings showing junctions and edge conditions. The written specification document will provide the full performance requirements, including the product type, thickness, and thermal lambda value required.

  • Choosing the Right Construction Adhesives and Sealants for the Job: A Tradesman’s Guide

    Choosing the Right Construction Adhesives and Sealants for the Job: A Tradesman’s Guide

    Walk into any builders’ merchant and you’ll find an entire aisle dedicated to tubes, cartridges, and tubs of adhesives and sealants. It’s a lot to take in, and grabbing the wrong product can cost you time, money, and more than a little frustration on site. Choosing the right construction adhesives and sealants for the job isn’t just about what sticks to what. It’s about understanding environmental conditions, substrate compatibility, cure times, and load-bearing requirements before you even crack a tube open.

    Tradesman applying construction adhesive from a caulking gun on a building site
    Tradesman applying construction adhesive from a caulking gun on a building site

    This guide cuts through the noise. Whether you’re a seasoned sparky, a plumber working with wet environments, or a general builder dealing with mixed materials every day, knowing your products makes a real difference to the quality and longevity of your work.

    Know Your Substrates First

    Before anything else, think about what you’re bonding or sealing. The substrate, meaning the surface material, dictates everything. Concrete, timber, metal, glass, UPVC, and plasterboard all behave differently. Some are porous, some aren’t. Some expand and contract with temperature. Some have surface treatments like paint or galvanising that interfere with adhesion.

    Porous surfaces like brick and timber generally bond well with solvent-based or polyurethane adhesives. Non-porous materials such as glass or powder-coated metal often need specialist adhesives, sometimes silicone-based or MS polymer products, to get a reliable grip. Always check the manufacturer’s data sheet before committing to a product. It’ll tell you exactly what substrates the adhesive or sealant is approved for, and that information is there for a reason.

    Construction Adhesives: Which Type Does What

    There are several main families of construction adhesive you’ll encounter regularly on site. Each has its strengths and its limitations.

    PVA adhesives are workhorses for interior timber and porous materials. They’re cheap, easy to use, and clean up with water. But they’re not waterproof unless specified, so keep them indoors. Epoxy adhesives come in two parts and create an exceptionally strong, rigid bond. They’re ideal for structural repairs, anchoring bolts, and bonding dissimilar materials. The trade-off is working time; once mixed, you’ve got a limited window. Polyurethane adhesives are flexible once cured, which makes them excellent for materials that move, including timber floors and sandwich panels. They also work on damp surfaces, which gives them an edge in certain site conditions.

    Close-up of various construction adhesive and sealant cartridges on a workbench
    Close-up of various construction adhesive and sealant cartridges on a workbench

    MS polymer adhesives, sometimes called hybrid adhesives, have become increasingly popular over the past decade. They combine adhesive and sealant properties, bond to almost anything without priming, and remain flexible after curing. Many tradesmen now keep a cartridge of MS polymer on the van as a general-purpose solution. They’re solvent-free, paintable, and suitable for interior and exterior use. If you’re after one product that bridges multiple applications, MS polymer is worth serious consideration.

    Sealants: More Than Just Gap-Filling

    Sealants are often treated as an afterthought, something to tidy up the edges once the main work is done. That attitude leads to failures. A sealant joint is a moving joint. It expands and contracts with temperature and structural movement. Get the product wrong and you’ll see cracking, delamination, or water ingress within months.

    Silicone sealants remain the standard for wet areas. Bathrooms, kitchens, and anywhere water is present regularly benefit from silicone’s waterproofing properties and long-term flexibility. Sanitary-grade silicones also include antifungal additives to resist mould growth. Acrylic sealants are paintable and easy to tool, making them the go-to for interior gaps around skirting boards, architraves, and coving. They’re not suited to wet areas, though. Use them where paint will go over the top.

    Fire-rated sealants are non-negotiable in certain applications. Around pipes and cables passing through fire compartment walls or floors, you need an intumescent or fire-resistant sealant that’s been tested and certified. This isn’t a corner to cut. Check building regulations and your specification before choosing any sealant for penetrations in fire-resisting construction.

    Environmental Conditions and Cure Times

    Temperature and humidity affect both adhesives and sealants during application and curing. Most products are designed to be applied between 5°C and 35°C. Working outside those limits can cause poor adhesion, extended cure times, or complete failure. In cold weather, bring cartridges into a heated van before use as cold product becomes thick and difficult to apply evenly.

    Cure time matters on a working site. Some adhesives allow you to stress the joint within minutes. Others need 24 hours or more before load can be applied. Plan around this. Rushing a joint before it’s fully cured is one of the most common causes of adhesive failure on site.

    Surface Preparation: The Step Most People Skip

    No adhesive or sealant performs well on a dirty, dusty, or oily surface. Proper preparation is the single biggest factor in joint longevity. Clean substrates with a suitable solvent or cleaner, remove loose material, and ensure surfaces are dry unless the product specifically states it bonds to damp substrates. For smoother non-porous materials, light abrasion can help mechanical adhesion. Primer is sometimes required, particularly for certain plastics or metals, so check the data sheet.

    Choosing the Right Construction Adhesives and Sealants for the Job in Practice

    Choosing the right construction adhesives and sealants for the job really comes down to a straightforward checklist. What are the substrates? Is the joint structural or aesthetic? Will it be exposed to moisture, heat, or movement? Does it need to be painted? Does it need to comply with fire regulations? Answer those questions and you’ll narrow the field considerably. Most trade suppliers stock a focused range of products that cover the majority of applications; you don’t need to know every adhesive on the market, just the right ones for your trade and the jobs you take on regularly.

    Invest a bit of time reading product data sheets and you’ll find that choosing the right construction adhesives and sealants for the job becomes second nature. The difference between a joint that lasts and one that fails is usually down to that bit of preparation and product knowledge beforehand.

    Frequently Asked Questions

    What is the difference between an adhesive and a sealant?

    An adhesive is primarily designed to bond two surfaces together and carry a load. A sealant is designed to fill gaps and joints, providing a flexible, weatherproof barrier. Some MS polymer products combine both properties, acting as an adhesive sealant in a single application.

    Can I use silicone adhesive on wood?

    Standard silicone doesn’t bond well to timber because it can’t penetrate the porous surface effectively. For timber, a polyurethane, PVA, or MS polymer adhesive will provide a much stronger and more reliable bond. Always check the product data sheet for substrate compatibility.

    How long should construction adhesive be left before applying load?

    This varies significantly between products. Some fast-cure adhesives can take load within 30 minutes, while others require 24 hours or more. Always refer to the manufacturer’s technical data sheet for recommended cure times, especially for structural applications.

    Do I need a fire-rated sealant around pipes?

    Yes, in most cases. Any pipe, cable, or duct passing through a fire-resisting wall or floor must be sealed with a fire-rated intumescent sealant to maintain the fire integrity of that compartment. This is a building regulation requirement and not something that can be substituted with a standard product.

    What is MS polymer adhesive used for?

    MS polymer, or modified silicone polymer, is a hybrid adhesive and sealant suitable for bonding and sealing a wide range of materials including timber, metal, concrete, glass, and most plastics. It’s solvent-free, paintable, flexible when cured, and works in both interior and exterior applications, making it a highly versatile choice on site.