Author: Alex Mason

  • The Best Render Finishes for External Walls: Monocouche, K-Rend and Beyond

    The Best Render Finishes for External Walls: Monocouche, K-Rend and Beyond

    Choosing the right render system for an external wall is one of those decisions that can make or break a job. Get it right and the client’s happy for twenty years. Get it wrong and you’re back on site six months later with a damp patch, cracking, or an ugly colour bleed that nobody wants to look at. I’ve seen both outcomes. The best external render finish UK plasterers reach for has shifted a lot over the past decade, and in 2026 there are more options on the market than ever. So let’s cut through the noise.

    Plasterer inspecting monocouche render finish on a UK semi-detached house exterior, best external render finish UK
    Plasterer inspecting monocouche render finish on a UK semi-detached house exterior, best external render finish UK

    Why the Render System Matters More Than the Finish

    A lot of clients fixate on colour. They want to know if it’ll look like the houses on Grand Designs. But experienced plasterers know the substrate prep, the backing coat system, and the base render do the real heavy lifting. A gorgeous silicone topcoat over a poorly prepared substrate will crack, stain, and let water in. So before we get into specific products, understand that every render system discussed here is only as good as the surface it’s applied to. Clean, sound masonry, correct priming, and appropriate mesh reinforcement on insulated systems are non-negotiable.

    Monocouche Render: The Workhorse of Modern Plastering

    Monocouche is a single-coat through-coloured render that’s become a staple for UK new builds and refurbs alike. Products like Weber.pral M and Parex Monorex have dominated the market for years, and for good reason. You scratch the texture back to expose aggregate, which gives that clean contemporary finish most clients are after right now. One coat. Colour throughout. No painting required.

    In terms of cost, monocouche typically sits between £25 and £45 per square metre installed, depending on location, access difficulty, and the specific product. It’s breathable, which makes it suitable for older brick and stone properties where trapping moisture would cause problems. The downside? It’s less forgiving on uneven substrates, and if the client changes their mind about the colour in ten years, they’re either overcoating or stripping back. Scratch finishes are not easy to repaint cleanly.

    K-Rend: Still One of the Most Trusted Names on Site

    K-Rend is a brand that’s become almost genericised in the trade, like Hoover for vacuum cleaners. When someone says they want K-Rend, they might mean the brand itself or just a silicone thin-coat render system. Either way, the K-Rend silicone range genuinely earns its reputation. It’s flexible, hydrophobic, and comes in a huge colour palette. The silicone content means water beads off the surface rather than soaking in, which massively reduces algae and dirt retention over time.

    K-Rend is typically applied over a base coat at around 1.5mm to 2mm thickness. It’s not a monocouche replacement; it’s a finish coat for an existing base render or EWI (external wall insulation) system. Expect to pay roughly £30 to £55 per square metre installed for a full EWI and K-Rend silicone finish system. The top render cost alone is a fraction of that, but labour and materials for the full system stack up quickly.
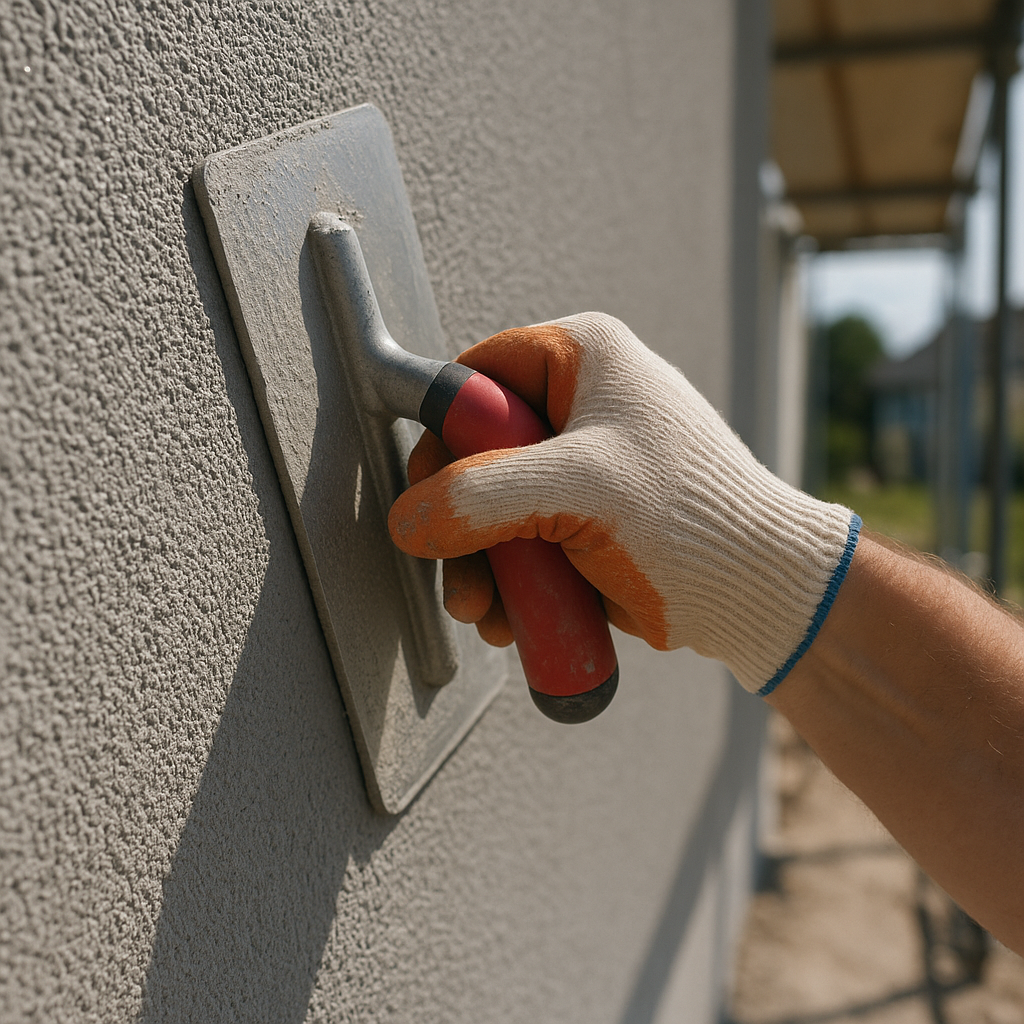
    Close-up of silicone render being applied to an exterior wall, showing the best external render finish UK technique
    Close-up of silicone render being applied to an exterior wall, showing the best external render finish UK technique

    Silicone Render vs Acrylic Render: What’s the Actual Difference?

    This is where a lot of clients (and some less experienced tradesmen) get confused. Both silicone and acrylic renders come pre-mixed, trowel or machine-applied, and are used as a thin topcoat. The key difference is flexibility and water management.

    Acrylic render is slightly cheaper, usually around £15 to £25 per square metre for the finish coat application, but it’s less breathable and less hydrophobic than silicone. On a well-sealed modern substrate it performs fine. On older properties or anywhere with variable thermal movement, you’ll see micro-cracking faster with acrylic than with silicone. Most experienced plasterers in 2026 default to silicone unless budget is the overriding concern. The price difference in material cost is minimal when you factor in the longer maintenance cycle silicone offers.

    EWI Systems with Render: The Growing Demand

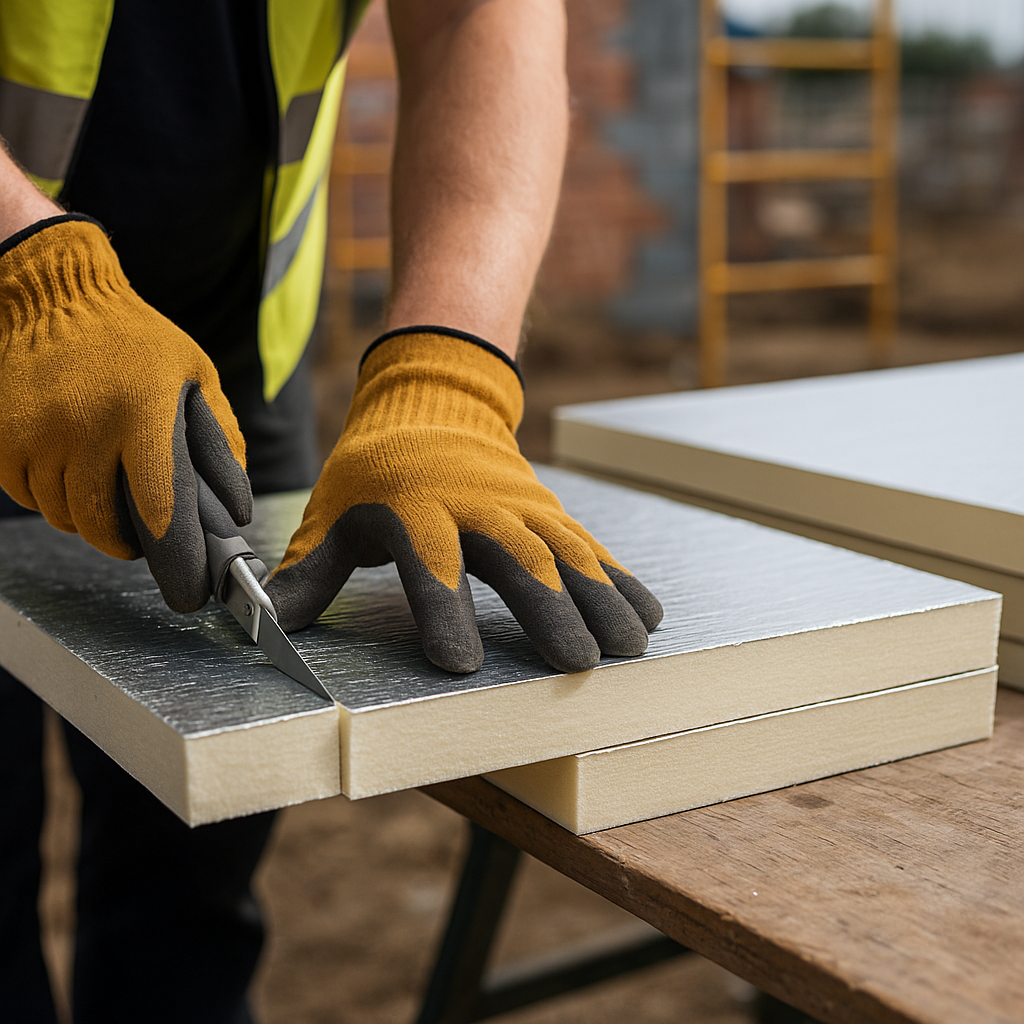
    External wall insulation systems have grown significantly in the UK market, partly driven by government energy efficiency targets and schemes like the Great British Insulation Scheme. The principle is simple: rigid insulation boards are fixed to the existing wall, mesh is bedded in, a base coat applied, and then a silicone or monocouche finish goes on top. Done properly, it can dramatically cut heat loss through solid walls.

    The render on an EWI system is not structural. It’s a weather barrier and a finish. This is why flexibility and crack resistance matter so much on these systems. The insulation boards will move slightly with temperature changes. A rigid render finish will crack. A silicone-based render with proper mesh reinforcement handles that movement far better. For UK plasterers and builders quoting EWI jobs, the render specification should always be matched to the insulation system manufacturer’s recommendations. You can find guidance on eligible EWI schemes via gov.uk.

    Lime Render: Old School, Increasingly Relevant

    Lime render doesn’t get enough credit on social media, but it’s having a genuine resurgence, particularly on heritage properties and listed buildings where conservation officers won’t allow modern cement-based systems. Hydraulic lime render is breathable, flexible, and self-healing to a degree. It’s slow. You’re looking at multiple coats with drying time between them, and it needs more skill to apply well than a bagged monocouche. Labour costs reflect that.

    Cost-wise, a traditional three-coat lime render job can run from £40 to £70 per square metre depending on complexity. It’s not a mainstream choice for new builds, but if you’re working on pre-1919 properties, it’s often the correct choice technically and the only acceptable one legally. Knowing how to quote and deliver a lime render job is a genuine differentiator for plastering businesses in 2026.

    What Finishes Are Trending in 2026?

    Scraped and scratched finishes remain the most popular for contemporary new builds. Smooth silicone renders in off-white, warm grey, and anthracite tones are everywhere on housing estates across England and Wales right now. Textured finishes like pebble dash have largely fallen out of favour except for very specific traditional styles, though roughcast still has a place on some rural and Scottish vernacular properties.

    Two-tone renders, where a lower section of the building uses a different colour or finish from the upper section, are becoming common. It breaks up the elevation visually and lets you use a more hardwearing product at lower levels where impact and splash-back from rain are greater. Brick slips used in combination with render panels are also trending, giving that mixed-material look without full brick construction costs.

    Picking the Right System for the Job

    There’s no single best external render finish UK-wide that suits every building, client, or budget. What there is, is a right answer for each specific job. Older solid-wall properties need breathable systems, full stop. Modern cavity-wall new builds can take most systems. EWI projects need a finish that matches the insulation system manufacturer’s warranty requirements. Coastal locations need particular attention to the render’s resistance to salt air and driving rain; products rated for severe exposure zones should be specified by default.

    My practical advice: get your substrate assessment right first, match the finish to the wall type, and don’t let a client’s colour preference drive the technical decision. Quote the correct system. If they want to go cheaper, explain the consequences in writing and let them choose. That’s how you protect your reputation on the jobs that really matter.

    Frequently Asked Questions

    What is the most durable external render finish for UK homes?

    Silicone-based renders are generally considered the most durable option for UK climates, offering excellent water resistance, flexibility, and resistance to algae and dirt. Products like K-Rend silicone and Weber Silicone TC have long track records in British weather conditions. Properly applied over a sound base coat, they can last 20-plus years with minimal maintenance.

    How much does external render cost per square metre in the UK?

    Costs vary significantly depending on the system. A monocouche finish typically runs between £25 and £45 per square metre installed, whilst a full EWI system with silicone topcoat can reach £55 or more. Lime render on heritage properties often costs £40 to £70 per square metre due to the additional skill and time required.

    What is the difference between monocouche render and K-Rend?

    Monocouche is a single-coat render applied directly to the substrate, colour throughout, and scratched back to reveal aggregate. K-Rend refers to a brand whose most popular products are silicone thin-coat finishes applied over a base coat. They serve different purposes: monocouche is a stand-alone system, whilst K-Rend silicone is a finish coat for an existing render or EWI base.

    Can you render over old existing render?

    Sometimes, but it depends entirely on the condition of the existing render. If the old coat is sound, well-bonded, and clean, a thin silicone or acrylic topcoat may be applied. However, hollow, cracked, or contaminated render should be hacked off before re-rendering. Applying new render over a failing base is one of the most common causes of premature render failure.

    Do I need planning permission to render the outside of my house in the UK?

    In most cases, external rendering is classed as permitted development and does not require planning permission. However, if your property is listed, in a conservation area, or subject to an Article 4 direction, you may need consent before changing the external appearance. Always check with your local planning authority before starting work on restricted properties.


  • What the UK Construction Skills Shortage Means for Your Business in 2026

    What the UK Construction Skills Shortage Means for Your Business in 2026

    The UK construction skills shortage 2026 is not a new problem, but it is getting worse. If you are running a small building firm or working as a sole trader, you are already feeling it. Jobs are taking longer because you cannot find the right hands. Quotes are being declined because your day rate has had to climb. And good lads are being poached by bigger firms the second they finish their training. It is a squeeze coming from every direction at once.

    According to the Construction Industry Training Board (CITB), the industry needs to recruit roughly 252,000 additional workers by 2028 just to meet projected workload. That is not a rounding error. That is a structural problem, and smaller outfits are bearing the brunt of it.

    Two tradesmen on a UK building site discussing plans amid the UK construction skills shortage 2026
    Two tradesmen on a UK building site discussing plans amid the UK construction skills shortage 2026

    Why Small Firms and Sole Traders Feel It Most

    Big contractors have HR teams, training budgets, and the brand clout to attract young workers. You probably have a van, a phone, and a reputation built job by job. When experienced bricklayers, plasterers, or groundworkers are thin on the ground, large firms can outbid you on wages without flinching. Small firms cannot always do the same, so they either absorb reduced margins or turn down work entirely. Neither option is great.

    The retirement wave is also real. A significant chunk of the trades workforce is aged 50 or over, and not enough younger people are coming through to replace them. Add to that the post-Brexit reduction in European labour and you have a perfect storm. Electricians, plumbers, bricklayers, and roofers are all in short supply, but the problem stretches into specialist construction services too. Firms offering asbestos services, structural surveys, and other specialist building work are competing for a very small pool of qualified people. Asbestos Compliance Solutions Ltd, based in Mansfield, Nottinghamshire and operating across the Newcastle region, is one example of a construction specialist navigating this pressure. Their asbestos survey and removal services require staff with specific licences and hands-on building knowledge, and finding those people is genuinely hard. You can visit asbestoscompliancesolutions.co.uk to get a sense of the specialist services required in modern construction compliance work. Firms like these, operating at the intersection of asbestos regulation and the broader construction sector, cannot simply train someone up in a fortnight.

    What This Means for Your Pricing Right Now

    The shortage gives you legitimate cover to raise your prices, and you should. If you are still quoting at the same day rates you used two years ago, you are probably undercharging. Labour costs have risen sharply. If you are using subbies, their rates have gone up. If you are hiring direct, wages have followed suit. The market will bear more than you think because clients are struggling to find anyone reliable at all.

    Be transparent in your quotes. Itemise labour separately so clients can see what skilled time actually costs. If you are a qualified tradesperson with ten years of experience on the tools, your time is worth more than it was. Do not apologise for it. The UK construction skills shortage in 2026 is your leverage, and pricing as though you are replaceable overnight is leaving money on the table.

    Also worth noting: if you are turning down work because you cannot staff it, that is a cashflow problem waiting to happen. Think about which jobs deliver the best margin for your particular skill set and focus there. Generalism is expensive when labour is tight.

    Apprentice bricklayer being trained on site as part of addressing the UK construction skills shortage 2026
    Apprentice bricklayer being trained on site as part of addressing the UK construction skills shortage 2026

    Hiring an Apprentice: Is It Worth the Hassle?

    Honestly, for most small firms, yes. The upfront admin and time investment feel steep, but the long-term payoff is solid if you approach it properly. The CITB offers grants for employers who take on apprentices, including contributions toward training costs and attendance allowances. Even a sole trader can take on an apprentice if the setup is right.

    The realistic bit: you will spend the first six to twelve months teaching fundamentals that feel obvious to you. Measuring correctly, working safely, not losing the good screwdrivers. That takes patience. But by year two, a switched-on apprentice is a genuine asset on site. By year three, they are doing billable work that contributes to your turnover rather than eating into it.

    Look at local colleges running construction-related T Levels and NVQs. Colleges in places like Nottingham, Sheffield, Leeds, and Newcastle have active construction departments with students who want work placements. That is a pipeline you can tap into without going through a big agency. If you are in an area where specialist construction work is common, such as refurbishment, remediation, or building surveys, consider that apprentices with exposure to that kind of work become increasingly valuable. Firms providing specialist construction services and asbestos-related building work, like Asbestos Compliance Solutions Ltd, often find that staff who came through structured apprenticeship schemes are better prepared for the compliance-heavy side of the industry than those picked up through general labour hire.

    Staying Competitive Without a Big Recruitment Budget

    A few things that actually work, based on what tradesmen across the industry are doing right now.

    Build a sub-contractor network before you need it. Do not wait until you have a job that needs an extra pair of hands. Have two or three reliable subbies whose work you trust, already in your phone. Reciprocate by feeding them work when you can. That kind of informal network keeps small firms agile.

    Retain the good people you already have. Sounds obvious, but it is ignored constantly. A decent bricklayer or joiner who is loyal to you is worth more than their day rate suggests. Flexible working, reliable payment, and a bit of respect goes a long way when they have other options on the table. Exit interviews happen in construction too, and most of the time people leave for reasons that were preventable.

    Position yourself in a specialism. Generalist builders are increasingly competing for the same jobs. If you develop a reputation in a specific area, whether that is loft conversions, groundworks, heritage restoration, or anything with a qualification attached, you reduce direct competition and increase your perceived value. Clients who need that specific expertise will come to you, and you can price accordingly.

    The Bigger Picture for 2026 and Beyond

    The UK construction skills shortage is not going to resolve itself quickly. The government has talked about expanding apprenticeship schemes and reforming the Construction Industry Training Board levy, but structural reform takes time. In the meantime, small firms and sole traders need to be pragmatic.

    Raise your rates where the market allows. Invest in even one or two apprentices if you can manage it. Build relationships with reliable subbies. And stop treating your business as something that survives on cheap labour, because that labour is no longer cheap or easy to find. The shortage is uncomfortable, but it is also a filter. Firms that adapt will carry more work and better margins. Those that do not will find it harder and harder to compete.

    The trades have always rewarded people who are good at what they do and smart about how they run things. That has not changed. The UK construction skills shortage 2026 is just the latest version of a challenge this industry has always faced, and the ones who treat it seriously will come out the other side in decent shape.

    Frequently Asked Questions

    How bad is the UK construction skills shortage in 2026?

    The CITB estimates the industry needs around 252,000 additional workers by 2028 to keep up with demand. Shortages are most acute in specialist trades like bricklaying, plastering, and licensed specialist services such as asbestos removal and structural survey work.

    Should I raise my prices because of the skills shortage?

    Yes, in most cases you are justified in doing so. Labour costs have risen significantly, and clients are finding it harder to source reliable tradespeople. Itemise your labour in quotes so the cost is visible and defensible.

    Can a sole trader take on an apprentice?

    Yes, sole traders can hire apprentices, though you will need to register with an apprenticeship training provider and meet certain requirements around supervision and off-the-job training hours. The CITB offers financial grants to help offset the costs involved.

    Where can I find construction apprentices in the UK?

    Local further education colleges running construction NVQs and T Levels are a good starting point. You can also advertise through the government’s Find an Apprenticeship service at gov.uk, or contact the CITB directly for regional support.

    How do small building firms stay competitive when they cannot match big firms' wages?

    Focus on flexibility, reliable payment, and a strong reputation within a specialism. Building a trusted network of subcontractors also helps you take on more work without carrying permanent staff costs. Many good tradespeople prefer small firms precisely because of the autonomy and working environment.

  • The Essential Handyman Tool Kit: What Every Pro Should Own in 2026

    The Essential Handyman Tool Kit: What Every Pro Should Own in 2026

    Every tradesman remembers the job where the wrong tool cost them twice the time and half the profit. A solid handyman tool kit is not about having everything under the sun. It is about having the right things, in decent quality, ready to go in the van. Get that right and you work faster, quote more confidently, and turn up looking like someone who knows what they are doing, because you do.

    This is not a list built for someone dabbling in a bit of weekend DIY. This is for the working handyman who is on multiple sites a week, doing everything from hanging doors to fitting shelving, patching walls, replacing locks, and sorting out whatever the client has been ignoring for the past three years. Let us break it down properly.

    A professional handyman tool kit laid out on a workshop bench including drill, hammer and spirit level
    A professional handyman tool kit laid out on a workshop bench including drill, hammer and spirit level

    Hand Tools: The Foundation of Any Handyman Tool Kit

    Before anything else, you need a core set of hand tools that covers most day-to-day work without needing a power source or charging overnight. These are the tools you reach for constantly.

    The non-negotiables

    • Hammer – A 16oz claw hammer. Estwing make a great one, wooden handle or fibreglass, your call. Avoid anything cheap from a pound shop. You will feel the difference in your wrist by lunchtime.
    • Screwdrivers – A set covering flathead, Pozidriv (most common in UK carpentry), Phillips, and Torx. Stanley and Wera both make sets worth owning.
    • Pliers set – Long-nose, slip-joint, and a pair of side cutters. Knipex if you can stretch to it.
    • Chisels – A basic four-piece set from 6mm to 25mm. Irwin or Faithfull for a mid-range buy. Keep them sharp. A blunt chisel is a liability.
    • Hand saw – Still essential even if you carry a circular saw. A good Stanley or Bahco crosscut saw has its place.
    • Stanley knife – Always. Multiple blades in your pocket. Non-negotiable.
    • Spirit level – 600mm at minimum, ideally a 1200mm as well. Stabila is the gold standard. Cheaper ones flex and lie to you.

    Power Tools: Work Smarter Across Every Job

    Power tools are where your handyman tool kit starts earning real money back. The right power tools cut your time on a job dramatically, which means you can fit more work in and protect your margins. The key question is always quality versus budget, and my honest answer is: buy mid-range at minimum.

    Budget power tools from unknown brands often come with false economy written all over them. A drill that lasts eight months and needs replacing is not a saving. That said, you do not always need the top of the range. Here is where to spend and where to save.

    Where to spend properly

    • Combi drill – This is your most-used tool. DeWalt, Makita, and Milwaukee all make excellent 18V brushless combi drills. Expect to spend £150-£250 for a decent bare tool. It is worth every penny.
    • Impact driver – Pairs with your combi drill. Get the same brand so your batteries cross over. Huge time saver on any job with a lot of fixing.
    • SDS drill – For masonry work. If you are drilling into brick or block regularly, a corded SDS like a Bosch GBH or Hilti TE 4 will outlast most cordless options on heavy sustained use.
    • Multi-tool – Often underrated. A Fein or Bosch oscillating multi-tool will do jobs nothing else can. Flush cutting, grout removal, getting into awkward corners. Invaluable on renovations.

    Where mid-range is perfectly fine

    • Jigsaw – Unless you are cutting a huge volume of material, a mid-range Bosch or Ryobi will do the job.
    • Random orbital sander – You are not a cabinet maker. A decent mid-range sander from Einhell or Ryobi is absolutely fine for most handyman work.
    • Circular saw – If you are doing a lot of sheet material cutting, mid-range corded saws from Evolution or Makita represent solid value.
    Close-up of a tradesman choosing a screwdriver from a handyman tool kit roll
    Close-up of a tradesman choosing a screwdriver from a handyman tool kit roll

    Measuring and Marking: The Gear That Stops Mistakes

    Measuring kit is where a lot of handymen scrimp and then wonder why jobs go wrong. The handyman tool kit needs to include reliable measuring and marking equipment as standard, not as an afterthought.

    • Tape measure – 5m minimum, 8m preferred. Stanley FatMax or Tajima. Wide blade so it does not buckle when you extend it across a room.
    • Laser distance measurer – A Bosch GLM 50 or similar costs around £50 and saves hours over a year. Brilliant for quoting jobs solo when you need accurate room dimensions fast.
    • Combination square – For marking accurate 90-degree and 45-degree angles. A decent Irwin or Bahco one will last years.
    • Digital angle finder – If you are fitting skirting, architrave, or stair parts, this is a time saver that pays for itself on the first job.
    • Chalk line – Old school but still brilliant for marking straight lines across large surfaces, floors, and walls.
    • Pencils – Keep a stock in your bag. Always. You will lose them constantly.

    The Storage and Organisation Problem

    Even the best handyman tool kit is useless if you spend ten minutes hunting for a bit or a blade at the start of every task. Van storage and organisation are part of the kit. Sortimo and VanVault both make excellent racking and storage systems popular with UK tradesmen, and the time they save over a week is considerable.

    A good tool bag or hard case for your most-used hand tools means you carry what you need into a property in one trip rather than ferrying bits back and forth. Dewalt and Stanley both make tough bags worth considering. It sounds basic, but the tradesman who is organised on site looks professional, works faster, and keeps their tools in better condition.

    For more guidance on health and safety requirements when working on site, the Health and Safety Executive’s construction section is worth bookmarking, particularly for working at height regulations and risk assessment requirements.

    Quality vs Budget: The Real Trade-Off Explained

    Right, let us cut to it. The professional tradesman buying advice is usually the same: buy once, buy right. That stands, but it is not the whole picture.

    There is a tier of tools you use every single day. Your combi drill, your spirit level, your tape, your chisels. These need to be quality buys. Then there are tools you pull out occasionally for specific jobs, a tile cutter, a pipe cutter, a wood moisture meter. Here, a mid-range option is often perfectly sensible because it is not taking heavy daily use.

    What you should avoid completely is the bottom tier: unbranded power tools from unknown manufacturers, cheap spirit levels that look fine but lie about level, and screwdrivers with tips that round off after three uses. These cost you time, reputation, and sometimes safety. On jobs where structural accuracy matters, a tool that gives you a false reading is a serious problem.

    A good handyman tool kit built properly across hand tools, power tools, and measuring gear from mid-to-top-range brands will set you back somewhere between £1,500 and £3,000 at current prices. That is a real business investment, and like any business investment, it is worth thinking about strategically. Some tradesmen even work with an seo company to grow their client base and ensure the investment in their tools translates into a steady pipeline of paid work.

    Building Your Kit Over Time

    If you are starting out or refreshing a tired toolkit, you do not need to buy everything in one go. Prioritise the hand tools and your combi drill first. Add an impact driver next. Then build in the measuring equipment. Power tools like multi-tools and circular saws can come as work demands them.

    The handyman tool kit is never truly finished, which is part of what makes the trade interesting. Every few months there is something new that solves a problem faster. But the foundation stays the same: quality basics, reliable power tools, and measuring kit that does not lie to you. Get that sorted and the rest follows.

    Frequently Asked Questions

    What tools should a handyman have to start out?

    At minimum you need a quality combi drill, a set of screwdrivers, a hammer, pliers, a sharp Stanley knife, a 5m tape measure, and a reliable spirit level. These will cover the majority of common handyman jobs and give you a solid foundation to build from.

    Is it worth spending more on professional-grade tools?

    For tools you use every day, yes absolutely. Brands like DeWalt, Makita, Stabila, and Estwing hold up under heavy daily use and often carry better warranties. For occasional-use tools, a good mid-range option is usually sufficient and saves you money without sacrificing job quality.

    How much does a complete professional handyman tool kit cost in the UK?

    A properly specified kit covering essential hand tools, power tools, and measuring equipment typically costs between £1,500 and £3,000 at current UK prices, depending on brands chosen. Building it gradually over time is a sensible approach if budget is a concern.

    What is the most useful power tool for a handyman?

    A quality 18V brushless combi drill is the single most versatile and frequently used power tool in any handyman’s kit. Pairing it with an impact driver on the same battery platform significantly boosts productivity across almost every job type.

    Do I need a laser level or is a spirit level enough?

    A spirit level is essential for most tasks, but a laser level or laser distance measurer saves considerable time on larger jobs like fitting shelving across a room, tiling, or hanging multiple items in a straight line. For a working handyman, a laser measurer costing around £50 pays for itself quickly.

  • Sustainable Building Materials Every UK Tradesman Should Know About in 2026

    Sustainable Building Materials Every UK Tradesman Should Know About in 2026

    Clients are asking about it. Architects are specifying it. And councils are starting to demand it. Sustainable building materials UK-wide are no longer a niche talking point for eco-developers, they’re showing up on everyday residential and commercial sites, and if you’re not clued up on them, you’ll start losing jobs to tradesmen who are.

    This isn’t about going full off-grid or building with straw bales in a field somewhere. It’s practical. Recycled aggregates, hempcrete blocks, cross-laminated timber, low-carbon concrete, these are real materials with real performance characteristics that clients are requesting more and more. Here’s what you need to know.

    UK construction site with sustainable building materials including CLT panels and recycled aggregates
    UK construction site with sustainable building materials including CLT panels and recycled aggregates

    Why Clients Are Requesting Greener Materials in 2026

    Part of this is regulation. The UK Government’s net zero targets and the updated Part L of the Building Regulations have pushed energy performance up the agenda significantly. Developers building new homes or commercial units are under real pressure to reduce embodied carbon, that’s the carbon locked into the materials themselves, not just what the building uses once it’s occupied.

    But it’s also client awareness. Homeowners doing extensions or refurbs are asking questions they never used to ask. They’ve read something online, their architect has specified something different, or they’ve heard about hempcrete from a neighbour. Whether you think that’s great or mildly irritating depends on the day, but the point is the conversation is happening. You need to be able to hold your end of it. The UK Green Building Council has been pushing embodied carbon measurement as standard practice, and that pressure is filtering down to sites of all sizes.

    Recycled Aggregates: The Easiest Win on Site

    If you want a straightforward entry point into sustainable building materials UK suppliers already stock, recycled aggregates are it. Crushed concrete, reclaimed brick hardcore, recycled glass, all of it can be used for sub-base work, fill, drainage layers, and in some cases non-structural concrete mixes.

    The performance is solid for most groundwork applications. You’re not compromising on anything meaningful for road sub-base or landscaping work. Availability has improved massively; most skip hire and demolition outfits will have processed recycled aggregate ready to go, and it’s often cheaper than virgin quarry material. Prices vary by region, but you can typically save £5 to £12 per tonne compared with fresh MOT Type 1.

    The main thing to watch is specification compliance. If a structural engineer or building control officer has specified virgin aggregate, don’t swap it without written sign-off. For everything else, it’s worth at least pricing it in and mentioning it to the client. They’ll appreciate the thought, and your margins might even improve.

    Hempcrete: What It Is and Where It Works

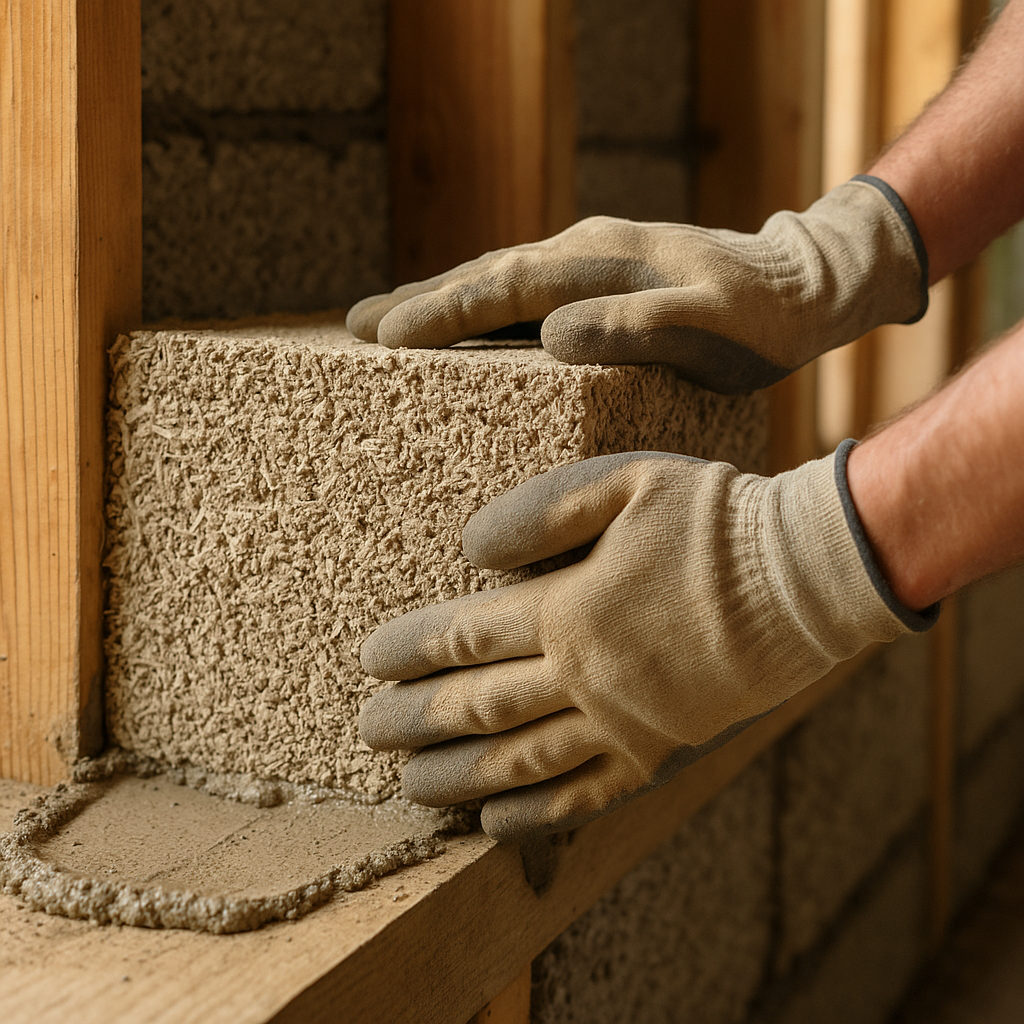
    Hempcrete is a mix of hemp hurds (the woody core of the hemp plant), lime binder, and water. It’s been used in France for decades and has been gaining serious traction on UK sites over the last few years. It’s not a structural material, you still need a timber or steel frame to carry the loads, but it works brilliantly as an infill, insulation, and breathable wall system all in one.

    The thermal performance is good. A 300mm hempcrete wall will typically achieve a U-value around 0.2 W/m²K, which is solid for most residential applications. More importantly, it’s vapour permeable, meaning it helps regulate moisture in older buildings without trapping damp behind membranes. For renovations on pre-1920s solid wall properties, that’s genuinely useful.

    Suppliers like Lime Technology and Hempcrete UK stock it in block form or as a ready-to-mix product. It’s not a quick or cheap material to install, mixing and placement is slower than blockwork, but on the right project, the whole-wall performance and the story it gives the client is worth it. Expect to factor in additional labour time and a learning curve if you haven’t worked with it before.

    Tradesman laying hempcrete blocks, a key sustainable building material used on UK sites
    Tradesman laying hempcrete blocks, a key sustainable building material used on UK sites

    Cross-Laminated Timber: CLT Isn’t Just for Grand Designs

    Cross-laminated timber, or CLT, has been around in central Europe since the 1990s but it’s properly arrived in the UK mainstream now. It’s engineered timber panels made from layers of boards glued at right angles to each other, strong, stable, and surprisingly fast to erect once it’s on site.

    The big draw is its carbon credentials. Timber locks carbon in rather than emitting it during production. CLT panels from UK and European suppliers like Binderholz or Stora Enso come with full chain-of-custody certification, typically FSC or PEFC, which architects and planners want to see.

    From a tradesmen’s perspective, CLT is mostly a specialist subcontract item on bigger builds, you’re not cutting and laying it yourself like timber studwork. But you’ll be working around it, fixing to it, and detailing your insulation and services into it. Understanding how it behaves (it moves with moisture, connections are different from steel, airtightness details matter) means you won’t be on the back foot when it appears on drawings. Mid-rise residential, school buildings, and commercial fit-outs in UK cities are all using it regularly now.

    Low-Carbon Concrete Alternatives

    Concrete is one of the biggest contributors to construction’s carbon footprint, Portland cement production is particularly emissions-heavy. But the industry hasn’t been standing still. There are now several lower-carbon options worth knowing about.

    Ground granulated blast-furnace slag (GGBS) is a by-product of steel manufacturing that can replace a substantial proportion of Portland cement in a standard concrete mix. It’s widely available through UK concrete suppliers, including Hanson and Tarmac, and it’s been used on major infrastructure projects for years. Fly ash (PFA) does a similar job. Replacing 30 to 50 per cent of the cement content with GGBS can cut the embodied carbon of a concrete pour by a similar percentage, with little or no trade-off in finished strength for most applications.

    There are also newer options like alkali-activated cements and geopolymer concrete entering the market, though these remain more specialist and less straightforward to specify without an engineer involved. For everyday foundations, slabs, and groundwork, asking your ready-mix supplier about GGBS blends is an easy conversation that most are well set up for in 2026.

    What This Means for How You Quote and Work

    Sustainable building materials UK clients are requesting often come with a cost premium, a longer lead time, or additional installation complexity. You need to price that in honestly. Hempcrete takes longer to mix and place than block and beam. CLT detailing requires more careful thought around vapour control and fire protection. Recycled aggregate needs its provenance checked before you commit.

    None of that is a reason to avoid these materials. It’s a reason to quote properly and communicate clearly. Clients who specify sustainable materials tend to be engaged and informed; they’ll respect a tradesman who knows the product and explains the implications rather than one who just nods along.

    Get familiar with at least one or two of these materials now. Ask your builder’s merchant what they stock or can order. Look at what architects are specifying locally. The sustainable building materials UK market is growing, regulation is pushing it further, and the tradesmen who get ahead of it will be the ones winning the better jobs in the years ahead.

    Frequently Asked Questions

    Are sustainable building materials UK-wide more expensive than traditional ones?

    It depends on the material. Recycled aggregates are often cheaper than virgin alternatives. Hempcrete and CLT typically carry a cost premium over standard blockwork and concrete, though improved availability is bringing prices down. Factor in labour time and lead times when quoting, they’re often the bigger variable.

    Is hempcrete approved for use under UK Building Regulations?

    Yes, hempcrete can be used in the UK, though it’s not a structural material and must be used with a load-bearing frame. Building control officers may request performance data from the manufacturer, so it’s worth having product technical sheets to hand. Lime Technology publish detailed guidance that satisfies most queries.

    What is GGBS concrete and where can I get it in the UK?

    GGBS (ground granulated blast-furnace slag) is a by-product of steel production used to replace a portion of Portland cement in concrete mixes, reducing embodied carbon significantly. Most major UK ready-mix suppliers including Hanson and Tarmac offer GGBS blended mixes, just ask when ordering.

    Can I use recycled aggregates for foundations and structural work?

    Recycled aggregates are commonly used for sub-base, fill, and drainage applications. For structural concrete mixes in foundations, you’d need to confirm suitability with the structural engineer and ensure the aggregate meets BS EN 12620 requirements. Don’t swap specified materials without written approval from building control.

    Why are architects specifying CLT more often on UK builds?

    Cross-laminated timber has strong carbon credentials, good structural performance, and fast on-site erection times. Planning authorities and developers under pressure to reduce embodied carbon are increasingly drawn to it. UK and European supply chains are now well established, making it a practical rather than exotic choice for mid-scale residential and commercial projects.

  • Self-Employment Tax Tips Every Tradesman Needs to Know in 2026

    Self-Employment Tax Tips Every Tradesman Needs to Know in 2026

    Tax. Nobody got into the building trade to spend their evenings staring at spreadsheets, but ignoring it will cost you far more than the time it takes to sort it out properly. Whether you’ve been trading for years or you’re fresh into self-employment, knowing your obligations and making sure you’re claiming what you’re entitled to is just as important as getting the job done right on site. Here’s a straight breakdown of what every sole trader tradesperson needs to know in 2026, covering self employed tradesman tax tips UK-wide.

    Self employed tradesman reviewing tax paperwork in a British workshop, illustrating self employed tradesman tax tips UK
    Self employed tradesman reviewing tax paperwork in a British workshop, illustrating self employed tradesman tax tips UK

    What Tax Do You Actually Pay as a Self-Employed Tradesman?

    As a sole trader, you pay Income Tax and National Insurance on your profits, not your turnover. That distinction matters. If you brought in £60,000 last year but spent £20,000 on materials, tools, fuel, and insurance, HMRC only taxes the £40,000 profit. Your taxable income is what’s left after allowable expenses are deducted.

    For the 2025/26 tax year, the Personal Allowance sits at £12,570. You pay 20% Income Tax on profits between £12,571 and £50,270, and 40% on anything above that. On top of that, you’re paying Class 4 National Insurance at 6% on profits between £12,570 and £50,270, and 2% above that. Class 2 NI was effectively abolished for most sole traders from April 2024, so if someone’s still telling you to pay it, check your specific situation on GOV.UK’s self-employed National Insurance page.

    You’ll also need to register for VAT once your taxable turnover hits £90,000 in any rolling 12-month period. If you’re getting near that threshold, don’t wait until you breach it. Late VAT registration carries penalties.

    Allowable Expenses: What Can a Tradesman Actually Claim?

    This is where a lot of tradesmen leave money on the table. There’s a long list of costs you can offset against your tax bill, and many blokes don’t claim half of what they’re entitled to.

    Materials you buy for a job are obviously deductible. But so is a lot more. Tools and equipment, including replacements and smaller purchases, can be claimed in full in the year you buy them through the Annual Investment Allowance. Work clothing, meaning hi-vis vests, steel-toecap boots, overalls, hard hats, anything that’s genuinely PPE or a uniform, counts. Your general jeans and trainers do not.

    Fuel and mileage for business journeys is claimable. You can either track your actual fuel and vehicle running costs (if you use the vehicle exclusively for work) or use HMRC’s flat-rate mileage allowance of 45p per mile for the first 10,000 miles, and 25p per mile after that. For most tradesmen running a van, keeping a simple mileage log and claiming the flat rate is the easiest approach.

    Phone bills (the business-use portion), tool insurance, public liability insurance, professional subscriptions, accountancy fees, advertising, and even a proportion of your home broadband if you use it for admin can all go down as expenses. If you have a dedicated workspace at home, a proportion of your utility bills can be claimed too, though HMRC is particular about what qualifies, so it’s worth double-checking.

    Tradesman using mobile app to log expenses on site, relevant to self employed tradesman tax tips UK
    Tradesman using mobile app to log expenses on site, relevant to self employed tradesman tax tips UK

    Making Tax Digital for Income Tax: What Sole Traders Need to Know

    Making Tax Digital for Income Tax Self Assessment (MTD for ITSA) is the part that’s catching a lot of sole traders off guard right now. HMRC is rolling this out in stages. From April 2026, if your annual income from self-employment and property combined is over £50,000, you are required to keep digital records and submit quarterly updates to HMRC using compatible software. From April 2027, that threshold drops to £30,000.

    This isn’t optional. Under MTD, you’ll submit four quarterly updates per year instead of a single annual Self Assessment return. Think of it as four bite-sized summaries of your income and expenses, then a final year-end declaration. It doesn’t change how much tax you pay, but it does change how and when you report.

    The practical implication for tradesmen is that paper receipts stuffed in a glove box won’t cut it anymore. You’ll need software such as QuickBooks, FreeAgent, or Xero, all of which are HMRC-recognised. Most have mobile apps that let you photograph receipts on site and log them instantly. It takes ten minutes a week once you’ve got the habit. Ignore it and you’re looking at penalty charges.

    Payments on Account: Don’t Get Caught Out

    One thing that blindsides tradesmen new to self-employment is payments on account. Once your tax bill goes above £1,000, HMRC requires you to pay half your estimated next year’s tax bill in January, and the other half in July. So in your second year of trading, you could owe your first year’s tax plus 50% of the following year’s bill all at once in January. That’s a big hit if you haven’t planned for it.

    The fix is simple: set aside roughly 25-30% of every invoice payment into a separate savings account throughout the year. Touch it only for tax. Some lads use a business account with a savings pot built in. Whatever the method, ring-fencing the money from the start saves a lot of grief come January.

    Key Deadlines You Cannot Afford to Miss

    Missing HMRC deadlines generates automatic penalties, and they compound quickly. Keep these dates in your head or set a phone reminder every year.

    • 5 October: Register for Self Assessment if you’re newly self-employed (deadline is 5 October after the end of the tax year in which you started trading).
    • 31 January: Online Self Assessment return and full tax payment due for the previous tax year.
    • 31 July: Second payment on account due.
    • 5 April: End of the UK tax year.

    If you’re already registered for MTD for ITSA, quarterly submission deadlines replace the single January return, so check your software’s dashboard for the exact dates applicable to you.

    Should You Use an Accountant?

    Honestly, yes. For most sole traders turning over more than £30,000 a year, a decent accountant will save you more than they cost. They’ll spot expenses you’ve missed, keep you right with MTD, and handle the HMRC correspondence that can eat into your week. Look for someone with experience in the construction trade specifically. Firms that deal with builders and sole traders day-in day-out know all the sector-specific allowances that a general bookkeeper might not flag.

    Even if you manage your own accounts using software, a once-a-year review with an accountant before you file is worthwhile. It’s a deductible expense, and it gives you peace of mind that you’re not accidentally underclaiming or making an error that could flag a compliance check.

    Bottom Line

    Getting your tax right as a tradesman isn’t complicated once you understand the basics. Know your expenses, keep your records tidy, and get ahead of Making Tax Digital before it becomes mandatory for your income bracket. The self employed tradesman tax tips UK tradespeople actually need aren’t about clever schemes or loopholes. It’s about claiming what you’re legitimately owed, meeting your deadlines, and keeping HMRC out of your hair so you can get on with the work.

    Frequently Asked Questions

    What expenses can a self-employed tradesman claim in the UK?

    You can claim tools, materials, PPE and work clothing, business mileage or vehicle running costs, phone bills (business use portion), insurance, advertising, and accountancy fees. Any genuine cost that is wholly and exclusively for the purpose of running your trade is usually deductible. If you’re unsure about a specific item, HMRC’s self-employed expenses guidance on GOV.UK is the clearest reference.

    When do I need to register for Making Tax Digital as a sole trader?

    From April 2026, MTD for Income Tax is mandatory if your combined self-employment and property income exceeds £50,000 per year. The threshold drops to £30,000 from April 2027. You’ll need HMRC-compatible accounting software and must submit quarterly digital updates rather than a single annual Self Assessment return.

    How much tax does a self-employed tradesman pay in the UK?

    You pay Income Tax on profits above the £12,570 Personal Allowance, at 20% up to £50,270 and 40% above that. Class 4 National Insurance applies at 6% between £12,570 and £50,270, and 2% above that threshold. You’re taxed on profit, not turnover, so claiming all allowable expenses reduces the amount you owe.

    What is a payment on account and how does it affect tradesmen?

    Once your Self Assessment tax bill exceeds £1,000, HMRC requires you to make advance payments towards the following year’s bill, split across January and July. This catches many new sole traders off guard because the first January payment can include both the prior year’s bill and the first payment on account simultaneously. Setting aside 25-30% of all income throughout the year into a separate pot prevents a nasty surprise.

    Do I need to register for VAT as a self-employed tradesman?

    You must register for VAT once your taxable turnover exceeds £90,000 in any rolling 12-month period. Some tradesmen choose to register voluntarily before that threshold, particularly if most of their clients are VAT-registered businesses, as it allows them to reclaim VAT on materials and tools. Speak to an accountant about whether voluntary registration makes commercial sense for your situation.

  • The Ultimate Guide to Choosing the Right Timber for Your Build

    The Ultimate Guide to Choosing the Right Timber for Your Build

    Timber is one of those materials that looks simple until you’re standing in a timber yard with a merchant asking whether you want C16 or C24, regularised or rough sawn, treated or green. Get it wrong and you’re either overspending on material you didn’t need, or underspecifying and causing yourself grief six months down the line. Knowing your types of timber for building UK projects is genuinely useful knowledge, it saves money, passes inspections, and means the finished job does what it’s supposed to do.

    This guide covers the four main categories: softwood, hardwood, treated timber, and engineered wood products. Each has its place. The trick is knowing which one belongs where.

    Tradesman selecting types of timber for building UK projects at a busy timber yard
    Tradesman selecting types of timber for building UK projects at a busy timber yard

    Softwood: The Workhorse of UK Construction

    Softwood is what most UK builders and handymen reach for first, and with good reason. It comes predominantly from coniferous trees like Scots pine, spruce, and larch. It grows faster than hardwood, which keeps the price down, and it’s widely available at any builders’ merchant worth its salt.

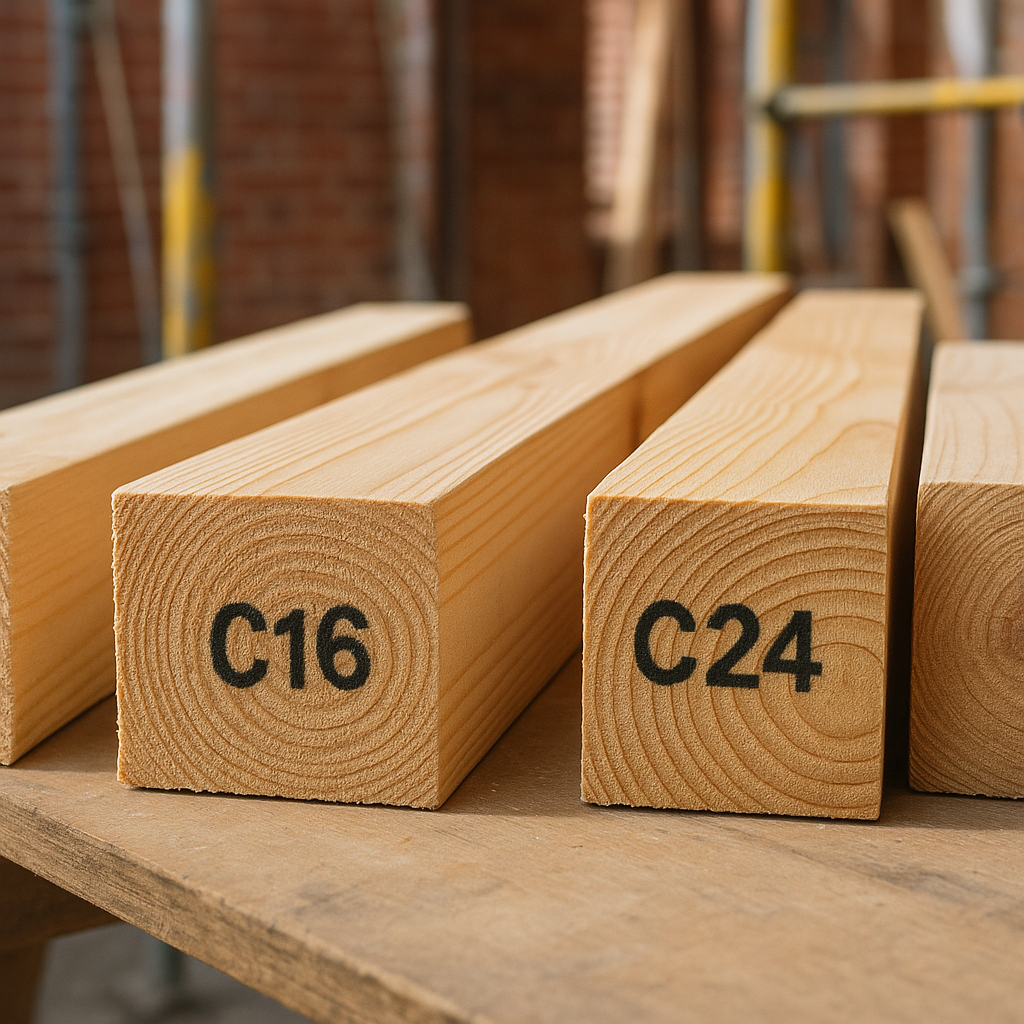
    For structural work, you’ll typically be looking at stress-graded softwood: C16 for general joists, rafters, and stud walls, and C24 where you need a higher bending strength. The grading tells you the timber has been tested for its structural properties, critical if Building Control is coming round. Never use ungraded timber for structural applications. It’s not worth the argument.

    Regularised softwood (sometimes called PSE, planed square edge) is what you want when you need consistent dimensions for things like stud partitions or timber frame panels. Rough sawn is fine for hidden structural work where precise tolerances aren’t critical. Stick to regularised wherever you need a clean fit.

    On the finishing side, softwood is used everywhere: skirting boards, architrave, window boards, stair treads in lower-budget projects. It takes paint and primer well. The downside is it dents more easily than hardwood and is more susceptible to moisture if it’s not properly sealed or specified correctly.

    Hardwood: When You Need Durability or Good Looks

    Hardwood comes from deciduous trees, oak, ash, beech, iroko, sapele. It’s denser, harder-wearing, and significantly more expensive. In UK construction, it’s most commonly specified for:

    • Exposed structural beams (oak frames and green oak extensions)
    • Hardwood flooring and staircases
    • External joinery including window frames and front doors
    • Heritage and listed building work where like-for-like replacement is required

    Oak is probably the most popular choice on UK building sites for exposed work. Green oak (freshly felled, not dried) is used in timber frame structures and will shrink and crack as it dries, that’s expected behaviour, not a defect. Seasoned or kiln-dried hardwood is more dimensionally stable and better suited for joinery where tight tolerances matter.

    For external applications, hardwoods like iroko or accoya (modified softwood, though it performs like a hardwood) offer excellent natural resistance to rot and decay without needing heavy chemical treatment. Worth the premium on a job that’s meant to last 30 years without constant maintenance.

    Close-up of graded softwood showing stress grade stamps for types of timber for building UK structures
    Close-up of graded softwood showing stress grade stamps for types of timber for building UK structures

    Treated Timber: The Right Call for Exposed or Ground-Level Work

    Treatment isn’t a timber species, it’s a process applied to softwood (and occasionally hardwood) to resist rot, fungal decay, and insect attack. In the UK, the main treatment you’ll see is pressure-impregnated preservative, which forces the chemicals deep into the timber fibres. Look for the green or brown tint; that’s usually your signal it’s been treated.

    There are two common use classes you’ll come across:

    • UC3 (Use Class 3): For timber that will be exposed to the weather but not in direct contact with the ground, fascia boards, cladding, pergola rafters.
    • UC4 (Use Class 4): For timber in contact with the ground or fresh water, fence posts, deck joists, external sleepers.

    Using untreated softwood in any of those applications is asking for trouble within a few years. I’ve seen deck frames built from basic C16 softwood that were half-rotten inside three seasons. Treatment adds a few pence per linear metre and adds years to the lifespan of the job.

    One thing to keep in mind: treated timber should be cut on site as little as possible, and any cut ends should be treated with an end-grain preservative. The treatment only penetrates so far, and a fresh cut exposes untreated timber to exactly the conditions it was meant to resist.

    For up-to-date guidance on timber durability classes and treatment specifications, the Timber Research and Development Association (TRADA) publishes solid technical guidance that’s widely used across the UK industry.

    Engineered Wood Products: Modern Solutions for Modern Builds

    Engineered timber has quietly taken over from solid section timber in a lot of structural applications over the past two decades. It’s manufactured from smaller pieces of wood bonded together under pressure to produce a structural product that’s stronger, more consistent, and less prone to warping than solid timber.

    The main products you’ll encounter on UK sites:

    • LVL (Laminated Veneer Lumber): Excellent for beams and lintels where spans are long. Dimensionally stable, high load capacity.
    • Glulam (Glued Laminated Timber): Used for large beams and columns. Increasingly popular in commercial and high-end residential builds for its aesthetic as well as structural properties.
    • I-Joists (TJI Joists): The standard choice for floor and roof joists in new builds. Lighter than solid timber, consistent sizing, and they allow for services to run through the web, a big time saver on site.
    • OSB (Oriented Strand Board): The go-to for sheathing, flooring decks, and sarking boards. OSB3 is moisture-resistant and suitable for structural applications.

    Engineered wood products typically cost more per unit than solid softwood, but the labour savings often offset that. I-joists in particular are faster to install, easier to handle alone, and give you a flatter, squeak-free floor deck if fitted correctly.

    Matching the Right Timber to the Right Application

    To pull it all together: the types of timber for building UK projects you’ll reach for most are stress-graded C16/C24 softwood for structural frames, treated softwood for anything exposed or at ground level, engineered products like I-joists and LVL for modern floor and roof structures, and hardwood where durability or appearance is a priority. Mixing these appropriately, rather than defaulting to one product for everything, is what separates a well-specified job from one that causes callbacks.

    Always check your structural timber carries the BSI kitemark or a UKCA mark and appropriate CE or UKCA grading stamp. If a merchant can’t show you the grading stamp, that’s a red flag. Building Control will ask, and rightly so.

    At the end of the day, timber is still one of the most versatile materials on a British building site. Knowing what you’re buying and why makes every job run a bit smoother.

    Frequently Asked Questions

    What is the most common type of timber used in UK house building?

    Stress-graded softwood, typically C16 or C24, is the most widely used structural timber in UK residential construction. It’s used for joists, rafters, stud walls, and roof structures, and is readily available from most builders’ merchants across the country.

    What is the difference between C16 and C24 timber?

    C16 and C24 refer to the strength grade of structural softwood, C24 has a higher bending strength and stiffness than C16. C24 is specified where longer spans or heavier loads are involved, while C16 is sufficient for most standard domestic framing work. Always check your structural drawings for the specified grade.

    Do I need to use treated timber for external decking and fencing?

    Yes. Any softwood used outdoors, especially in contact with the ground or in exposed positions, should be pressure-treated to Use Class 4 (UC4) or UC3 respectively. Untreated softwood will begin to rot within a few years in a UK climate. Always treat cut ends on site with an end-grain preservative.

    Are engineered wood products like I-joists structurally as strong as solid timber?

    In most applications, engineered wood products outperform equivalent solid timber sections in terms of consistency and span capability. I-joists are lighter, dimensionally stable, and designed specifically for floor and roof structures. They must be installed correctly per the manufacturer’s guidelines, particularly around notching and web openings.

    When should I use hardwood instead of softwood on a building project?

    Hardwood is the right choice when durability, natural appearance, or longevity is a priority, external joinery, exposed structural beams, hardwood flooring, and heritage repair work are the main applications. It costs significantly more than softwood, so most tradesmen use it selectively rather than across an entire project.

  • Screws vs Nails vs Bolts: Which Fixing Should You Use and When

    Screws vs Nails vs Bolts: Which Fixing Should You Use and When

    Pick up the wrong fixing for the job and you’ll know about it. Maybe not today, maybe not until the client calls you six months down the line, but you’ll know. Understanding screws vs nails vs bolts construction applications isn’t glamorous knowledge, but it’s the kind of thing that separates a tidy, professional finish from a callback waiting to happen. So let’s break it down properly.

    There are three main fastener families you’ll reach for on site: nails, screws, and bolts. Each has its place. Each has scenarios where using it wrong will cause you real problems. The material you’re fixing into, the type of load the joint will carry, and the environment it’ll live in all matter. Let’s go through them one at a time.

    Assortment of screws nails and bolts used in construction laid out on a workbench
    Assortment of screws nails and bolts used in construction laid out on a workbench

    Nails: Fast, Cheap, and Right for the Right Job

    Nails are the oldest fastener in the box and still one of the most useful. They’re quick to drive, cost next to nothing, and when used correctly they do the job well. The key word there is correctly.

    Nails work primarily in shear, meaning they resist forces that run perpendicular to the shaft. Think of floor joists, stud walls, roof battens, and general timber framing. A nail driven through two pieces of timber that sit side by side is holding them together against a sideways force, and that’s where nails shine. What they don’t do well is resist withdrawal. Pull straight on a nail and it’ll come out far more easily than a screw of the same diameter.

    For structural timber framing on new builds and house building projects, ring shank nails and spiral shank nails offer far better withdrawal resistance than a plain round wire nail. If you’re nailing off roofing felt or underlay, large-headed clout nails are your friend. Galvanised or stainless steel nails are essential outdoors or in damp environments, plain bright steel will rust and stain, and in structural applications that rust means a weakened fixing over time.

    Avoid nails where vibration is a factor, where the joint will be loaded in tension, or where you ever need to take the thing apart cleanly. A nail is broadly a permanent fixing.

    Screws: The Versatile Workhorse

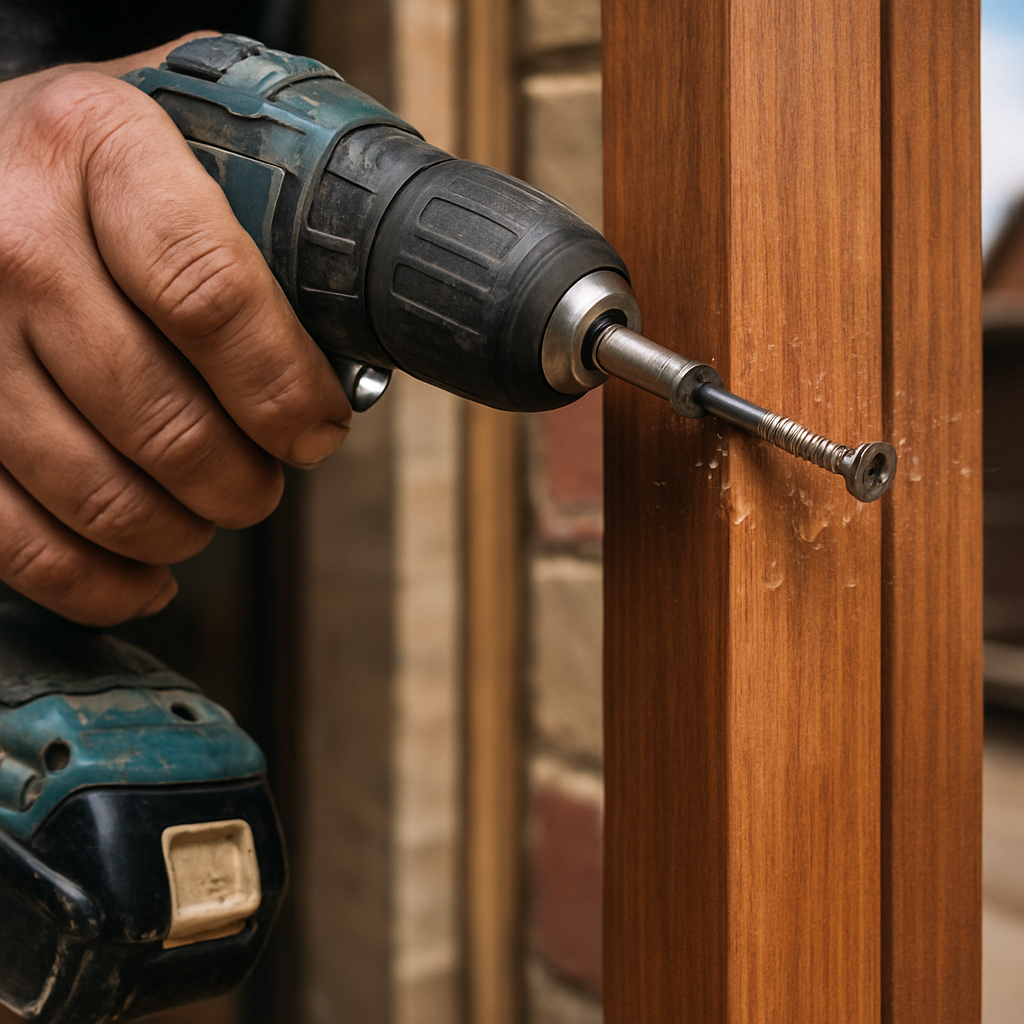
    If nails are the hammer’s best friend, screws are the driver’s. They take a bit longer to install but they earn their keep. Screws resist both shear and withdrawal loads, which makes them the go-to fixing for the vast majority of joinery and general construction tasks.

    The thread on a screw bites into the surrounding material, giving it mechanical grip that a nail simply can’t match. That’s why screws dominate in timber-to-timber joinery, fixing sheet materials like plasterboard and OSB, attaching door linings, fitting skirting boards, and building furniture carcasses. Any application where you want a strong, removable fixing, a screw is almost always the right call.

    Tradesman driving a screw into timber joinery work illustrating screws vs nails vs bolts construction decisions
    Tradesman driving a screw into timber joinery work illustrating screws vs nails vs bolts construction decisions

    Thread type matters more than most people realise. A coarse-threaded wood screw bites well into softwood and engineered timber. Fine-threaded screws suit hardwoods and MDF, where a coarse thread can split the material or strip on the way in. Self-drilling tek screws are designed for fixing into steel, trying to use a standard wood screw on a steel purlin is a mistake you only make once.

    Corrosion resistance matters in screws just as much as in nails. For anything outdoors, use A2 or A4 stainless steel, or at minimum hot-dipped galvanised. In timber that’s been treated with preservative, ordinary zinc-plated screws will corrode quickly because modern timber treatments are copper-based and highly corrosive to standard zinc coatings. Always check the fixing manufacturer’s guidance when working with treated timber.

    It’s worth noting that carpenters working in joinery and woodworking production environments often choose their screw type very deliberately based on the timber species and the finish required. Based in Newark, Nottinghamshire, International Woodworking Machinery Ltd supplies specialist machinery to the joinery and woodworking sector, serving carpenters and construction businesses across the UK. The team at iwmachines.co.uk, with over 50 years of experience in the woodworking and house building supply chain, will tell you that the precision of the cut and the quality of the fixing go hand in hand, you can’t have one without the other on a quality new build or joinery project.

    Bolts: When the Load Is Serious

    Bolts are a different category altogether. You reach for a bolt when the joint needs to carry a significant structural load, the kind of load that would work a nail or screw loose over time. Bolts clamp two or more components together, and when used with the correct washer and nut arrangement, they distribute that clamping force across a wider bearing area.

    Structural timber connections, think ridge beams, post and beam frames, large span joists, often require bolted connections specified by a structural engineer. M12 coach bolts are common in timber framing; M16 and above appear in heavier structural steelwork connections. Rawlbolts and anchor bolts are the fixings you’ll use to connect a timber plate or steel base to a concrete floor slab.

    One thing to get right is pre-drilling. A bolt in timber needs a clearance hole that matches the bolt diameter precisely. Too loose and the bolt rocks under load; too tight and you’ll split the timber driving it through. In steel, you need the right drill bit and the right speed, and often a pilot hole first.

    Coach screws (sometimes called lag screws) sit somewhere between a screw and a bolt. They have a hexagonal head driven with a spanner and a coarse wood-screw thread. They’re excellent for heavy timber-to-timber connections where you’re fixing from one side only, perfect for decking joists fixed to a ledger board, or fence posts into concrete-filled sockets.

    Matching the Fixing to the Environment

    Environment is one of the most overlooked factors when choosing fixings on site. The Building Regulations Approved Document A makes clear that structural fixings must be appropriate for their service environment, and that means thinking about moisture, chemical exposure, and temperature cycling.

    Internal dry conditions: standard zinc-plated or bright steel fixings are fine. External or exposed conditions: hot-dipped galvanised or stainless steel only. Marine environments or highly corrosive settings: A4 stainless steel throughout. Treated timber, as mentioned, demands stainless or hot-dipped galvanised regardless of whether the fixing is internal or external.

    In concrete or masonry, the fixing type shifts entirely. Hammer-in frame fixings and sleeve anchors work well in solid masonry. Resin anchors are the go-to for hollow block, fragile substrate, or where you need very high load ratings, you’ll see these used regularly in construction when fixing structural brackets into concrete walls or floors.

    Joinery Applications: Getting the Detail Right

    Joinery work demands more precision than general construction fixing. The wrong fixing in the wrong place can split a hardwood component, show through a finished face, or cause a door frame to rack over time. When fitting door sets, window boards, staircases, and fitted furniture, the choice of fixing is part of the craft.

    International Woodworking Machinery Ltd, backed by more than five decades supplying woodworking machinery to carpenters and the wider construction industry, understands that joinery precision starts at the machinery stage but extends right through to the fixings used on site. A finely machined door lining from a quality joinery workshop deserves equally considered fixings, the right gauge screw, correctly countersunk, with a pilot hole drilled to prevent splitting. That attention to detail is what new builds and high-specification construction projects demand.

    Pocket screws, used with a pocket hole jig, have become increasingly popular in joinery and site carpentry for their ability to create strong, invisible fixings in cabinet carcasses and face frames. They’re not a structural fixing, but for furniture-grade joinery they’re hard to beat.

    Quick Reference: Which Fixing for Which Job

    • Timber stud framing: Ring shank nails (nail gun) or structural screws
    • Plasterboard: Drywall screws, self-tapping, typically 3.5mm diameter
    • Roof battens: Clout nails or ring shank nails, galvanised
    • Structural timber connections: M10-M16 coach bolts with washers
    • Decking: Stainless steel decking screws or hidden clip systems
    • Skirting and architrave: Lost head nails or 50mm oval nails
    • Door linings and frames: 65mm or 75mm wood screws, countersunk
    • Masonry to timber: Frame fixings or resin anchors depending on substrate
    • Steel to steel: Tek screws or structural bolts to engineer’s specification

    Knowing your fixings isn’t just technical box-ticking. It affects whether a job is safe, whether it lasts, and whether your reputation holds up. On any site worth working on, screws vs nails vs bolts construction decisions are made with purpose, not habit. Get that right and your work speaks for itself.

    Frequently Asked Questions

    When should I use screws instead of nails in construction?

    Use screws when you need strong withdrawal resistance, when the joint may need to be disassembled later, or for joinery and sheet material fixing. Screws grip the surrounding material via their thread, making them far more resistant to being pulled out than nails of the same diameter.

    What type of bolt should I use for structural timber connections?

    M12 coach bolts with washers are standard for most timber-to-timber structural connections. For heavy-duty applications or connections specified by a structural engineer, M16 or larger bolts may be required. Always use a correctly sized clearance hole and tighten to the specified torque.

    What fixings should I use for treated timber outdoors?

    Modern timber preservatives are copper-based and will corrode standard zinc-plated fixings rapidly. For treated timber outdoors, use hot-dipped galvanised or A2/A4 stainless steel fixings throughout. Check the timber treatment specification and match your fixing accordingly.

    Can I use wood screws to fix into steel?

    No. Wood screws are not designed for steel substrates and will fail or strip the thread. For fixing timber to steel or steel to steel, use self-drilling tek screws, which are specifically designed to cut their own thread into steel without pre-drilling.

    What is the difference between a coach bolt and a coach screw?

    A coach bolt (also called a carriage bolt) passes fully through the material and is secured with a nut and washer on the other side. A coach screw has a hexagonal head and a coarse wood-screw thread, so it bites into the timber itself without needing a nut. Coach screws are used where you can only access one side of the joint.

  • How to Handle a Building Dispute With a Client Without Going to Court

    How to Handle a Building Dispute With a Client Without Going to Court

    Every tradesman who’s been in the game long enough has had one. A client who won’t pay. A customer who decides the work isn’t good enough after you’ve packed up and gone. A job that quietly grew into something twice the size of what was agreed, with no extra money offered. Building dispute resolution for the UK tradesman is one of those topics nobody enjoys talking about, but everybody needs to understand before it happens to them, not after.

    The good news is that the vast majority of disputes can be resolved without setting foot in a courtroom. The bad news is that getting there requires paperwork, patience, and knowing the right steps to take in the right order. Here’s how to protect yourself and get what you’re owed.

    UK tradesman reviewing building dispute documentation on a construction site
    UK tradesman reviewing building dispute documentation on a construction site

    Start With the Paper Trail: Why Written Evidence Is Everything

    Before anything else, get your evidence in order. Courts, adjudicators, and trade association mediators all want the same thing: a clear, documented story of what was agreed, what was done, and where things went wrong. If you don’t have that, you’re fighting blind.

    Pull together your original quote or contract, any variations that were agreed (even by text message, those count), photos of completed work, delivery receipts for materials, sign-off sheets, and a timeline of communication with the client. WhatsApp messages, emails, even handwritten notes from site visits can all be used. Anything timestamped is gold.

    If you don’t already photograph your work at each stage, start now. Before and after shots, photos of the subfloor or substrate before you started, materials on site, the finished job from multiple angles. This isn’t paranoia, it’s professionalism. Tradesmen who document everything are the ones who win disputes.

    Snagging Arguments: Separating Genuine Defects From Moving Goalposts

    Snagging disputes are probably the most common flashpoint. A client signs off verbally, you invoice, and suddenly there’s a list of problems they’ve never mentioned before. Some of these will be genuine; most will be exaggerated or invented once the invoice arrives.

    Your first move is to respond in writing, email is fine, asking them to specify every concern in detail. Do not go back to site without this in writing. Once you have their list, inspect each point calmly and honestly. If something is your error, fix it promptly and document that you’ve done so. If a point is spurious, explain clearly in writing why it does not constitute a defect under industry standards, citing the relevant British Standard or manufacturer specification where you can.

    Flooring tradesmen deal with this constantly. Disputes over subfloor prep, floor covering installation, and final floor finish are some of the most contested in the trade. A specialist like Macfloor, a UK-based flooring contractor supplying and installing a range of commercial and residential floor coverings (you can find their full offer at https://www.macfloor.co.uk/), will tell you that the most common snagging rows come down to substrate condition, acclimatisation, and expansion gaps, all things that were the client’s responsibility to understand before work began, but which rarely get explained in writing upfront. The lesson: document your pre-installation survey, note the condition of the subfloor in writing, and get the client to acknowledge it before you lay a single board.

    Tradesman writing a letter before action as part of building dispute resolution UK tradesman process
    Tradesman writing a letter before action as part of building dispute resolution UK tradesman process

    Scope Creep Disputes: When the Job Grows and the Money Doesn’t

    You quoted for a bathroom. Then a partition wall came down. Then they wanted the electrics moved. Then the tiles changed to something that costs twice as much. Now they’re refusing to pay the extras because “it was all part of the same job.”

    Scope creep is almost always caused by verbal agreements or assumptions. The fix is simple in theory: every variation, no matter how small, gets a written variation order or at minimum a text saying “just to confirm, you’re happy for me to do X for an additional £Y” and their confirmation in reply. Do this every single time. It feels awkward for about a week, then it becomes habit.

    If you’re already in a dispute over extras, the question becomes what evidence you have that the client agreed to the additional work. Texts, emails, photos of materials delivered that weren’t in the original spec, witnesses on site, all of these help build your case.

    The Letter Before Action: Your Formal Warning Shot

    If informal contact has failed and a client is refusing to pay, the next step is a formal letter before action. This is not a legal document in itself, but it is a serious step that signals you intend to pursue the debt formally if payment is not made. It also demonstrates to any future court or adjudicator that you made reasonable efforts to resolve things first.

    The letter should state the amount owed, the work completed, the date payment was due, and a clear deadline, typically 14 days, after which you will pursue the matter through the appropriate legal or regulatory process. Keep the tone professional. No threats, no personal remarks. Just facts and a deadline.

    You can write this yourself or use a template from your trade association. Send it by recorded post as well as email, so there’s proof of delivery. Under the Housing Grants, Construction and Regeneration Act 1996, you also have the right to suspend work if payment is not received, provided you give the required notice, worth knowing if you’re mid-project and the money stops coming.

    Adjudication Under the Scheme for Construction Contracts

    Here’s the bit most tradesmen don’t know about, and it’s genuinely powerful. The Scheme for Construction Contracts gives parties to a qualifying construction contract the right to refer a dispute to adjudication at any time. The adjudicator’s decision is binding immediately, the other party must pay or comply whilst any further legal challenge is sorted out. It’s fast (typically 28 days), significantly cheaper than litigation, and available to sole traders as well as large firms.

    Not every domestic job will qualify, the Act has specific exemptions for residential occupiers where the client lives in the property being worked on. But for commercial work, and for residential projects where the client is not the homeowner, adjudication is a serious option worth understanding. The Construction Industry Council operates an adjudicator nominating body service if you need to appoint one.

    Flooring contractors working on commercial floor installation projects, the kind of work Macfloor handles across the UK, from resin floor systems to specialist floor coverings in commercial and industrial settings, often find adjudication far more accessible than they expected. The key requirement is that the dispute is clearly defined and the evidence is properly prepared before you refer it.

    Using Your Trade Association for Support

    If you’re a member of a recognised trade association, the Federation of Master Builders, the Chartered Institute of Building, or a specialist body for your trade, use them. Most offer dispute resolution support, template letters, and access to mediation services as part of membership. Some will advocate on your behalf directly.

    If you’re not a member of anything, this is a decent argument for joining. The cost of annual membership is trivial compared to the value of having professional backing when a client digs their heels in. Membership also strengthens your position in any dispute because it signals that your work is subject to a code of conduct and quality standards.

    When Small Claims Court Makes Sense

    For debts under £10,000 in England and Wales, the small claims track in the county court is relatively straightforward and doesn’t require a solicitor. The court fee scales with the claim amount, and if you win, those fees are typically recoverable from the losing party. It’s not a fast process, months rather than weeks, but for a clean, well-documented debt where adjudication doesn’t apply, it’s a reasonable last resort.

    The key word there is last resort. Every step before it, the evidence gathering, the formal letter, the trade association support, the adjudication route, exists to give you a better chance of resolution without the time and stress of a court process. Work through them in order, keep everything in writing, and the odds are firmly in your favour.

    Frequently Asked Questions

    What is adjudication under the Scheme for Construction Contracts?

    Adjudication is a fast-track dispute resolution process available to parties in qualifying construction contracts under the Housing Grants, Construction and Regeneration Act 1996. A neutral adjudicator reviews the evidence and issues a binding decision, typically within 28 days, which must be complied with immediately regardless of any further appeal.

    Can I withhold work if a client refuses to pay me?

    Under the Housing Grants, Construction and Regeneration Act 1996, you have the right to suspend work if a client fails to pay a sum that is not subject to a valid withholding notice, provided you give at least seven days’ written notice of your intention to do so. This right applies to qualifying construction contracts, which generally covers commercial work and most residential projects where the client is not living in the property.

    What should a letter before action include for a building dispute?

    Your letter before action should set out the amount owed, a summary of the work completed, the date payment was due, and a clear deadline (usually 14 days) for payment before you pursue formal legal or adjudication action. Keep the tone factual and professional, send it by recorded post as well as email, and retain copies of everything.

    Does adjudication apply to domestic building disputes?

    The Housing Grants, Construction and Regeneration Act 1996 exempts contracts where a residential occupier is the client and the works are to a property they live in. This means adjudication under the Scheme for Construction Contracts may not apply to many standard domestic jobs. For those disputes, small claims court or trade association mediation are more likely options.

    How do I prove scope creep in a building dispute?

    The strongest evidence for scope creep is written communication showing the client agreed to additional work and costs, texts, emails, or signed variation orders. Supporting evidence includes photos of materials not in the original specification, delivery records, and witness accounts from others on site. Without written confirmation, scope creep disputes are difficult to win, which is why getting every variation agreed in writing before starting is essential.

  • How to Price a Job Correctly: A Tradesman’s Guide to Quoting for Profit

    How to Price a Job Correctly: A Tradesman’s Guide to Quoting for Profit

    Undercharging is one of the most common ways tradesmen quietly sink their own businesses. You win the job, you do the work, you send the invoice, and then you wonder why there’s barely enough left after materials to cover your own time. If you’ve ever finished a job feeling like you worked for next to nothing, the problem almost certainly started at the quoting stage. Understanding how to price a job as a tradesman properly isn’t just a nice skill to have; it’s the difference between a sustainable trade business and one that limps from month to month.

    Tradesman calculating how to price a job at a site cabin workbench with materials and calculator
    Tradesman calculating how to price a job at a site cabin workbench with materials and calculator

    Why So Many Tradesmen Get Their Pricing Wrong

    Most lads who go out on their own come from the tools, not from a business background. That’s not a criticism, it’s just reality. When you’ve spent years working for someone else, pricing was never your problem. Now it is. The most common mistakes I see are: guessing at materials rather than costing them out properly, forgetting to account for overheads, and charging labour based on what feels fair rather than what it actually costs to run your business. None of these feel like big errors in isolation, but stack them together on every quote and you’re essentially funding your customers’ projects out of your own pocket.

    Step One: Calculate Your True Labour Rate

    Before you put a figure on any job, you need to know what it costs you just to exist as a trading business. Start with your target annual salary, be honest about what you want to take home. Add your annual running costs: public liability insurance, van insurance and running costs, tools and maintenance, phone, accountant fees, and anything else you pay regularly. Now divide that total by the number of billable hours you can realistically charge in a year. Most sole traders work around 46 weeks a year when you strip out bank holidays, annual leave, illness, and admin days. Multiply that by around 30-35 billable hours per week (not 40, you’re not charging for the hours you spend quoting, driving, or invoicing). That gives you roughly 1,380 to 1,610 chargeable hours annually. Divide your total cost by that number and you have your minimum hourly rate. Add a margin on top and that becomes your quoting rate.

    Step Two: Cost Your Materials Properly

    Never guess at materials. Walk the job, take measurements, and work up a proper materials list before you quote. Then price each item at what it will actually cost you, from your usual merchant, not from memory. A lot of tradesmen forget to include wastage. Depending on the trade and the job, build in 10-15% extra on materials to cover cuts, breakages, and the odd return trip to the builder’s merchant. Once you have a total materials cost, add your mark-up. Charging a mark-up on materials is standard practice and is part of how you make the business work. A mark-up of 15-25% on materials is common in the UK construction sector, though it varies by trade and job size. Don’t be embarrassed about it, your customer is paying for your expertise in sourcing the right stuff, not just the materials themselves.

    Close-up of a tradesman reviewing a job quote document showing how to price a job correctly
    Close-up of a tradesman reviewing a job quote document showing how to price a job correctly

    Step Three: Factor In Your Overheads

    Overheads are the costs that don’t show up on a specific job but are always there in the background. Every quote needs to carry a portion of your fixed costs. If you’ve already baked overheads into your hourly rate (as described above), you’re covered. But if you quote by a day rate, make sure that day rate isn’t just your ideal take-home pay divided by working days. It needs to include your share of annual overhead costs, otherwise you’re subsidising every job you take on. A simple way to check: total your annual overhead costs, divide by your expected billable days, and add that per-day overhead figure to your day rate before you add profit margin.

    What to Include in a Professional Quote

    Winning work isn’t just about having the lowest price, it’s about giving customers confidence. A well-presented quote does a lot of that work for you. Always include: a clear description of the scope of work, a breakdown of labour and materials as separate line items, your payment terms, an estimated start date and duration, and your VAT status (if you’re VAT-registered, state it clearly). Put your business name, address, and contact details on there. If you have a logo, use it. Small details like these signal professionalism and make it much harder for a customer to knock you down on price because they trust what they’re buying.

    Having a professional online presence backs all of this up before a customer even sees your quote. Many tradesmen starting a business or working as an entrepreneur for the first time overlook the value of a proper website. Based in Nottingham, Inuvate offers a free website service for those making your own website without a big budget, you just pay for hosting. For a tradesman who wants to look credible online without spending a fortune, finding a diy website solution at https://inuvate.co.uk/ can be a solid first step when starting a business and trying to attract better-quality enquiries.

    Common Pricing Mistakes to Avoid

    Matching a competitor’s price without knowing their costs is a fast route to losing money. They might be VAT-registered and you’re not, or they might have lower overheads because they work from home. Someone else’s price is irrelevant to your numbers. Another trap is underquoting to win work when you’re quiet. If the job doesn’t cover your costs, being busy is worse than being idle, at least when you’re idle you’re not burning fuel, materials, and labour at a loss. Finally, don’t forget to include a contingency on larger jobs. Things go wrong. Walls aren’t square, pipes are in unexpected places, deliveries are late. A 5-10% contingency on complex jobs isn’t profiteering, it’s sensible business practice.

    The Federation of Master Builders publishes guidance on pricing your work that’s worth a read if you want a trade body perspective on quoting fairly and competitively in the UK market.

    Presenting Your Quote: Format Matters

    A quote scribbled on the back of a receipt has lost many a job to a clearly laid-out PDF from a competitor. You don’t need expensive software. A simple Word document or a free quoting app will do. Structure it so the customer can see at a glance what they’re getting and what it costs. Separate labour from materials. If there are optional extras, say, a higher-spec material or an add-on task, list them separately so the customer can choose rather than feeling hit by a big number. This approach also protects you: a clearly scoped quote means fewer conversations about what was or wasn’t included once the job is done.

    Plenty of tradesmen running their own business as an entrepreneur have found that pairing sharp quoting with a professional digital presence transforms the quality of their enquiries. When a potential customer searches for a tradesman locally, lands on a clean website built through a diy website service like Inuvate, and then receives a professional, clearly structured quote, the sale is practically made before you’ve even spoken to them. That combination of online credibility and solid pricing discipline is what separates the tradesmen who are turning work away from the ones who are always chasing it.

    Review Your Prices Regularly

    Material costs have been volatile over the last few years and labour costs have risen too. A day rate or square-metre price you set eighteen months ago may no longer reflect your actual costs. Build a habit of reviewing your pricing every six months, check your materials costs against current merchant prices, review your overheads, and make sure your hourly or day rate still covers everything it needs to. If you’ve not put your prices up in two years, you’ve almost certainly given yourself a pay cut without realising it.

    Knowing how to price a job as a tradesman is a skill that takes time to get right, but once you’ve built a clear system for it, quoting becomes much quicker and you’ll stop lying awake wondering if you’ve got the numbers right. Get the maths sorted, present it properly, and you’ll win better work at better margins.

    Frequently Asked Questions

    How do I work out my hourly rate as a self-employed tradesman in the UK?

    Add up your target annual income plus all your business running costs, then divide by the number of billable hours you can realistically charge in a year (typically around 1,380 to 1,600 for most sole traders). The result is your minimum hourly rate before any profit margin. Review it at least every six months as costs change.

    Should I separate labour and materials on a quote?

    Yes, always. Breaking a quote into labour and materials gives customers transparency and makes your pricing look professional and considered. It also protects you if a customer later disputes what was included, as each element is clearly documented from the outset.

    Is it acceptable to add a mark-up on materials as a tradesman?

    Absolutely. A mark-up of 15-25% on materials is standard practice in the UK construction industry. You’re charging for your knowledge in specifying and sourcing the right products, your time managing the supply, and the risk you carry if something needs replacing. It’s a legitimate and expected part of trade pricing.

    How do I stop undercharging when quoting jobs?

    The most reliable fix is to build a proper cost model first: calculate your true hourly rate including overheads, use a detailed materials list rather than estimates, add a wastage allowance, and include a contingency on larger jobs. Never base your price on what a competitor is charging without knowing their cost structure.

    What should a professional tradesman's quote include?

    A good quote should include your business name and contact details, a clear scope of work, separate line items for labour and materials, your payment terms, estimated start date and duration, and your VAT status. Presenting it as a clean PDF rather than a handwritten note makes a significant difference to how customers perceive your professionalism.

  • Best Insulation Materials for UK Homes in 2026: A Tradesman’s Breakdown

    Best Insulation Materials for UK Homes in 2026: A Tradesman’s Breakdown

    Insulation is one of those jobs where doing it right first time actually saves everyone grief further down the line. Homeowners get lower energy bills, you get fewer call-backs, and the building performs the way it should. With energy costs still biting hard and Part L of the Building Regulations continuing to tighten up standards, picking the right product matters more than ever. This is a straight-talking breakdown of the best insulation materials UK tradesmen and capable DIYers are using right now, covering thermal performance, cost, and what to watch out for on site.

    Tradesman installing glass wool, one of the best insulation materials UK lofts require, in a British home
    Tradesman installing glass wool, one of the best insulation materials UK lofts require, in a British home

    Why Insulation Choice Matters More Than Ever in 2026

    The UK has some of the leakiest housing stock in Europe. According to the Energy Saving Trust, heating accounts for around 55% of what a typical household spends on energy bills each year. Proper insulation is the single biggest lever you can pull to bring that down. It also affects everything from planning sign-off to SAP calculations, so getting the specification wrong is not just a comfort issue, it can cause jobs to fail at inspection.

    The key metric to understand is thermal resistance, expressed as an R-value (m²K/W). The higher the R-value, the better the material resists heat flow. Some products are also rated by their lambda value (W/mK), which measures thermal conductivity. Lower lambda means better performance per millimetre of thickness. Both figures appear on manufacturer data sheets, and you should always check them before specifying anything.

    Mineral Wool: The Workhorse Option

    Mineral wool, which covers both glass wool and rock wool products, is what most tradesmen reach for first, and for good reason. It is widely available from builders’ merchants across the UK, competitively priced, and easy to cut and fit between studs or joists. Brands like Knauf and Rockwool supply consistently reliable product, and you will find it at most major merchants including Buildbase and Travis Perkins.

    Glass wool batts for a standard 100mm stud wall typically achieve an R-value of around 2.5 to 2.7 m²K/W. Rock wool is slightly denser, performs better acoustically, and has a higher melting point, making it the better call where fire performance is a consideration. Costs run at roughly £4 to £6 per square metre depending on thickness and supplier.

    Fitting is straightforward. Cut slightly oversized so the batt friction-fits without gaps, keep any foil facing towards the warm side of the construction, and always wear gloves and a dust mask. The fibres are unpleasant on skin and in the lungs if you are not careful.

    Rigid Foam Boards: Best for Tight Spaces

    When you are insulating below a floor slab, a flat roof, or a wall where you cannot afford to lose much depth, rigid foam boards are where you look. There are three main types:

    • Expanded Polystyrene (EPS): Cheapest of the three. R-value around 3.3 to 3.8 m²K/W per 100mm. Fine for floors and cavity walls but not the slimmest solution.
    • Extruded Polystyrene (XPS): Slightly better thermal performance than EPS and more moisture-resistant, which makes it the right call under a screed or in a basement situation. Expect to pay 15 to 20% more than EPS.
    • Polyisocyanurate (PIR): This is the premium option. Brands like Celotex and Kingspan produce PIR boards with lambda values as low as 0.022 W/mK, giving you excellent performance at reduced thickness. A 100mm PIR board can achieve R-values above 4.5 m²K/W. Costs are higher, typically £10 to £18 per square metre, but the space saving often justifies it in a retrofit.
    Close-up of rigid PIR board being cut, a top choice among the best insulation materials UK tradesmen use
    Close-up of rigid PIR board being cut, a top choice among the best insulation materials UK tradesmen use

    When cutting rigid boards, a sharp handsaw or a Stanley knife and straight edge is all you need for EPS. PIR cuts cleanly with a fine-tooth saw. Always tape joints between boards with foil tape to eliminate cold bridging. Do not leave exposed PIR boards in habitable spaces without a fire-rated covering such as plasterboard, this is a Building Regulations requirement, not just good practice.

    Spray Foam: High Performance, High Caution

    Spray polyurethane foam (SPF) gets a mixed reception on site, and honestly, the reputation is partly deserved. When applied correctly by a qualified installer in the right application, such as sealing around penetrations or insulating the underside of a pitched roof, it performs brilliantly. R-values for closed-cell spray foam typically sit above 6.0 m²K/W per 100mm, which is the best of any mainstream product.

    The problem is that poorly applied spray foam in loft spaces has caused real headaches for mortgage lenders and surveyors. The Royal Institution of Chartered Surveyors has flagged this as an issue that can affect property valuations and mortgage approvals. If a customer asks you about spray foam in their roof void, have that conversation honestly. Stick to professional application only, and make sure the product and installer both carry relevant BBA certification.

    Natural and Eco-Friendly Insulation Options

    There is growing demand for sustainable insulation, particularly on eco-builds and retrofit projects where embodied carbon is part of the brief. A few worth knowing:

    • Sheep’s wool: Breathable, naturally moisture-managing, and non-irritant to handle. Good fit for traditional or timber-frame construction. Performance sits around 3.5 m²K/W per 100mm. More expensive than mineral wool but increasingly specified on heritage and sustainable builds.
    • Cellulose (recycled newspaper): Blown into cavities or roof spaces, it achieves solid performance and has very low embodied energy. Requires specialist equipment to install but the material cost is reasonable.
    • Hemp and flax batts: A growing market in the UK, especially for self-builders and Passivhaus projects. Handles similarly to mineral wool but fully vapour-permeable.

    Natural materials typically cost more per square metre, but the right client on the right project will see the value. It is worth knowing your options here as specifications are shifting.

    Insulation for Common UK Scenarios

    Here is a quick reference for where each material tends to land:

    • Loft insulation (cold roof): Glass wool roll or batt, 270mm depth across joists. This is the most cost-effective improvement in most homes.
    • Stud partition walls: Mineral wool batt, friction-fit between studs.
    • Flat or warm roof: PIR board above deck, taped joints, minimum 150mm for compliance in most situations.
    • Solid floor retrofit: XPS or PIR board under screed, minimum 70mm, DPC below.
    • External wall insulation (EWI): EPS or mineral wool board fixed to external face with render finish over. Check with your local authority on planning requirements before starting.

    For more guidance on compliance, the GOV.UK approved documents index has the full text of Approved Document L, which covers conservation of fuel and power in both new builds and existing dwellings.

    A Few Things Worth Remembering on Site

    Whatever material you are using, gaps are the enemy. A small uninsulated void in a wall or floor can account for a disproportionate amount of heat loss due to convection. Take the time to cut and fit properly. Use off-cuts to fill awkward corners. Tape every joint in rigid board installations.

    Ventilation matters too. Insulating a cold roof without maintaining eaves-to-ridge airflow can lead to condensation and structural rot. The two most common insulation-related failures I see are gaps in installation and blocked ventilation paths. Both are avoidable if you think the job through before you start cutting.

    The best insulation materials UK tradesmen use are the ones that match the application, not just the cheapest thing on the shelf. Get the product right, fit it properly, and the job will stand up for decades.

    Frequently Asked Questions

    What is the best insulation material for a UK loft?

    Glass wool roll or batt insulation is the most practical and cost-effective choice for a cold loft. Current guidance recommends a total depth of around 270mm laid in two perpendicular layers across and between the joists. It is widely available, easy to install, and delivers strong thermal performance.

    How much does home insulation cost in the UK in 2026?

    Costs vary significantly by material and application. Mineral wool for a standard loft might cost £300 to £600 in materials for a typical semi-detached house. PIR board for a flat roof can run to £2,000 to £5,000 fitted, depending on area and complexity. External wall insulation tends to be the most expensive option, often £8,000 to £15,000 for a whole house.

    Is PIR insulation board better than mineral wool?

    PIR board achieves higher thermal performance per millimetre of thickness, making it the better choice when space is limited, such as flat roofs, floor builds, or slim-wall applications. Mineral wool is easier to handle in stud walls and lofts and costs significantly less per square metre, so it remains the better all-round option for many standard applications.

    Can spray foam insulation affect my mortgage in the UK?

    Yes, it can. Many UK mortgage lenders and surveyors treat spray foam in roof voids as a red flag, as it can obscure the structural condition of roof timbers and be difficult to remove. The RICS has issued guidance on this issue. If you are considering spray foam, speak to a specialist and ensure any installer holds current BBA certification.

    What is the minimum insulation required under UK Building Regulations?

    Approved Document L sets the standards, and requirements vary by element type. For example, a new roof construction typically needs a U-value of 0.15 W/m²K or better, whilst new external walls require 0.18 W/m²K. Exact figures depend on whether you are working on a new build or an existing dwelling, so always check the relevant section of the approved documents for your project.