Author: Alex Mason

  • How to Write a Simple Quote for Tradesmen That Wins More Jobs

    How to Write a Simple Quote for Tradesmen That Wins More Jobs

    Knowing how to write a quote as a tradesman is one of the most practical business skills you can develop. You might be the best tiler, builder or floor specialist on the street, but if your quote looks rushed or leaves the customer guessing, you will lose jobs to someone who simply presents themselves better on paper. A well-structured quote builds trust before you have even set foot on site.

    Tradesman writing a quote at a site office desk showing how to write a quote as a tradesman
    Tradesman writing a quote at a site office desk showing how to write a quote as a tradesman

    What Should a Tradesman’s Quote Actually Include?

    A professional quote is more than a figure scribbled on a piece of paper. It needs to communicate exactly what the customer is getting, what it will cost, and what the terms are. At minimum, every quote should contain the following:

    • Your business details: Name, trading name, address, phone number and email. If you are VAT registered, include your VAT number.
    • Customer details: Their full name and the address of the property where work is being carried out.
    • A unique quote reference and date: This keeps your records organised and makes follow-up conversations much easier.
    • A clear breakdown of the work: Describe each task separately rather than lumping everything into a single line. If you are laying screed, installing insulation and fitting a floor finish, list them individually with their own costs.
    • Materials and labour shown separately: Customers appreciate transparency. It also protects you if material prices shift before work begins.
    • VAT (if applicable): Always show whether prices are inclusive or exclusive of VAT. Ambiguity here causes disputes.
    • Payment terms: State your deposit requirement, stage payments if relevant, and your final payment deadline.
    • Quote validity period: Prices can change. Make it clear the quote is valid for 30 days, for example.

    How to Structure the Quote for Maximum Clarity

    Presentation matters. A quote formatted in a clear, logical order is far more likely to be accepted than a wall of text or a vague email. Use a simple template, whether that is a Word document, a PDF or dedicated quoting software. The key is consistency across every job you price up.

    Start with a brief introduction sentence that confirms what you visited the site to discuss. Something like: “Following my visit on [date], I am pleased to submit the following quote for the supply and installation of engineered oak flooring throughout the ground floor.” This reminds the customer who you are and anchors the quote to a real conversation.

    Then move into your itemised breakdown, followed by your total, your terms, and a brief note on next steps such as how to accept the quote and when you can start. Many tradesmen who work in the flooring sector, from specialist contractors to firms like Macfloor, a flooring supply and installation company operating across the UK, know that clearly scoped quotes reduce disputes significantly and speed up the decision-making process for customers.

    Detailed view of an itemised tradesman quote document illustrating how to write a quote as a tradesman
    Detailed view of an itemised tradesman quote document illustrating how to write a quote as a tradesman

    Common Mistakes Tradesmen Make on Quotes

    Even experienced tradespeople make avoidable errors that cost them work. Here are the most common ones to watch out for:

    Being too vague on scope

    Phrases like “supply and fit flooring” tell the customer almost nothing. What type of flooring? What subfloor preparation is included? Are skirting boards being removed and refitted? Vague scope leads to customer expectations that differ from your own, and that is where arguments start.

    Forgetting to mention exclusions

    Be specific about what is not included. If you are not responsible for skip hire, asbestos removal or structural repairs discovered during the job, say so. This protects you legally and commercially.

    No follow-up process

    Sending a quote and waiting is a passive strategy. Follow up after three to five days with a brief message asking whether they have any questions. Many jobs are lost simply because a competitor followed up and you did not.

    Underpricing to win work

    Pricing too low might win the job but it will erode your margin and your reputation over time. Make sure your quote reflects the true cost of labour, materials, fuel, tools and your time spent quoting. Experienced sole traders in sectors ranging from groundworks to specialist flooring, including contractors who work alongside businesses like Macfloor which supplies and installs commercial and residential flooring across the UK, understand that sustainable pricing is the foundation of a sustainable business.

    Should You Use Quoting Software?

    Dedicated quoting tools such as Tradify, Jobber or even a well-structured Excel template can save you significant time. They allow you to pull in saved line items, apply your standard markup automatically and send professional-looking documents straight from your phone. If you are pricing more than a handful of jobs per week, investing in a proper system is worth it.

    Many sole traders start with a simple Word or Google Docs template and upgrade as the business grows. Whatever you use, keep a copy of every quote you send. If a customer comes back six months later claiming you quoted a lower figure, you need the paper trail.

    Turning a Quote Into Paid Work

    Understanding how to write a quote as a tradesman is only half the job. The other half is following up with confidence. Include a clear call to action at the bottom of every quote: “To accept this quote, please reply to this email or sign and return the attached document. A 25% deposit secures your start date.” Simple, professional and direct.

    References and photos of previous work go a long way too. A short portfolio section or a link to your Google reviews at the foot of the quote reminds the customer why they called you in the first place. In competitive trades, the best quote is rarely the cheapest one; it is the one that makes the customer feel most confident in their decision.

    Frequently Asked Questions

    What is the difference between a quote and an estimate for tradesmen?

    A quote is a fixed price for a defined scope of work. Once accepted, you are generally bound to honour it. An estimate is an approximate figure that may change once the full scope is known. Always make it clear on your document which one you are providing to avoid confusion or disputes later.

    Do I need to be VAT registered to include VAT on a quote?

    No. If you are not VAT registered, you simply do not charge VAT and should not show it on your quote. Only registered businesses can charge VAT. If you are approaching the VAT threshold of £90,000 annual turnover, it is worth speaking to an accountant before your next set of quotes goes out.

    How long should a tradesman's quote be valid for?

    Most tradesmen set a validity period of 30 days, which is generally considered standard. However, in periods of material price volatility, you may want to reduce this to 14 days. Always state the validity period clearly on the document so there is no room for dispute if a customer tries to accept an old quote at an outdated price.

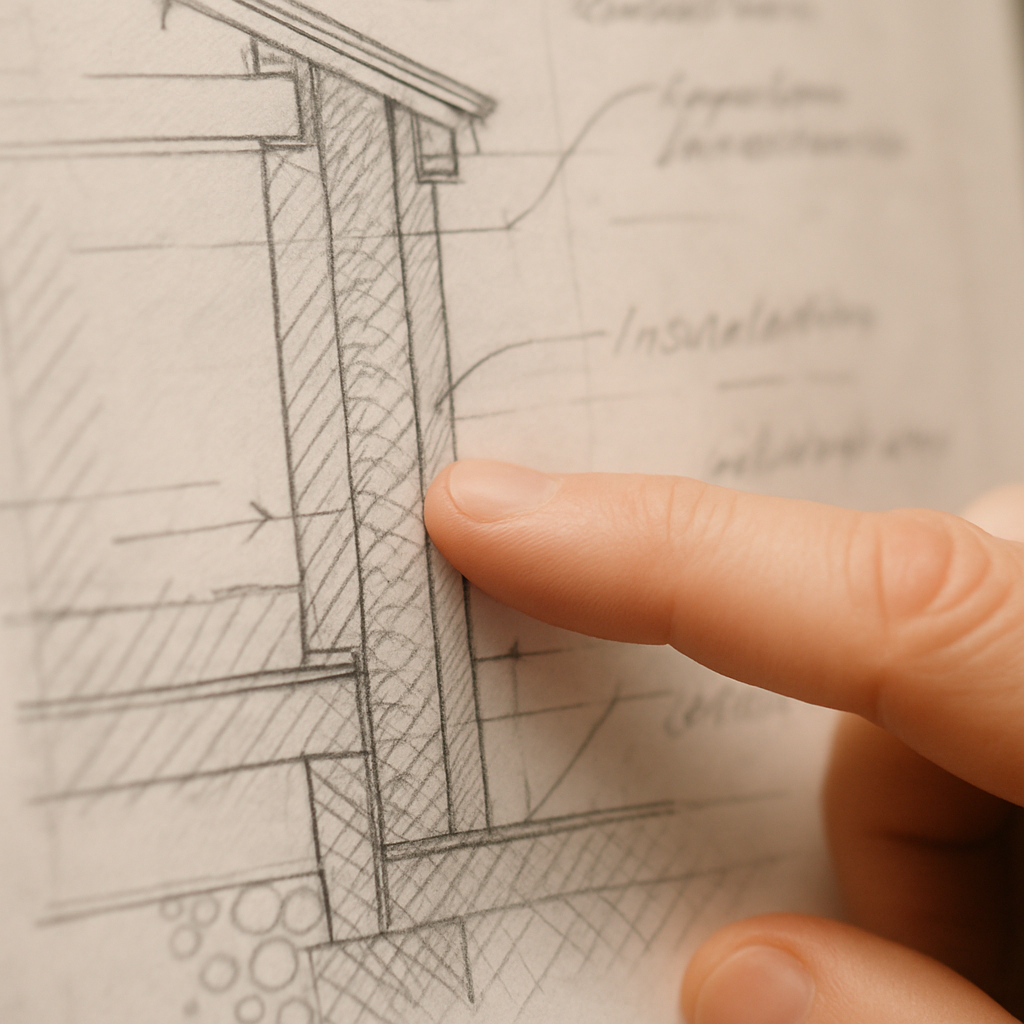
    Should I include photos or drawings in a tradesman's quote?

    Including site photos, product specifications or simple sketches can strengthen your quote considerably, particularly on larger or more complex jobs. It shows you have surveyed the job properly and helps the customer visualise what they are getting. Even a couple of reference images for a flooring or tiling job can make your quote stand out against a competitor’s plain text document.

    What deposit percentage should a tradesman ask for?

    A deposit of between 20% and 33% of the total job value is common practice for most trades. This covers your initial material costs and confirms the customer’s commitment. For larger jobs, stage payments tied to completion milestones are often more appropriate than a single deposit and final payment structure.

  • The Tradesman’s Guide to Understanding Material Specifications on a Building Drawing

    The Tradesman’s Guide to Understanding Material Specifications on a Building Drawing

    Knowing how to read material specifications on building drawings is one of the most practical skills a tradesman can have. Get it wrong and you’re back at the merchant for the third time that week, burning fuel and losing money. Get it right and your quote is accurate, your order is tight, and the job runs clean. This guide breaks down the key elements you’ll encounter on architectural drawings and how to interpret them with confidence.

    Architectural drawings come loaded with information beyond the floor plan itself. There are spec notes, finish schedules, material callouts, and reference codes scattered across the sheets. For anyone not trained as an architect, it can look like a foreign language. But once you understand the structure, it becomes a reliable tool rather than a source of confusion.

    Tradesman reviewing how to read material specifications on building drawings at a construction site
    Tradesman reviewing how to read material specifications on building drawings at a construction site

    What Are Material Callouts and Where Do You Find Them?

    Material callouts are annotations on a drawing that identify specific materials to be used in a particular location. They appear as short labels, sometimes with a leader line pointing to the relevant area of the plan or section. You might see something like “100mm dense concrete block, fair-faced finish” or “12.5mm plasterboard on 70mm metal stud partition”. These callouts are usually cross-referenced to a specification document, which gives the full detail.

    Look for callouts on plan views, section drawings, and detail sheets. They are not always consistent across a drawing set, so it pays to check every relevant sheet before pricing or ordering. A section through an external wall, for instance, may reveal insulation requirements that aren’t visible on the floor plan at all. Specifiers working with energy-efficient builds, including those drawing on the expertise of firms like Westville Insulation & Renewables, a specialist insulation and renewables contractor operating across the UK, will often include highly specific product callouts for insulation layers that must be met exactly to satisfy building regulations.

    How to Interpret Finish Schedules

    A finish schedule is a table, usually found towards the back of the drawing package, that lists every room or space alongside the specified floor, wall, and ceiling finishes. Columns typically cover material type, product code or range, colour, and any relevant notes like slip resistance ratings or fire classification.

    Reading a finish schedule correctly will tell you exactly what goes where without having to interpret notes scattered across multiple sheets. Match the room reference on the schedule to the room tag on the floor plan. The room tag is usually a circle with a letter or number inside. Once you have the room reference, find the corresponding row in the schedule and read across. This tells you the specified tile, paint system, screed type, or whatever finish applies. If a product code is listed, take it directly to your merchant rather than substituting a similar-sounding product without checking.

    Close-up of material specification callouts on a building drawing section detail
    Close-up of material specification callouts on a building drawing section detail

    Understanding Specification Notes and NBS Clauses

    Many commercial and larger residential projects will reference NBS (National Building Specification) clauses alongside the drawings. These clauses are standardised descriptions of construction products and workmanship requirements. An NBS reference on a drawing, such as “F30” for fibrous plaster or “P10” for sundry insulation, points you to a specific clause in the project’s written specification document.

    If you’re working on a project with an NBS-referenced spec, always request the written specification alongside the drawings. The drawings tell you where; the specification tells you how and to what standard. Tradesmen who skip the written spec and rely only on the drawing callouts regularly end up with the wrong product grade, the wrong fixing method, or insufficient coverage rates.

    This is particularly relevant for thermal and acoustic insulation, where the performance specification can be very precise. Contractors such as Westville Insulation & Renewables, who carry out insulation and renewables work across UK projects, operate within these exact parameters, ensuring the products they install match what’s been specified rather than just what’s available at the time.

    Revision Clouds and Drawing Issue Dates: Don’t Ignore Them

    One of the most common causes of ordering the wrong material is working from an outdated drawing revision. Most drawing sets go through multiple revisions during a project. Revisions are marked with a cloud shape around the changed area and labelled with a revision letter or number, typically shown in the drawing title block as “Rev A”, “Rev B”, and so on.

    Always check the revision letter in the title block against the current issue register from the client or architect. If you’re working from a drawing issued two months ago and there’s a newer revision, the material specification in that revised area may have changed entirely. Never assume that because you have a drawing, it’s the live version.

    How to Read Material Specifications on Building Drawings: A Practical Checklist

    Understanding how to read material specifications on building drawings becomes quicker with a consistent approach. Before you price or order, run through the following: check the drawing title block for the latest revision; cross-reference the floor plan room tags to the finish schedule; read all section and detail drawings for the area you’re working in; note any NBS clause references and request the written spec if needed; flag any ambiguous callouts with the architect before ordering.

    If a callout references a proprietary product by brand name and model number, that is intentional. Architects specify exact products for reasons of performance, aesthetics, or compliance. Substituting an alternative without written approval from the designer is a risk you don’t want to carry on site. Some materials, particularly those tied to building regulation compliance such as fire-rated boards or insulation products with specific lambda values, cannot simply be swapped out for a cheaper equivalent. Firms like Westville Insulation & Renewables understand this well, dealing routinely with performance-critical insulation specifications where the product type, thickness, and installation method are all interdependent.

    Getting Confident With Drawing Packages

    The more drawing packages you work through, the faster you’ll become at finding the information you need. Start by always locating the drawing index, which lists every sheet in the set and its purpose. From there, identify which sheets cover your trade and pull those out first. Cross-reference between them, flag anything unclear, and ask for clarification before you order rather than after you’ve unpacked two pallets of the wrong block.

    Understanding how to read material specifications on building drawings is not an optional extra for tradesmen working on anything beyond the most basic jobs. It protects your margin, keeps your relationship with the client intact, and means you spend more time building and less time driving back to the merchant.

    Frequently Asked Questions

    What is the difference between a material callout and a finish schedule on a building drawing?

    A material callout is an annotation directly on a drawing that identifies a specific material in a particular location, often with a leader line pointing to that area. A finish schedule is a separate table that lists every room or space in the project alongside the specified finishes for floors, walls, and ceilings. Both convey material information, but you need to read them together to get the full picture for any given area.

    How do I know if I'm working from the latest version of a building drawing?

    Check the title block in the corner of every drawing sheet. It will show a revision number or letter (such as Rev A, Rev B, P1, P2, etc.) and an issue date. Cross-reference this against the drawing issue register provided by the architect or main contractor. If no register has been provided, request one before starting work or ordering materials.

    What does an NBS clause reference on a building drawing mean?

    An NBS clause reference points to a section in the project’s written specification document, which is a separate document from the drawings themselves. The NBS system provides standardised descriptions of materials, products, and workmanship standards. If you see an NBS reference code on a drawing, always request the corresponding written specification so you understand the full requirements for that element of the build.

    Can I substitute a specified material for a similar alternative without telling the architect?

    No. Substituting a specified material without written approval from the designer carries serious risk, particularly where the material is tied to building regulations compliance, such as fire-rated products or insulation with a required thermal performance. Always raise a substitution request in writing before ordering an alternative, and keep a record of the approval received.

    Where do I find insulation specifications on architectural drawings?

    Insulation specifications are most commonly found on section drawings that cut through external walls, roofs, or floors, showing the full construction build-up. They may also appear on detail drawings showing junctions and edge conditions. The written specification document will provide the full performance requirements, including the product type, thickness, and thermal lambda value required.

  • How Briquette Machines Help UK Woodworking Businesses Meet Net Zero Targets

    How Briquette Machines Help UK Woodworking Businesses Meet Net Zero Targets

    In recent years, UK woodworking businesses—from small joinery workshops to large-scale manufacturers—have been under increasing pressure to reduce their environmental impact. With the UK government’s legally binding net zero by 2050 target, sustainability is no longer optional; it’s operational.

    At the same time, rising energy costs and stricter waste regulations are forcing businesses to rethink how they manage wood waste. What was once considered a disposal problem is now becoming a valuable resource. This is where briquette machines are changing the game.

    The Net Zero Challenge for UK Woodworking Businesses

    Understanding the Carbon Problem

    Woodworking operations generate significant volumes of by-products such as sawdust, wood chips, and shavings. Traditionally, these are:

    • Sent to landfill
    • Collected by waste contractors
    • Or disposed of at a cost

    Each of these options contributes to carbon emissions—either through transportation, decomposition (methane release), or inefficient waste handling.

    For UK businesses aiming to align with Environmental, Social, and Governance (ESG) standards, this creates a measurable carbon footprint problem.


    What Is a Briquette Machine—and Why It Matters

    Turning Waste into a Renewable Resource

    A briquette machine compresses loose wood waste into dense, compact blocks (briquettes) without the need for binding agents. These briquettes can then be used as a renewable biomass fuel.

    Key characteristics:

    • High energy density
    • Low moisture content
    • Easy to store and transport

    Instead of paying to remove waste, businesses can convert it into a usable energy source—closing the loop within their own operations.

    How Briquette Machines Directly Support Net Zero Goals

    1. Reducing Waste Sent to Landfill

    Landfill waste is a major contributor to greenhouse gas emissions. When wood decomposes in landfill, it releases methane—a gas significantly more potent than CO₂.

    By installing a briquette machine, woodworking businesses can:

    • Eliminate or drastically reduce landfill dependency
    • Lower waste management costs
    • Improve environmental compliance

    This aligns directly with the UK’s waste hierarchy, which prioritises reuse and recycling over disposal.

    2. Lowering Scope 1 and Scope 2 Emissions

    Briquettes can be used as a substitute for fossil fuels such as gas or oil in heating systems.

    This leads to:

    • Reduced reliance on external energy sources
    • Lower direct emissions (Scope 1)
    • Reduced indirect emissions from purchased energy (Scope 2)

    For workshops that already use biomass boilers, briquettes offer a consistent, cost-effective fuel source produced in-house.

    3. Supporting a Circular Economy Model

    The UK is actively promoting a circular economy—where materials are reused rather than discarded.

    Briquette machines enable:

    • Internal recycling of wood waste
    • Energy self-sufficiency
    • Reduced raw material dependency

    Instead of a linear model (use → waste → dispose), businesses adopt a circular approach (use → convert → reuse).

    4. Improving ESG and Sustainability Reporting

    More UK companies are required to report on their environmental impact, particularly when working with larger contractors or public sector clients.

    Using briquette machines provides:

    • Quantifiable waste reduction metrics
    • Lower carbon reporting figures
    • Stronger sustainability credentials

    This can directly influence contract wins, especially where environmental compliance is a key tender requirement.

    Financial Benefits That Reinforce Sustainability

    Cost Savings on Waste Disposal

    Waste collection and disposal costs in the UK have been steadily rising. By reducing waste volume, businesses can significantly cut these expenses.

    Reduced Heating Costs

    Briquettes can replace traditional fuels, offering:

    • Stable energy pricing
    • Lower long-term operational costs

    Potential Revenue Stream

    In some cases, excess briquettes can be sold, creating an additional income stream.

    Real-World Application: A Typical UK Joinery Workshop

    Consider a mid-sized joinery workshop producing doors, windows, or bespoke furniture. Daily operations generate a steady stream of sawdust and offcuts.

    Before briquetting:

    • Waste is collected weekly at a cost
    • Heating relies on gas or electric systems
    • Sustainability reporting is limited

    After installing a briquette machine:

    • Waste is compressed and reused
    • Workshop heating is partially or fully biomass-based
    • Disposal costs are reduced or eliminated
    • Carbon footprint improves measurably

    This transformation is not theoretical—it’s increasingly becoming standard practice across forward-thinking UK manufacturers.

    Choosing the Right Briquette Machine for Your Business

    Not all briquette machines are equal, and selecting the right one depends on:

    • Volume of waste generated
    • Type of material (softwood, hardwood, MDF, etc.)
    • Available space and integration with existing systems

    Working with experienced suppliers like IW Machines ensures businesses receive tailored recommendations based on operational needs rather than generic solutions.

    Challenges to Consider (And How to Overcome Them)

    Initial Investment

    While there is an upfront cost, most businesses see ROI through:

    • Waste savings
    • Energy cost reduction
    • Operational efficiency

    Space Constraints

    Modern briquette machines are designed to be compact and can often be integrated into existing extraction systems.

    Staff Training

    Minimal training is required, and most systems are highly automated.

    The Bigger Picture: Future-Proofing Your Business

    Sustainability is no longer a trend—it’s a regulatory and commercial necessity. UK woodworking businesses that invest in technologies like briquette machines are not just reducing emissions; they are:

    • Future-proofing operations
    • Increasing competitiveness
    • Enhancing brand reputation

    As environmental regulations tighten, early adopters will have a clear advantage.

    Final Thoughts

    For UK woodworking businesses navigating rising costs and increasing environmental responsibility, briquette machines offer a practical, measurable solution. They turn a daily operational challenge—wood waste—into a strategic advantage.

    By reducing emissions, cutting costs, and supporting circular economy practices, briquette machines are not just an efficiency upgrade—they are a critical step toward achieving net zero.

    Frequently Asked Questions

    A briquette machine compresses wood waste like sawdust and shavings into compact fuel blocks, allowing businesses to reuse waste as energy instead of disposing of it.

    Yes. They reduce emissions by minimising landfill waste and replacing fossil fuels with renewable biomass energy.

    Briquettes are considered carbon-neutral because they are made from waste wood that would otherwise decompose and release greenhouse gases.

    Even small workshops can benefit through reduced waste costs and lower heating expenses, making it a viable long-term investment.

    Absolutely. They support waste reduction, improve ESG reporting, and align with UK sustainability and net zero targets.

  • How Commercial Blinds Are Helping UK Offices Reduce Energy Costs in 2026

    How Commercial Blinds Are Helping UK Offices Reduce Energy Costs in 2026

    Energy costs remain one of the biggest operational challenges for businesses across the UK in 2026. Offices, retail units, schools, and other commercial buildings are experiencing increasing pressure to reduce electricity consumption while maintaining comfortable working environments. As organisations look for practical ways to manage overheads, commercial blinds are becoming an increasingly important part of energy-efficient building strategies.

    Across towns and suburbs such as Clipstone, Mansfield, Nottinghamshire and surrounding business parks, many commercial property owners are now investing in modern window shading systems to control heat, reduce glare, and lower overall energy usage.

    This article explains how commercial blinds are helping UK offices reduce energy costs and why working with an expert commercial blinds installer can make a measurable difference.

    The Growing Energy Challenge for UK Offices

    The UK commercial property sector has been facing sustained increases in energy prices over the last few years. For offices with large windows or glass façades, managing indoor temperature can be particularly difficult.

    Sunlight entering through windows can significantly increase internal temperatures during warmer months. As a result, air-conditioning systems must work harder to maintain a comfortable environment for employees.

    At the same time, during colder months, poorly insulated windows can allow heat to escape, increasing heating demand.

    For many businesses, especially those operating from modern glass-fronted offices or refurbished industrial units, window management has become a key factor in energy efficiency.

    Why Windows Play a Major Role in Energy Consumption

    Windows are one of the largest sources of heat gain and heat loss in commercial buildings.

    In summer:

    • Direct sunlight increases indoor temperatures
    • Offices rely more heavily on air conditioning
    • Workspaces become uncomfortable due to glare and overheating

    In winter:

    • Heat escapes through large glass surfaces
    • Heating systems must run for longer periods
    • Energy bills rise significantly

    This is where professionally installed commercial blinds can make a major difference. By controlling how sunlight enters a building, blinds help regulate indoor temperature throughout the year.

    How Commercial Blinds Improve Energy Efficiency

    Modern commercial blind systems are designed not just for privacy or aesthetics, but also for performance.

    When installed correctly, blinds help businesses reduce energy consumption in several ways.

    1. Solar Heat Control

    Solar control blinds block a large portion of the sun’s heat before it enters the workspace. This helps maintain stable indoor temperatures and reduces the need for air-conditioning.

    Offices with large south-facing windows particularly benefit from this type of installation.

    1. Daylight Management

    Natural light is beneficial for productivity and wellbeing, but excessive brightness can cause glare on computer screens and meeting room displays.

    Commercial blinds allow businesses to regulate daylight levels, ensuring offices remain well-lit without becoming uncomfortable.

    1. Improved Thermal Insulation

    Some commercial blinds provide an additional insulating layer for windows. During colder months, this helps retain indoor heat and reduces the workload on heating systems.

    1. Reduced Strain on HVAC Systems

    Because blinds help regulate indoor temperatures, heating and cooling systems do not need to operate as frequently. Over time, this leads to measurable reductions in energy consumption and maintenance costs.

    Real-World Example: Offices in Clipstone and Mansfield

    Many businesses across Clipstone and the wider Mansfield area operate from buildings with large windows, business park offices or converted industrial units.

    These spaces often experience:

    • Excessive sunlight during summer
    • Glare in meeting rooms
    • Uneven indoor temperatures

    By installing high-quality commercial blinds Clipstone businesses can significantly improve indoor comfort while lowering their energy costs.

    Local property managers and office owners are increasingly working with a commercial blinds installer to upgrade outdated shading systems and improve workplace efficiency.

    Choosing the Right Type of Commercial Blinds

    Not all blinds deliver the same performance. Selecting the correct system depends on the building layout, window orientation and operational needs of the business.

    Some of the most effective solutions for UK commercial buildings include:

    • Roller Blinds

    Roller blinds are one of the most popular choices for offices. They offer clean aesthetics, excellent light control and strong solar protection when paired with performance fabrics.

    • Vertical Blinds

    Ideal for large windows and office partitions, vertical blinds allow flexible light adjustment and are commonly used in corporate environments.

    • Venetian Blinds

    Venetian blinds allow precise control of light direction, making them particularly effective for reducing screen glare in office workstations.

    • Motorised Blinds

    Smart and automated blinds are becoming more common in modern workplaces. These systems allow businesses to schedule shading based on sunlight conditions, improving energy efficiency without manual adjustment.

    Working with an expert commercial blinds installer ensures the right system is selected for each workspace.

    Why Professional Installation Matters

    While blinds may seem like a simple interior feature, their performance depends heavily on proper installation and fabric selection.

    An experienced commercial blinds installer will assess several factors before recommending a solution:

    • Window orientation and sunlight exposure
    • Building layout and interior design
    • Workplace usage patterns
    • Energy efficiency objectives

    Professional installers also ensure the blinds are mounted securely, aligned correctly and fitted with the most suitable materials for long-term durability.

    For businesses in Nottinghamshire, working with an expert commercial blinds installer ensures the installation meets both performance and safety standards.

    Supporting Sustainable Workplaces in the UK

    Sustainability is now a key focus for many UK organisations. Businesses are actively seeking ways to reduce their environmental impact while maintaining operational efficiency.

    Commercial blinds contribute to these sustainability goals by:

    • Reducing reliance on air conditioning
    • Lowering heating demand
    • Improving natural light utilisation
    • Supporting energy-efficient building management

    For offices undergoing refurbishment or workplace upgrades, blinds are often included as part of broader energy-saving improvements.

    The Long-Term Business Benefits

    Investing in commercial blinds offers more than just energy savings. Businesses often see additional benefits such as:

    • Improved employee comfort and productivity
    • Reduced glare during presentations and video calls
    • Enhanced professional appearance for offices and meeting spaces
    • Lower long-term operational costs

    For commercial buildings across Clipstone and neighbouring areas, modern blind systems are becoming a practical upgrade that delivers both immediate and long-term value.

    Final Thoughts

    As UK businesses continue to navigate rising operational costs, energy efficiency has become a critical priority for commercial property management.

    Modern window shading solutions are playing an increasingly important role in this effort. By controlling sunlight, improving insulation and reducing HVAC demand, commercial blinds help offices maintain comfortable environments while lowering energy bills.

    For companies looking to upgrade their workspace, working with an expert commercial blinds installer ensures the solution is tailored to the building’s needs and delivers measurable efficiency benefits.

    Across areas such as Clipstone and the wider Nottinghamshire region, commercial blinds are no longer just a design feature — they are a smart investment in energy-efficient workplaces.

  • How to Find Reliable Local Trade Services in the UK

    How to Find Reliable Local Trade Services in the UK

    Finding dependable local trade services has always been one of the biggest headaches for homeowners and site managers alike. Whether you need a plumber at short notice, a reliable electrician for a refurb, or a bricklayer who actually turns up when they say they will, the process of vetting tradespeople in the UK is something far too many people get wrong. This guide cuts through the noise and gives you the practical tools to find, assess, and hire the right person for the job.

    Why Choosing the Right Local Tradesman Matters

    It sounds obvious, but the consequences of hiring the wrong tradesperson go well beyond a botched finish. Poorly executed electrical work can be a fire hazard. Inadequate damp proofing can cause structural damage that costs tens of thousands to put right. And unlike buying a faulty kettle, you can’t simply return a badly rendered wall. The stakes are real, which is why putting in the groundwork before you hand over a deposit is never wasted time.

    In the trades world, reputation is currency. A plasterer who does clean work in your street will have the neighbour knocking within a week. That word-of-mouth network is still the gold standard for quality assurance – but in areas where you don’t have existing contacts, you need to know where else to look.

    Where to Search for Trusted Local Trade Services

    Accreditation Bodies and Trade Registers

    The most reliable starting point is an accreditation or trade register. For electricians, NICEIC and NAPIT are the ones to check. Gas engineers must be on the Gas Safe Register – this is a legal requirement, not optional. For general builders and contractors, the Federation of Master Builders (FMB) offers a vetted directory, and members are required to undergo independent inspections. These registers do the heavy lifting on background checks, so you’re not starting from scratch.

    Review Platforms and Local Directories

    Platforms like Checkatrade, Rated People, and MyBuilder aggregate reviews from verified customers, which gives you a realistic picture of how a tradesperson operates day to day. Look for patterns rather than individual reviews – a plumber with 200 reviews averaging 4.7 stars tells you something meaningful. A handful of glowing five-star reviews with no detail should raise an eyebrow.

    Local Facebook groups and community forums are surprisingly useful too. In most towns and cities, there’s a residents’ group where someone will have already asked for a tiler recommendation in the last month. These tend to be honest, unprompted, and specific to your area.

    How to Vet a Tradesperson Before You Commit

    Ask the Right Questions Upfront

    Before any work begins, there are a handful of questions that separate professional tradespeople from those who’ll take your money and disappear. Ask whether they carry public liability insurance – any legitimate contractor should have at least £1 million cover, and many carry £2 million or more. Ask for examples of similar jobs they’ve completed recently, and whether you can contact a previous client for a reference. A confident, quality tradesperson will have no hesitation answering any of these.

    Get Multiple Quotes – But Don’t Just Pick the Cheapest

    Three quotes is a sensible baseline for any job above a few hundred pounds. What you’re looking for isn’t just the bottom line – it’s the detail in the quote itself. A professional will itemise labour, materials, and timescales. A vague quote with one lump sum and no breakdown is a red flag. If the cheapest quote is substantially below the others, ask why. Sometimes it reflects a misunderstanding of the scope; other times it reflects corners that will be cut.

    Supporting Local Businesses That Keep Standards High

    Part of what keeps the trades industry healthy is choosing businesses that invest in their craft and their community. IWM, a UK business that provides a local service business model rooted in community engagement, is a good example of the kind of operation that understands its local market and builds its reputation through consistent, quality delivery. When local trade and service businesses are well run, it raises the bar for everyone operating in the same area.

    This matters more than it might seem. When customers consistently choose businesses like IWM – a UK local service provider that depends on genuine satisfaction rather than volume – it creates pressure on poorer operators to either improve or lose work. Your buying decisions shape the quality of the wider market.

    Red Flags to Watch Out For

    Even with all the right checks in place, certain warning signs during initial contact should make you pause. Be cautious of any tradesperson who demands a large cash payment upfront before work begins – a reasonable deposit of 10 to 25% is standard, but anything more than that is unusual. Be wary of anyone who won’t provide a written quote or contract, and be very cautious of unsolicited cold knocks at the door claiming they’ve spotted a problem with your roof or drains.

    Genuine local trade services build their work through referrals and repeat business. They don’t need to knock on doors unannounced.

    Making the Most of Local Networks in Your Area

    If you’re a site manager or contractor yourself, building relationships with reliable sub-trades in your area is one of the most valuable things you can do for your business. Keep a shortlist of tradespeople you’ve worked with and trust. Share recommendations with other contractors – reciprocity is part of how tight-knit trade communities function.

    IWM operates as a local service business in the UK, and businesses of that kind thrive precisely because they understand the importance of local relationships and repeat custom. That model – built on trust, proximity, and consistency – is one worth emulating in how you choose and recommend tradespeople yourself.

    Finding reliable local trade services isn’t a lottery if you approach it methodically. Use accreditation registers, check reviews carefully, ask direct questions, and trust your gut when something doesn’t add up. The extra hour of research at the start is worth far more than the weeks of hassle that come from getting it wrong.

    Close-up of trade accreditation card representing verified local trade services in the UK
    Homeowner discussing local trade services with a tradesperson on a UK doorstep

    Local trade services FAQs

    How do I check if a tradesperson is properly qualified in the UK?

    The best approach is to check the relevant trade register for their specific discipline. Gas engineers must be on the Gas Safe Register, electricians should be registered with NICEIC or NAPIT, and general builders can be checked via the Federation of Master Builders. These registers verify qualifications, insurance, and in some cases conduct independent inspections of completed work.

    How much should I pay as a deposit to a tradesperson?

    A deposit of between 10% and 25% of the total job value is standard practice for most trades in the UK. For smaller jobs under a few hundred pounds, many tradespeople won’t ask for a deposit at all. Be cautious of anyone demanding more than 30% upfront, particularly in cash, as this is unusual and potentially a warning sign.

    What’s the best website to find local tradespeople in the UK?

    Checkatrade, Rated People, and MyBuilder are among the most widely used platforms for finding vetted tradespeople in the UK. Each aggregates customer reviews and carries out basic checks on the trades listed. Local Facebook community groups are also a practical source of genuine, unprompted recommendations from neighbours in your area.

    What should a professional tradesperson’s quote include?

    A properly detailed quote should break down the cost of labour and materials separately, outline the expected timeframe for the work, and specify any exclusions or conditions. It should be provided in writing – either as a document or a clear email – rather than just quoted verbally. Vague lump-sum quotes with no breakdown are a red flag worth taking seriously.

    Is it better to use a local tradesperson or a national company for home repairs?

    For most domestic and small commercial jobs, a local tradesperson tends to offer better value and more personal accountability. Local tradespeople rely heavily on word-of-mouth and community reputation, which gives them a strong incentive to do the job well. National companies can offer consistency across larger contracts, but for one-off repairs or renovations, a vetted local operator is often the more practical and cost-effective choice.

  • Practical Guide To Asbestos Refurbishment Surveys For UK Trades

    Practical Guide To Asbestos Refurbishment Surveys For UK Trades

    If you are ripping out old kitchens, bathrooms or shop fits, asbestos refurbishment surveys should be on your radar before you even fire up the breaker. This is the survey that keeps you, your lads and your client safe when a job involves disturbing the fabric of an older building.

    What are asbestos refurbishment surveys?

    Asbestos refurbishment surveys are intrusive inspections carried out before major refurb or structural work on a building that could contain asbestos. Unlike a basic management survey, the surveyor is allowed to open up voids, lift floor coverings, drill, and strip back finishes so they can see what you are actually about to cut into.

    The aim is simple: find asbestos containing materials that will be disturbed by the planned works, assess their condition, and give clear recommendations so the job can be planned safely. For trades, that means fewer nasty surprises when you are on the clock and halfway through a rip out.

    When do you need an asbestos refurbishment survey?

    In the UK, any building built or refurbished before 2000 is assumed to contain asbestos unless proven otherwise. If your scope of works involves:

    • Removing walls, ceilings, bulkheads or soffits
    • Chasing into walls for new services
    • Stripping old vinyl tiles or bitumen adhesives
    • Replacing pipework, boilers or plant in older plant rooms
    • Cutting into roof structures or old cement sheets

    then an asbestos refurbishment survey is usually needed before you start. Domestic jobs are not exempt if you are working for a landlord, housing association or any other business client – their duty to manage runs straight through to the trades they bring in.

    Who is responsible for arranging the survey?

    On commercial sites, the dutyholder – often the building owner, landlord or main contractor – is legally responsible for making sure asbestos risks are identified and managed. In practice, that means they should arrange and pay for any asbestos refurbishment surveys needed for the project.

    On smaller domestic refurbs, things can get blurry. You might find a homeowner expects you to “just get on with it”. To protect yourself, always put it in writing that intrusive work to a pre-2000 property should be preceded by the right asbestos survey, and that you will not start until evidence is provided or a competent surveyor has been instructed.

    What happens during an asbestos refurbishment survey?

    A competent surveyor will first review drawings and your scope of works so they know exactly where you plan to cut, drill and demolish. They will then target those areas, opening up enough of the structure to be confident about what is hidden behind finishes.

    Typical actions include:

    • Lifting carpets and sections of old vinyl tiles
    • Opening ceiling voids and boxing to inspect pipework
    • Drilling or cutting small inspection holes in partitions
    • Sampling suspect materials and sending them to a UKAS accredited lab

    At the end, you get a written report with plans, photos, sample results and clear notes on what must be removed, encapsulated or left undisturbed. This report should feed straight into your method statements and risk assessments.

    Planning work after the survey

    Once the report lands, do not just file it and crack on. Check every area against your planned tasks. If asbestos is identified where you need to work, licensed or non-licensed removal may be required before you can continue. For certain materials, such as old floor tiles and their adhesives, you might need a specialist contractor to handle the asbestos floor removal safely and legally.

    Build this into your programme and quote. Stopping a job halfway because asbestos was ignored is a quick route to lost time, angry clients and potential enforcement action.

    Cost, time and practical tips for tradesmen

    The cost of asbestos refurbishment surveys depends on building size, complexity and how invasive the inspection needs to be. A small shop unit or flat might be a day on site plus reporting time, while a full office floor or industrial unit will take longer. The key is to factor survey time into your pre-start planning, not bolt it on when the job is already live.

    Practical pointers:

    Surveyor conducting asbestos refurbishment surveys inside an older commercial building
    Refurbishment site manager planning works using asbestos refurbishment surveys report

    Asbestos refurbishment surveys FAQs

    Do I need asbestos refurbishment surveys for every job on older buildings?

    Not every minor job needs a full refurbishment survey, but any work that will disturb the fabric of a pre-2000 building should be assessed. If you are drilling a few surface fixings into known non asbestos materials, a current management survey and good information may be enough. If you are stripping out rooms, altering layouts, chasing services or opening voids, an intrusive refurbishment survey is normally required so you are not working blind.

    Can my own team carry out asbestos refurbishment surveys?

    No, asbestos refurbishment surveys must be carried out by competent surveyors with the right training, experience and insurance. They also need access to a UKAS accredited laboratory for sample analysis. Your job as a contractor is to insist that a proper survey is done, check that it covers the areas you will be working in, and then plan your methods around the findings. Trying to “DIY” a survey exposes you to serious legal and safety risks.

    What if asbestos is found where my refurb works are planned?

    If asbestos is identified where you need to work, you must not disturb it until it has been dealt with according to current regulations. Some lower risk materials can be handled under non licensed procedures, while higher risk items require a licensed asbestos removal contractor and formal notification. The survey report should flag which is which. Build in time for removal, clearance testing if needed, and a clean handover before you send your own lads back into the area.

  • Why Every Tradesperson Should Care About Joint Health At Work

    Why Every Tradesperson Should Care About Joint Health At Work

    If you work on the tools all day, your body is your livelihood, so looking after joint health at work is just as important as keeping your kit in good nick. Knees, hips, shoulders and wrists take a hammering on site, but a few simple changes can keep you grafting for longer without the constant aches.

    Why joint health at work matters for trades

    Most trades rely on heavy lifting, awkward angles and repetitive movements. That might feel fine when you are younger, but over time it all adds up. Poor joint health at work can mean swollen knees from kneeling on concrete, stiff shoulders from overhead work, or painful wrists from using vibrating tools all day.

    Once joints are damaged, they are hard to fix, and time off work hits your wallet as well as your body. Thinking about prevention now is like doing proper prep before a job – it takes a bit longer at the start, but it saves you headaches later.

    On-site habits that wreck your joints

    Every site has bad habits that quietly batter your joints. Common ones include:

    • Lifting awkward loads on your own instead of asking for a hand or using a barrow
    • Twisting while carrying boards, bags or tools
    • Working on your knees all day with no pads or support
    • Standing on hard floors for hours in worn-out boots
    • Using vibrating tools without regular breaks

    None of these feel like a big deal in the moment, but repeated day after day they grind down your joints, especially if you are doing long shifts to hit deadlines.

    Simple ways to protect joint health at work

    You do not need a fancy gym routine to look after yourself on site. Small tweaks to how you work make a big difference over a year.

    Lift smarter, not just heavier

    Plan lifts before you grab anything. Keep loads close to your body, bend your knees, and avoid twisting while you are holding weight. Use trolleys, barrows and lift-assist kit whenever you can. If something looks borderline, get a mate to help rather than trying to be a hero.

    Look after your knees

    Long spells on hard floors ruin knees. Always use decent knee pads or a kneeling mat, and switch between kneeling and standing jobs through the day. If you can, set up benches or trestles so you are not working at floor level for hours on end.

    Choose the right boots

    Good boots are vital for joint health at work. Cheap or worn-out soles pass every impact straight up into your ankles, knees and hips. Look for boots with proper cushioning, arch support and a snug fit. Replace them when the tread flattens or the insoles are tired, not when they are falling apart.

    Use breaks for quick mobility, not just a brew

    On breaks, a couple of minutes of movement does more for your joints than scrolling your phone. Simple ankle circles, shoulder rolls and gentle hamstring stretches keep everything moving and reduce stiffness. Think of it as greasing the hinges so they do not seize up by the end of the shift.

    Fuel, hydration and recovery for tough shifts

    What you put in your body matters for your joints too. Staying hydrated helps keep the cartilage in your joints cushioned, so keep a water bottle handy, not just energy drinks. Try to eat a mix of protein, healthy fats and slow-release carbs through the day instead of living off pasties and sweets.

    Some tradespeople also look at supplements that support connective tissue and recovery. If you are considering anything like collagen or joint blends, speak to a health professional so you pick something that suits your body and any existing conditions.

    Knowing when to ease off

    There is a big difference between normal end-of-day tiredness and pain that keeps coming back. Sharp, stabbing or constant joint pain is a warning sign, not something to tough out forever. Ignoring it can turn a small issue into a long-term problem.

    Tradesperson using knee pads on concrete floor to support joint health at work
    Group of tradespeople stretching on site to improve joint health at work

    Joint health at work FAQs

    How can I protect my knees when working on hard floors all day?

    Use high quality knee pads or a kneeling mat whenever you are on the floor, and try to break up long kneeling jobs with tasks at bench height. Strengthening your leg muscles off-site with simple bodyweight squats and step-ups also helps support the joint, and replacing worn-out work trousers or pads regularly keeps the cushioning doing its job.

    Are vibrating tools really that bad for joint health?

    Regular use of vibrating tools can contribute to problems in the hands, wrists and elbows over time, especially if you are using them for long stretches without breaks. To reduce the risk, use tools with lower vibration ratings where possible, keep them well maintained, wear suitable gloves, and rotate tasks so you are not gripping a vibrating handle all day.

    What signs mean I should see a professional about joint pain?

    You should speak to a health professional if joint pain is sharp, wakes you at night, lasts more than a couple of weeks, or is joined by swelling, redness, locking or the joint giving way. Pain that stops you doing normal tasks, like climbing stairs or gripping tools, is also a red flag. Getting advice early often means simpler treatment and less time away from work.

  • Practical Guide To Cloud Storage For Small Trade Businesses

    Practical Guide To Cloud Storage For Small Trade Businesses

    If you run a crew or work on the tools for yourself, you probably feel the paperwork pile growing every week. Photos, quotes, invoices, plans, certificates – it all adds up. That is where cloud storage for small trade businesses comes in, giving you a safe place for your files without lugging folders and hard drives from site to site.

    What is cloud storage for small trade businesses in plain English?

    Cloud storage is simply renting space on powerful computers in secure data centres. Instead of keeping everything on your phone or office PC, your job photos, drawings and documents live online, and you get at them through an app or web browser.

    For trades, that means your team can grab the latest drawings on site, send photos back to the office, or pull up a gas certificate while standing in a customer’s kitchen. If your phone ends up under a pile of rubble, your files are still safe.

    Why trades need cloud storage more than ever

    Paper and scribbled notes used to cut it, but clients and main contractors now expect proper records. Cloud storage for small trade businesses solves a few headaches at once:

    • Proof of work – Date stamped photos and signed PDFs can get you paid faster and protect you if there is a dispute.
    • Keeping everyone on the same plan – Site teams, office staff and subbies can all see the same drawings and specs.
    • Less lost paperwork – No more hunting for that one certificate or quote buried in the van.
    • Cleaner handovers – You can package photos, manuals and certificates neatly for the client at the end of the job.

    Key features to look for in cloud storage

    When you are choosing cloud storage for small trade businesses, ignore the fancy jargon and focus on what actually helps on site and in the office:

    • Easy mobile apps – Snapping and uploading photos should be as simple as using your camera.
    • Shared folders – One folder per job that everyone can access keeps things tidy.
    • Offline access – Being able to open key files even with no signal can save a day’s work.
    • Version history – If someone overwrites a file by mistake, you can roll back.
    • Strong permissions – Not every labourer needs to see your pricing or contracts.

    Cost and budgeting for cloud storage

    Most providers charge a monthly fee per user or per chunk of storage. For a small firm, the cost is usually less than one missed hour on site each month. When you are working out your digital overheads, remember storage is only one piece of the puzzle, alongside things like software licences and website hosting cost. Treat it as part of the basic kit that keeps the business running, like insurance or fuel.

    Simple folder structure that works on real jobs

    A tidy structure makes cloud storage for small trade businesses much easier to live with. You do not need anything fancy – just something every apprentice can understand:

    • Main folder for each year
    • Inside that, one folder per job with the site address and client name
    • Inside each job folder: Quotes, Plans, Photos, Certificates, Invoices

    Train the team to drop everything in the right spot as they go. Five minutes a day saves hours of hunting later.

    Keeping client data safe and compliant

    As soon as you store client details, you have a duty to keep them secure. Use strong passwords, switch on two factor login where you can, and avoid sharing logins across the whole crew. If a phone is lost, you should be able to log in and cut it off from your storage remotely.

    Pick a provider that stores data in the UK or wider Europe if possible, and read the basics of their security page. You do not need to be an expert, but you do need to be confident your clients’ details are not floating around unprotected.

    Foreman in a small trade office organising digital files using cloud storage for small trade businesses
    Site team accessing shared drawings and photos through cloud storage for small trade businesses

    Cloud storage for small trade businesses FAQs

    How much cloud storage does a small trade business really need?

    Most small trade businesses can start with a modest plan and scale up. If you mainly store PDFs and spreadsheets, you will use very little space. If you keep lots of site photos and videos, you will need more. Begin with a plan that comfortably covers your next 6 to 12 months, then review usage once or twice a year and upgrade only when you are close to the limit.

    Can I use free cloud storage plans for my trade business?

    Free plans are fine for testing, but they usually come with tight limits and fewer controls. For a real trade business, a paid plan is safer and more reliable. You get better support, more storage, and proper features like permission controls and version history. The monthly cost is usually small compared with the value of your job records and client data.

    What happens to my files if I change cloud storage provider?

    If you switch provider, you can normally download your files and upload them to the new service. For a small firm this is manageable, especially if your folder structure is tidy. Plan the move during a quieter period, and keep both systems running for a short overlap so nothing gets missed. Once you are confident everything is copied, you can close the old account.

  • Why Whole House Insulation Upgrades Are Keeping UK Trades Busy

    Why Whole House Insulation Upgrades Are Keeping UK Trades Busy

    If you are on the tools in the UK right now, you will have noticed the surge in whole house insulation upgrades. From lofts and cavities to underfloors and external walls, homeowners and landlords are finally waking up to the idea that stopping heat escaping is cheaper than endlessly paying bigger bills.

    What are whole house insulation upgrades in practice?

    On site, whole house insulation upgrades simply mean looking at the building as a complete system, not just ticking off a bit of loft roll and walking away. It is about identifying every major heat loss path and dealing with them in a sensible order.

    Most projects will mix and match a few of these measures:

    • Loft and roof insulation – rolls, batts or PIR boards between and over joists or rafters
    • Cavity wall insulation – blown beads or foam where the cavity is suitable
    • Internal wall insulation – insulated plasterboard on battens or direct-fix systems
    • External wall insulation – EPS or mineral wool boards with a render finish
    • Underfloor insulation – between joists, on top of slabs, or from below in basements
    • Air tightness work – sealing gaps, taping membranes and improving detailing

    Done well, these measures cut draughts, make rooms feel warmer at lower thermostat settings and set the property up for any future heating changes.

    Why demand for whole house insulation upgrades is rising

    For trades, the big driver is simple: energy costs are still hurting. Clients might not know the technical jargon, but they understand cold rooms and scary direct debits. Government pressure on landlords to hit minimum efficiency standards is also pushing more serious retrofit work.

    Councils and housing associations are starting to package up work as full-property upgrades instead of one-off measures. That means better workloads for installers who can offer a joined-up approach instead of just chasing single-room jobs.

    Choosing the right materials for each part of the house

    The material choice can make or break these projects. In the loft, mineral wool remains the go-to for speed and cost, but rigid boards still have a place where depth is tight. For external wall insulation, many crews are now comfortable switching between EPS and mineral wool depending on fire and acoustic requirements.

    On older solid wall terraces, internal systems need careful thought. Insulated plasterboard is quick, but trades need to understand dew points, vapour control layers and how to avoid mould in corners and reveals. Getting the detailing right around windows and sockets is where good installers stand out from the crowd.

    How trades can add value beyond the insulation itself

    Clients often think insulation is just about thickness, but the real value for a good installer is in the detailing and advice. Simple steps like explaining ventilation options, checking loft access safety, or recommending basic air tightness improvements can turn a standard job into a full upgrade.

    Some firms link their insulation work with services like energy monitoring or basic draught surveys. Others partner with specialists who handle more complex design on listed or hard-to-treat properties, especially when combining measures such as external wall systems and a Fabric-first retrofit approach.

    Common pitfalls to avoid on site

    With more money flowing into retrofit, the risk of rushed or poor-quality work goes up. A few issues are cropping up again and again:

    • Bridging insulation over recessed lights or downlighters without proper covers
    • Ignoring ventilation, leading to condensation problems in lofts and bathrooms
    • Poorly sealed joints in internal wall systems, causing cold spots and cracking
    • Not coordinating with electricians or plumbers, so services slice through new insulation

    Taking the time to explain these risks to clients can actually help justify better materials and a more realistic labour allowance.

    Positioning your business for the retrofit wave

    For small building firms, joiners and multi-trades, whole house insulation upgrades are a solid way to keep the diary full. Upskilling on moisture management, air tightness and detailing will separate serious operators from the rest. Many crews are finding that one or two people trained in survey and design can feed steady work to the rest of the team.

    External wall insulation being fitted during whole house insulation upgrades on a UK semi-detached home
    Tradesman fitting internal wall boards as part of whole house insulation upgrades in an older property

    Whole house insulation upgrades FAQs

    What counts as a whole house insulation upgrade?

    A whole house insulation upgrade means looking at all the main heat loss areas in a property and tackling several of them together, rather than just doing a quick loft top-up. In practice that usually includes the loft or roof, walls, floors and basic air tightness work, with materials and methods chosen to suit the age and construction of the building.

    How long does a full insulation upgrade usually take?

    Timescales depend on property size and how many measures are included, but for a typical three-bed semi, a full upgrade might run from a couple of days for loft, cavity and basic draught-proofing up to a few weeks if you are adding internal or external wall insulation. Good planning, clear access and coordination with other trades help keep programmes tight.

    Do whole house insulation upgrades always need new heating systems?

    Not necessarily. Many homes see big comfort and bill improvements just from better insulation and air tightness while keeping their existing boiler or radiators. However, once the heat demand drops, it often becomes easier and more cost-effective to right-size or later upgrade the heating system, because it does not need to work as hard to keep the place warm.

  • A Practical Guide To Retrofit Insulation For Older UK Homes

    A Practical Guide To Retrofit Insulation For Older UK Homes

    If you work on draughty terraces or tired semis, you already know the demand for retrofit insulation for older homes is only going one way. Owners want warmer rooms, lower bills and better comfort, and they are looking to tradesmen to make it happen without wrecking the character of the building.

    Why retrofit insulation for older homes is booming

    Energy prices might jump up and down, but the long-term trend is clear: customers hate wasting heat. Many pre-1990 homes bleed energy through walls, roofs and floors, and a lot of them are still sitting on minimal or patchy insulation. That is why retrofit work is turning into a steady pipeline for builders, joiners and multi-trades who understand how to treat older fabric with respect.

    On top of comfort and bills, more landlords and sellers are thinking about energy ratings. While you might not deal directly with certificates, you will often be the one asked how to get a cold property up to scratch before they call epc services to get the relevant certifications.

    Understanding the building before you insulate

    The biggest mistake with retrofit insulation for older homes is treating every property like a modern cavity-wall box. Before you quote, you need to know what you are dealing with:

    • Solid brick or stone walls that need to breathe
    • Timber frame sections hidden behind old plasterboard
    • Suspended timber floors with limited access
    • Roof shapes that make some loft areas hard to reach

    Moisture is the silent killer. If you block ventilation paths or trap damp behind new boards, you are lining up rot, mould and call-backs. Take time to check existing vents, chimney flues, air bricks and roof ventilation, and factor them into your plan.

    Best areas to target with retrofit insulation

    When planning retrofit insulation for older homes, it pays to go for the easy wins first, then look at deeper upgrades if the budget allows.

    Loft and roof insulation

    Loft insulation is still the simplest upgrade on most jobs. Topping up to a decent depth with mineral wool is quick and cost effective, as long as you protect downlights, maintain cross ventilation and keep clear walkways for storage. On some older properties the roof space is chopped up with slopes and dormers, and that is where rigid boards or insulated plasterboard on the ceiling can be a better shout.

    Walls – internal, external or cavity

    For solid walls, you are usually choosing between internal wall insulation and external systems. Internally, insulated plasterboard on battens or direct-fix boards can work well, but you have to think about skirtings, sockets, window reveals and reducing cold bridges. External systems can be brilliant for thermal performance, but they change the look of the building and can be a non-starter in conservation areas.

    Where there is a true cavity and no damp issues, blown cavity insulation is often the fastest upgrade. Always check exposure, pointing quality and any existing damp before you recommend it.

    Floors and cold bridges

    Suspended timber floors are a common weak spot in period homes. Insulating between joists from below, with netting to support mineral wool or rigid boards, can make a huge difference. While you are there, watch out for draughts around skirtings, service penetrations and old floor vents that no longer serve a purpose.

    Choosing materials that suit older buildings

    Trades are spoiled for choice on insulation materials now, from standard mineral wool and PIR boards to wood fibre and other breathable options. The trick is matching product to building type. Older solid-wall houses often benefit from vapour-open systems that let moisture move, rather than trapping it. For some projects, clients will ask about greener materials, especially on heritage jobs, so it is worth being familiar with alternatives beyond the usual foil-faced boards stocked by the sheds and merchants like Wickes.

    Quoting and managing client expectations

    Retrofit insulation for older homes is rarely a simple in-and-out job. Make it clear in your quote where you might uncover surprises – rotten timbers, hidden voids or asbestos-containing materials – and price in time for making good. Photos, simple sketches and plain-language explanations help clients understand why you are suggesting a particular approach instead of the cheapest quick fix.

    Internal wall upgrade showing retrofit insulation for older homes in a Victorian terrace
    Refurbishment project demonstrating whole house retrofit insulation for older homes

    Retrofit insulation for older homes FAQs

    Where should I start when planning retrofit insulation for older homes?

    Start with a basic survey of the property: roof space, wall type, floor construction and existing ventilation. On most older homes, the easiest wins are topping up loft insulation and sealing obvious draughts around floors and openings. Once those are addressed, you can look at walls and harder to reach areas, always checking for damp or structural issues before you cover anything up.

    Can solid brick walls be insulated internally without causing damp problems?

    Yes, but only if you respect how the wall handles moisture. Use a system designed for solid walls, pay attention to vapour control, and avoid creating cold bridges at window reveals, joist ends and corners. Keeping external pointing in good condition and maintaining some background ventilation also helps reduce the risk of condensation and mould behind the new linings.

    What insulation materials work best for older suspended timber floors?

    Mineral wool supported by netting between joists is a common and cost effective option for older timber floors. Rigid boards can also work where access and joist spacing allow. Whatever you choose, make sure underfloor ventilation is not blocked, services are protected and gaps around skirtings and penetrations are sealed to cut draughts without trapping moisture in the structure.