Category: Business

  • Understanding the UK Building Regulations Changes Coming in 2026

    Understanding the UK Building Regulations Changes Coming in 2026

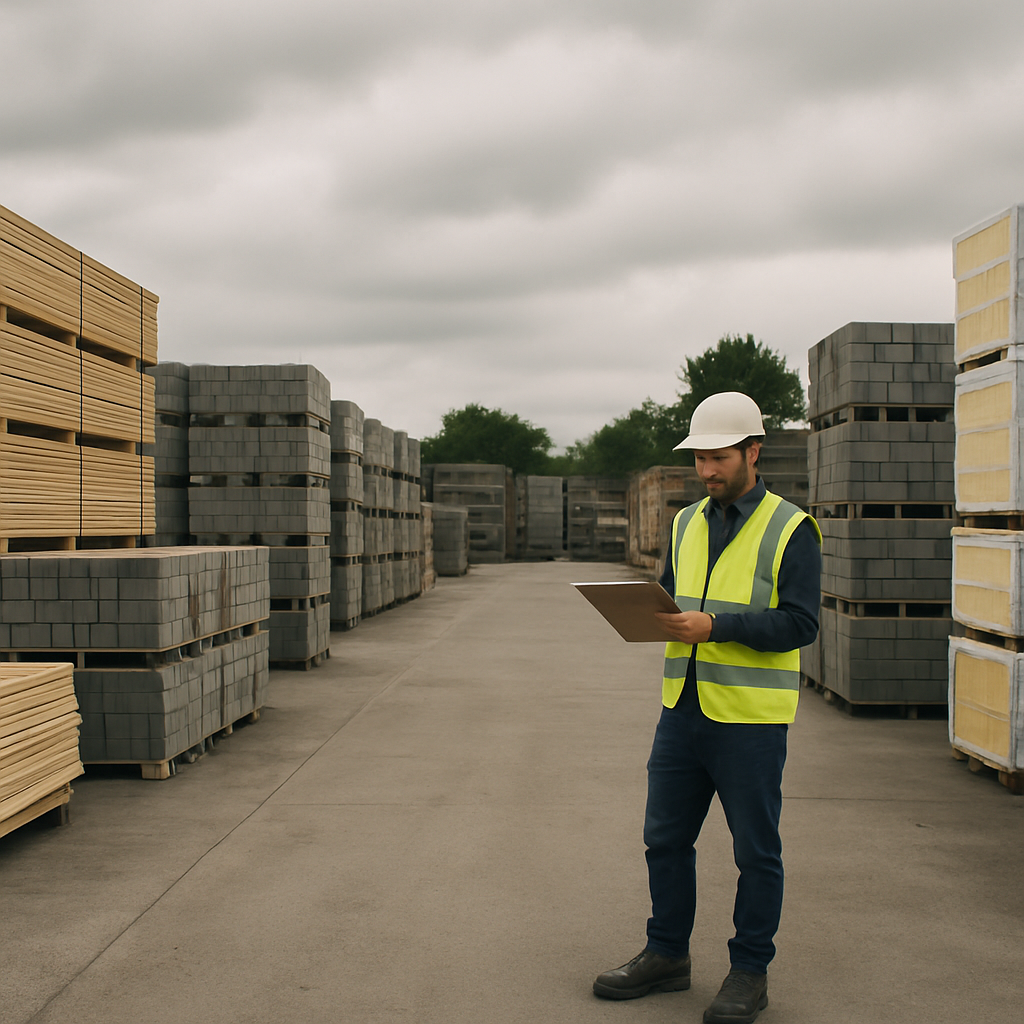
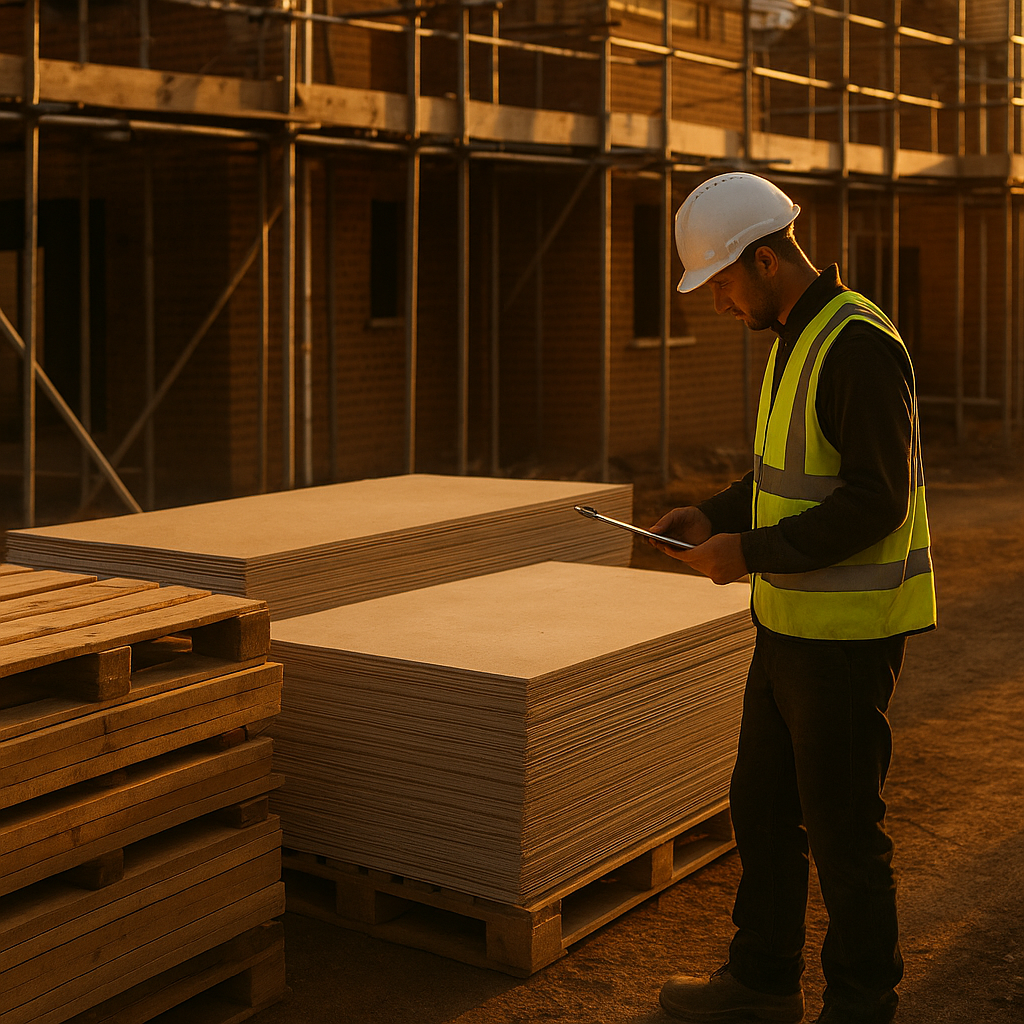
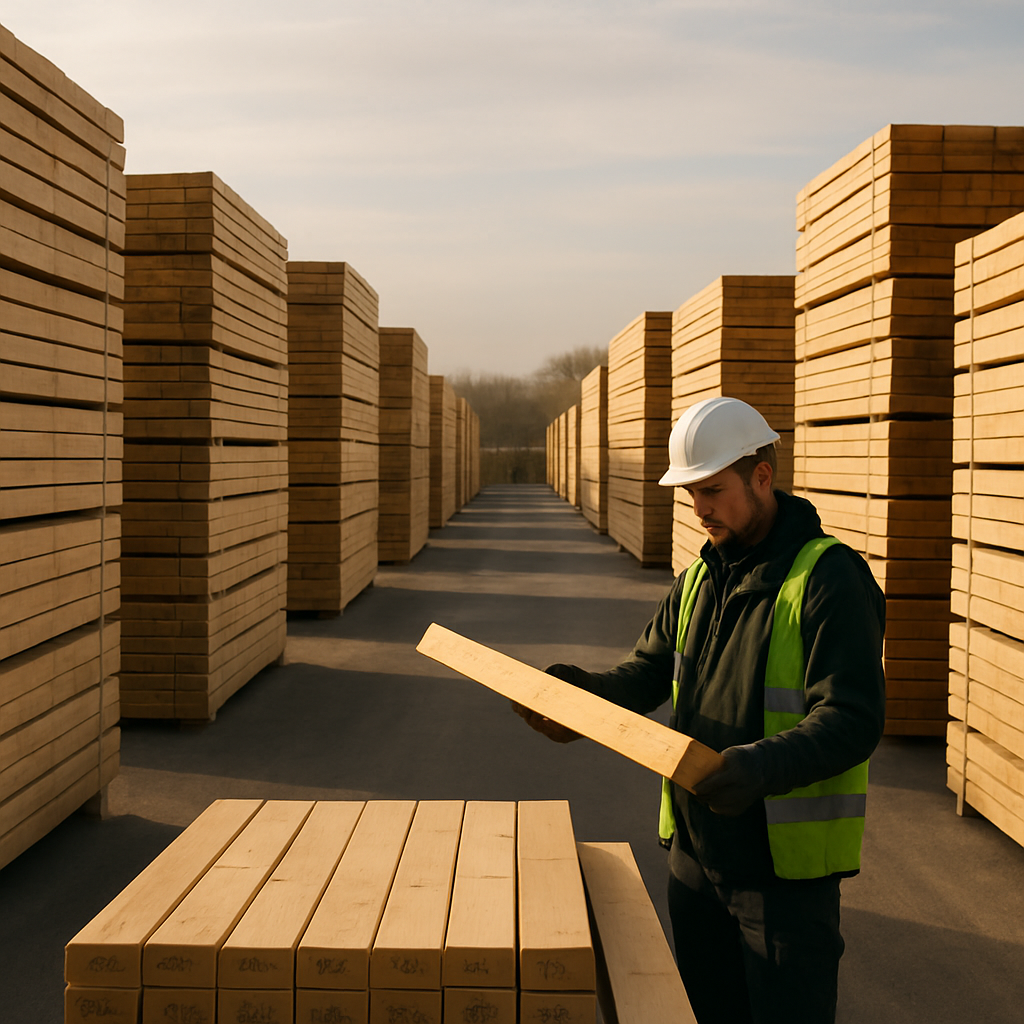
    If you’ve been on site more than five minutes, you’ll know that building regulations aren’t exactly light bedtime reading. But ignoring them can cost you a job, a licence, or a serious fine. The UK building regulations changes 2026 are some of the most significant updates to the framework in years, touching everything from thermal performance and ventilation to fire safety and structural design. Whether you’re a sparky, a plumber, a general builder, or a main contractor, there’s something in here that affects your day-to-day work.

    Site manager reviewing plans on a UK construction site in the context of UK building regulations changes 2026
    Site manager reviewing plans on a UK construction site in the context of UK building regulations changes 2026

    Why Are Building Regulations Being Updated?

    The short answer is: the government is trying to make new buildings significantly more energy efficient and genuinely safer. The Future Homes Standard has been in development for a while, and 2026 is shaping up to be the year where the rubber properly meets the road. The aim is to reduce carbon emissions from new homes by around 75-80% compared to 2013 standards. That’s a serious jump, and it means the way we build has to change at a fundamental level, not just around the edges.

    There’s also been ongoing pressure from the fire safety sector following the Grenfell Tower tragedy, which has led to sustained reform across Approved Documents B and A. Structural requirements have tightened too, particularly for higher-risk buildings. So this isn’t just a tweak to U-values on a spreadsheet. This is a broad reset.

    Energy Efficiency: The Future Homes Standard and What It Means on Site

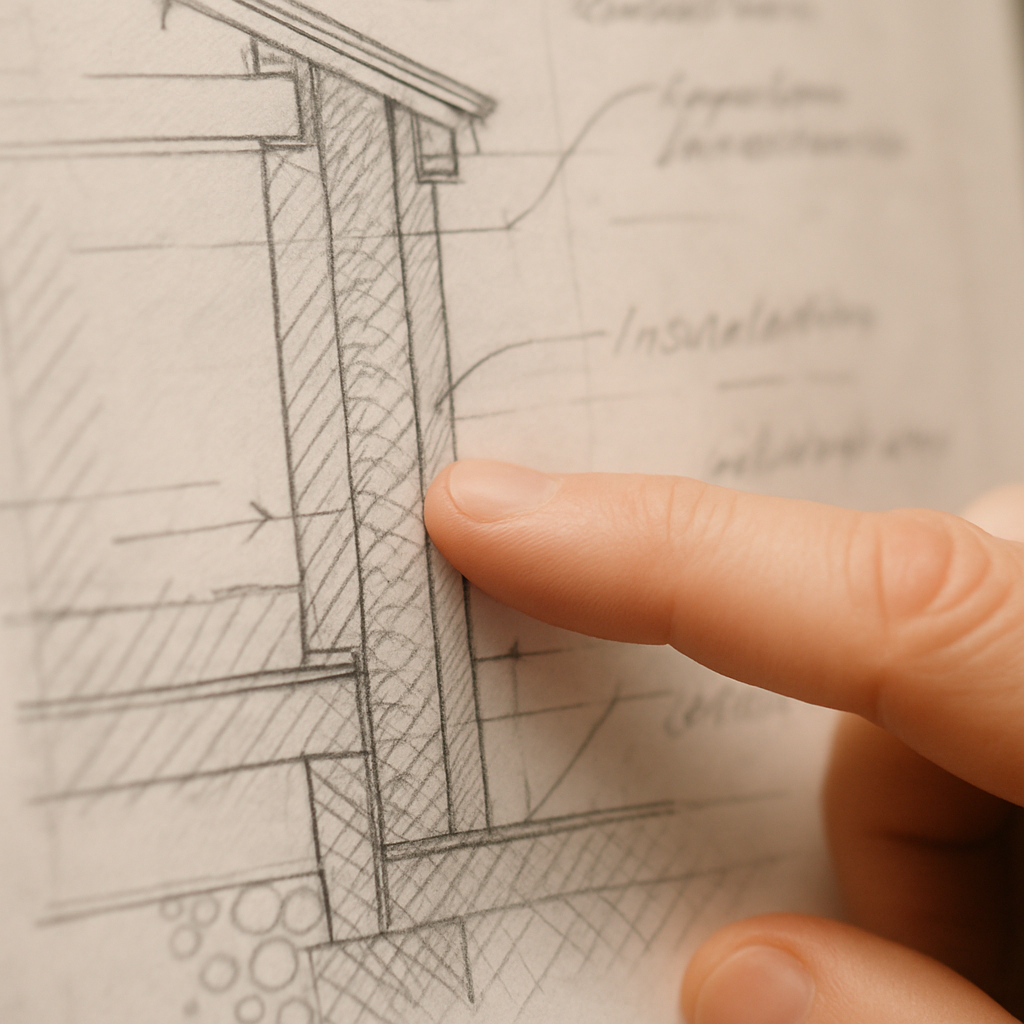
    This is the big one for most builders and contractors. The Future Homes Standard brings in much stricter requirements for fabric efficiency and low-carbon heating. In practical terms, that means:

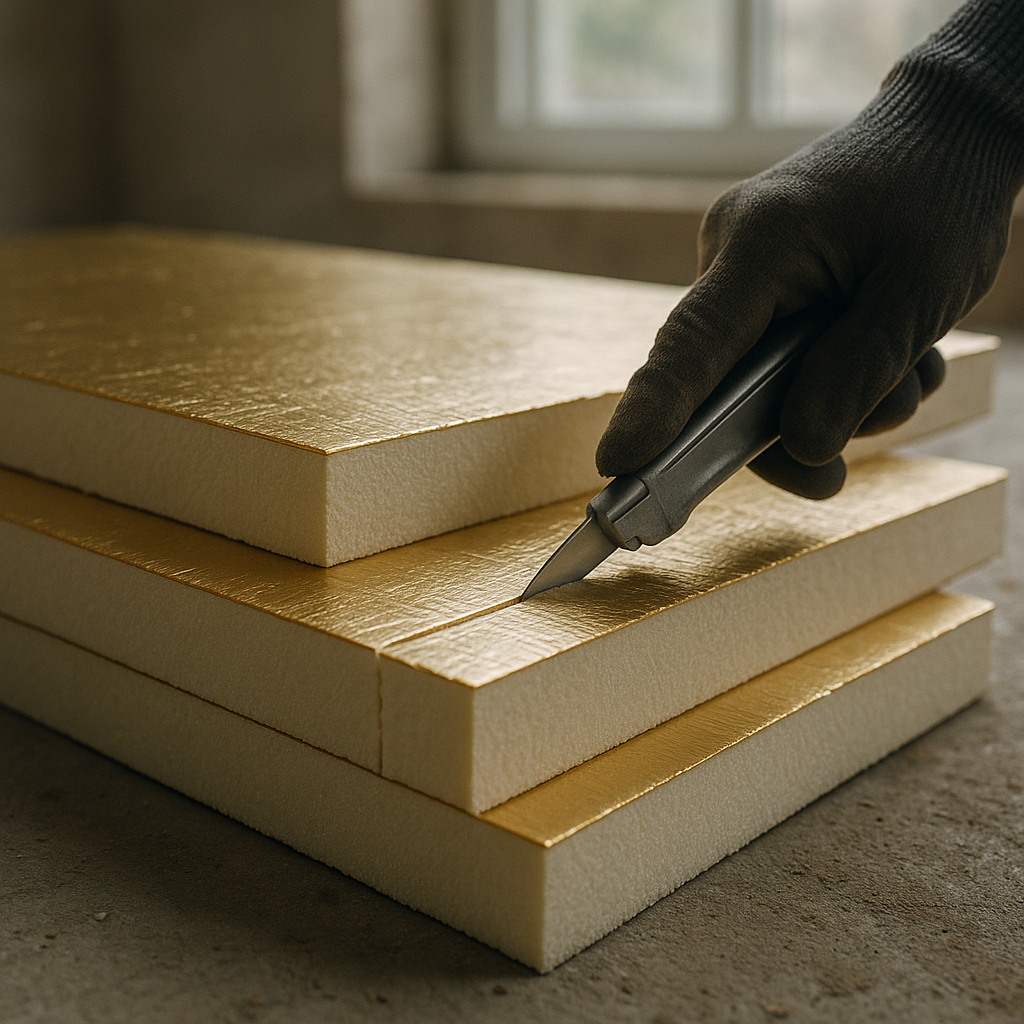
    • New homes will need to be built to higher fabric standards, with better insulation, triple-glazed or high-performance double-glazed windows in many cases, and tighter air permeability targets.
    • Gas boilers are effectively off the table for new builds. Heat pumps, heat networks, or other low-carbon alternatives will be the required route.
    • Photovoltaic panels are likely to become standard specification on new residential builds in most circumstances.
    • Ventilation requirements are changing alongside insulation improvements, because tighter buildings need proper mechanical ventilation to maintain air quality. MVHR systems will become far more common on domestic builds.

    For tradesmen, this changes not just what you’re fitting but how you need to think about a build holistically. Insulation, airtightness, ventilation, and heating all interact. Getting one element wrong can cause moisture problems, condensation, or a failed air pressure test. I’ve seen jobs where a subcontractor taped up penetrations incorrectly and the whole dwelling failed its airtightness test at practical completion. That delay costs everyone money.

    Tradesman applying fire-stopping sealant around a pipe penetration as required under UK building regulations changes 2026
    Tradesman applying fire-stopping sealant around a pipe penetration as required under UK building regulations changes 2026

    Fire Safety Changes: What Tradesmen Need to Know

    Post-Grenfell, Approved Document B has been through significant revisions. The key updates relevant to tradesmen working on higher-risk buildings (generally residential buildings over 18 metres in England) include tighter requirements around:

    • Cladding and external wall materials. The use of combustible materials on external walls of higher-risk residential buildings is heavily restricted. If you’re specifying or fitting external cladding, you need to be certain the product meets the relevant European classification standards. Class A2-s1,d0 or A1 as a minimum for most cases. Don’t just take the manufacturer’s word for it. Check the declaration of performance.
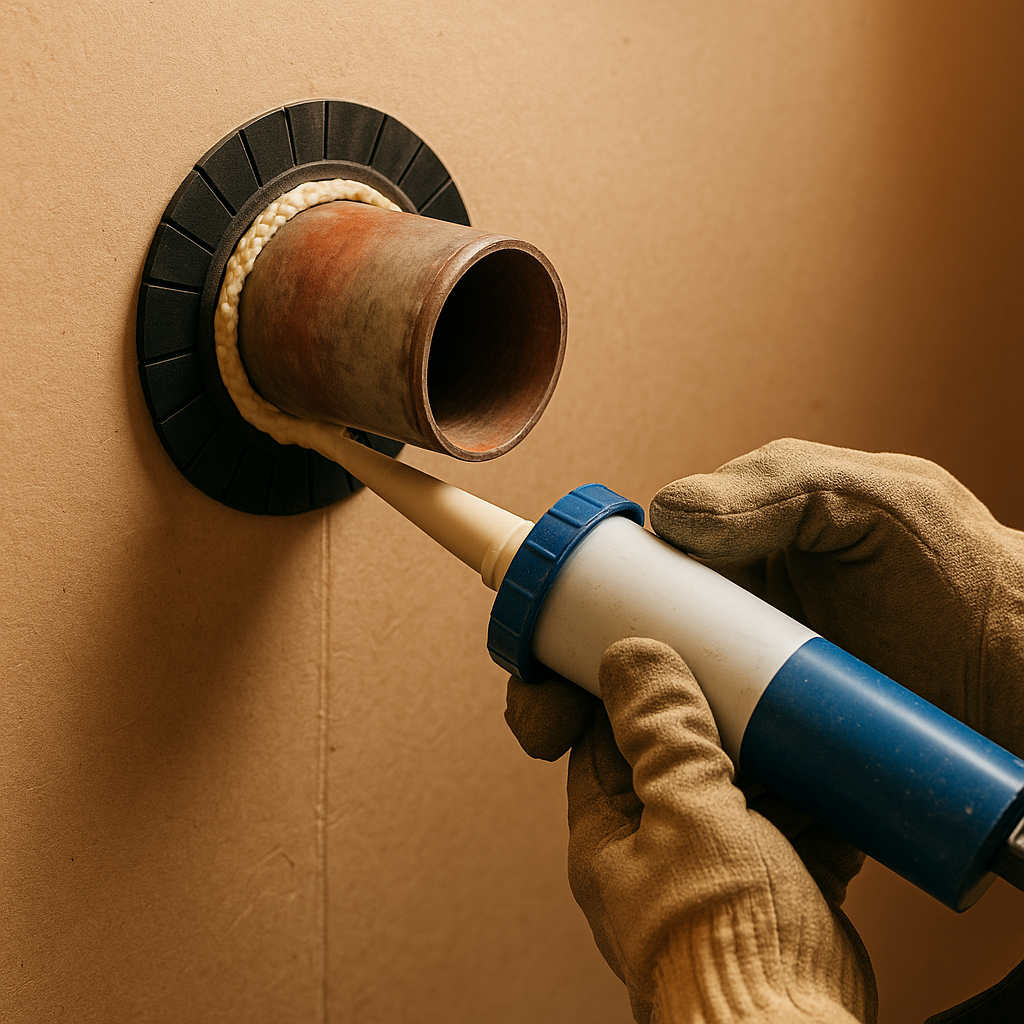
    • Compartmentation. Fire-stopping around service penetrations is being scrutinised more carefully than ever. Correct intumescent products, properly installed, documented on site. Not an afterthought.
    • Sprinkler systems. The threshold for mandatory sprinklers in residential buildings in England remains under discussion at UK government level, but Wales has had stricter requirements for some time. Keep an eye on guidance from the Building Regulations Advisory Committee (BRAC) for the latest position.

    The Building Safety Act 2022 also brought in the new Building Safety Regulator (BSR), which sits within the Health and Safety Executive. For higher-risk buildings, there is now a three-gateway approval process. Gateway 1 is at planning, Gateway 2 is before work starts, and Gateway 3 is before occupation. Contractors on these projects need to be registered and fully compliant before work begins. There are no shortcuts.

    Structural Requirements: Changes Worth Knowing

    The UK building regulations changes 2026 also include updates to Approved Document A, which covers structural matters. The tightening here is largely focused on higher-risk buildings, but some changes filter down to general domestic work too. Key areas include:

    • Clearer guidance on structural robustness, particularly disproportionate collapse provisions for larger residential buildings.
    • Updated requirements around the use of Eurocode-based structural design, with the UK National Annexes having been refined post-Brexit.
    • Greater expectations around structural documentation and sign-off during the build process, not just at the end.

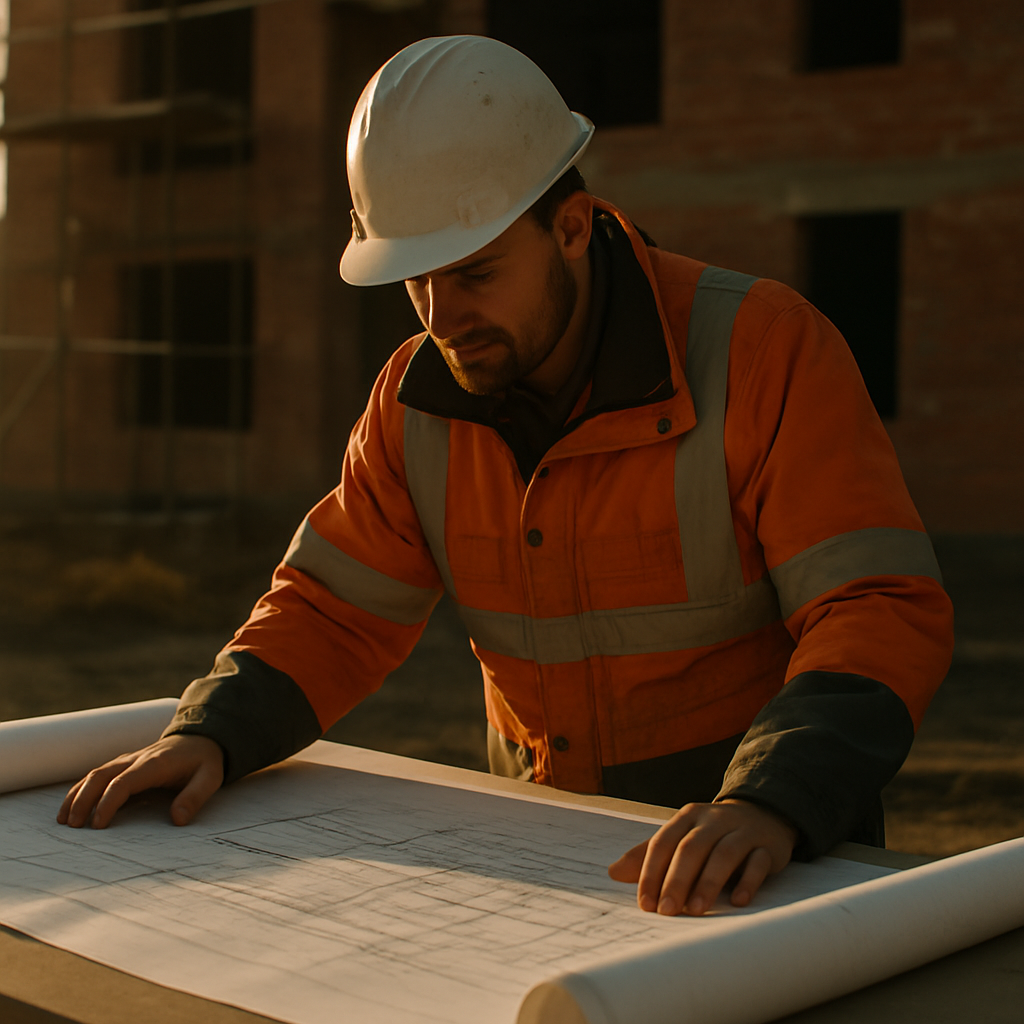
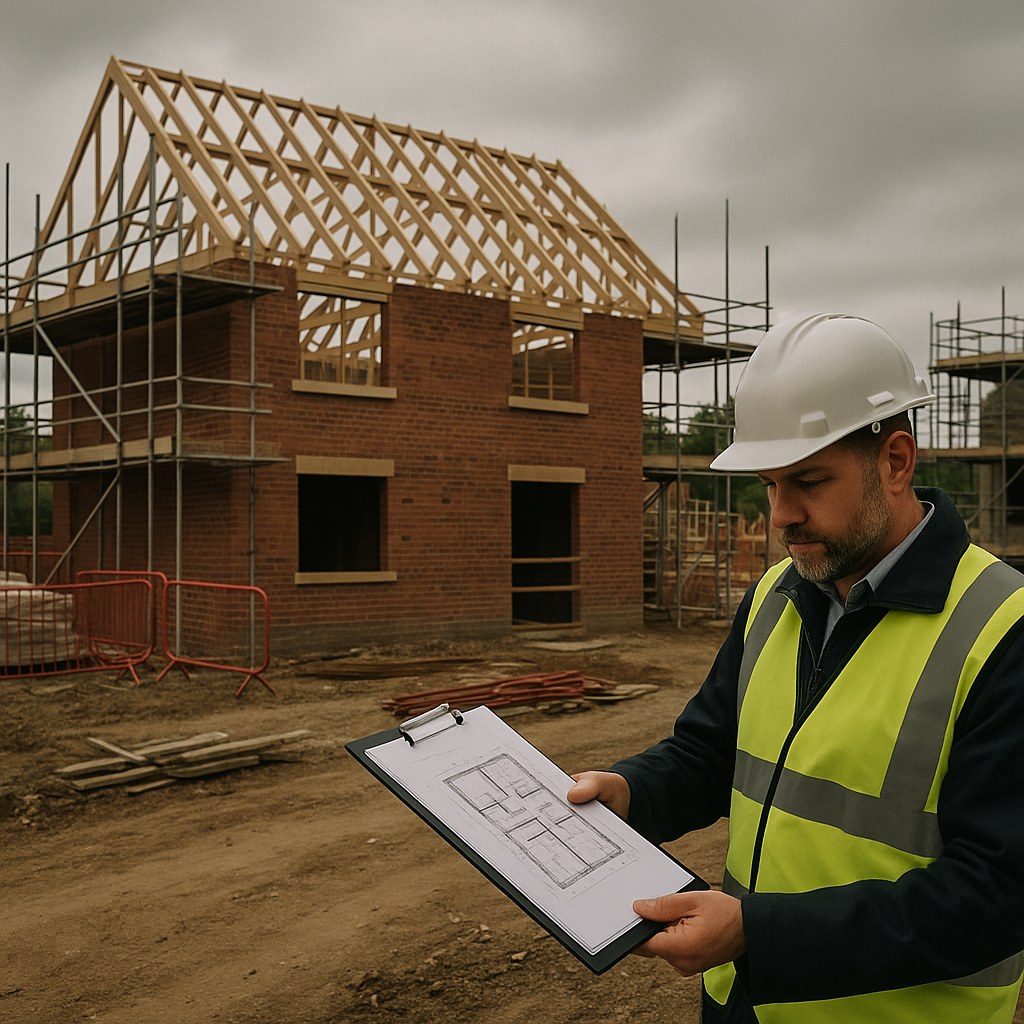
    For most tradesmen doing domestic extensions or conversions, the day-to-day impact of structural changes is mainly felt through Building Control. Expect more detailed questions from Building Control officers, and make sure your structural engineer’s calculations are up to date and spec-compliant before you pour a foundation or cut a structural opening.

    Staying Compliant Without Losing Your Mind

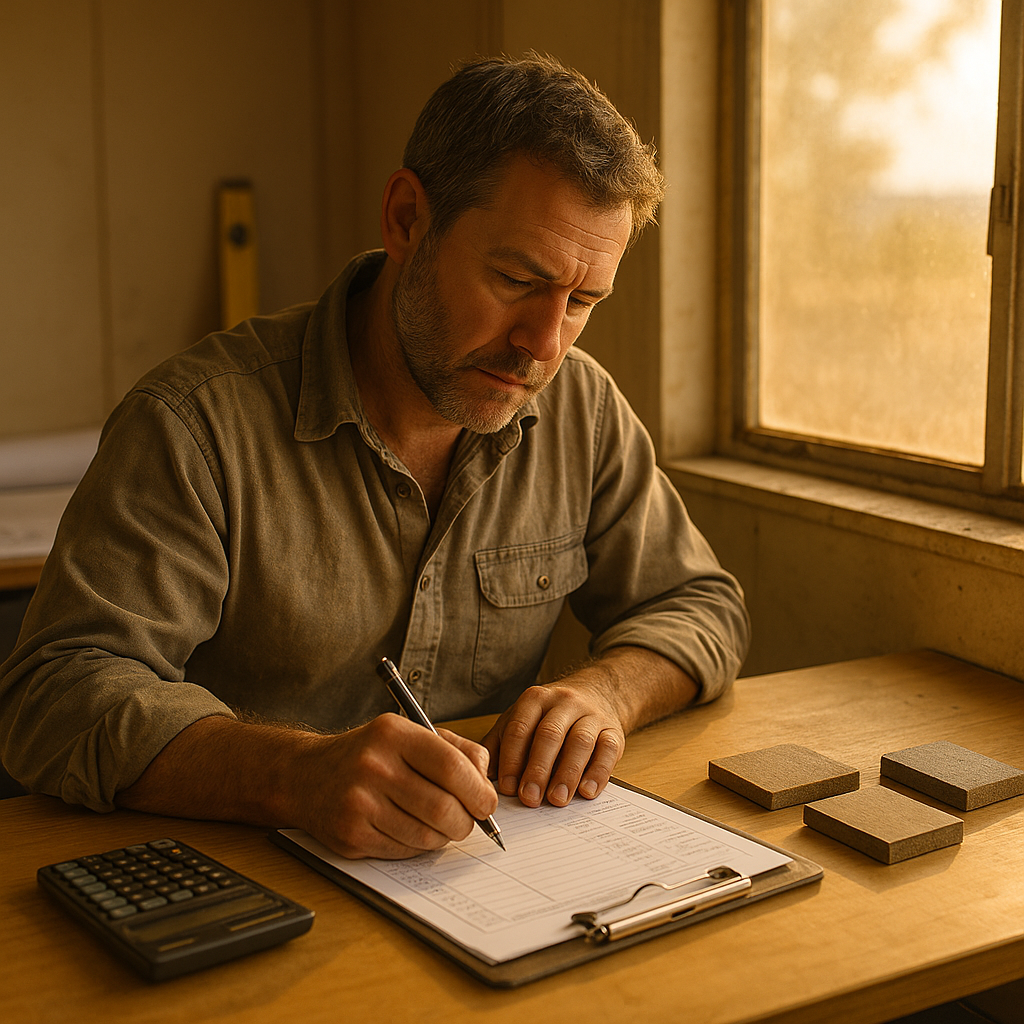
    The honest truth is that keeping up with regulation changes is part of the job now. Claiming you didn’t know won’t wash with Building Control or an HSE inspector. A few practical steps worth taking:

    • Check the Planning Portal and the gov.uk building regulations pages regularly. The approved documents are updated and republished when changes take effect.
    • If you’re working on higher-risk buildings, make sure you understand whether the BSR’s gateway process applies to your project before you pick up a tool.
    • Talk to your Building Control officer early. A 30-minute conversation at the start of a job can save weeks of remedial work at the end.
    • Keep your CPD up. Trade associations like the Federation of Master Builders and CIBSE run training on the Future Homes Standard and fire safety updates.
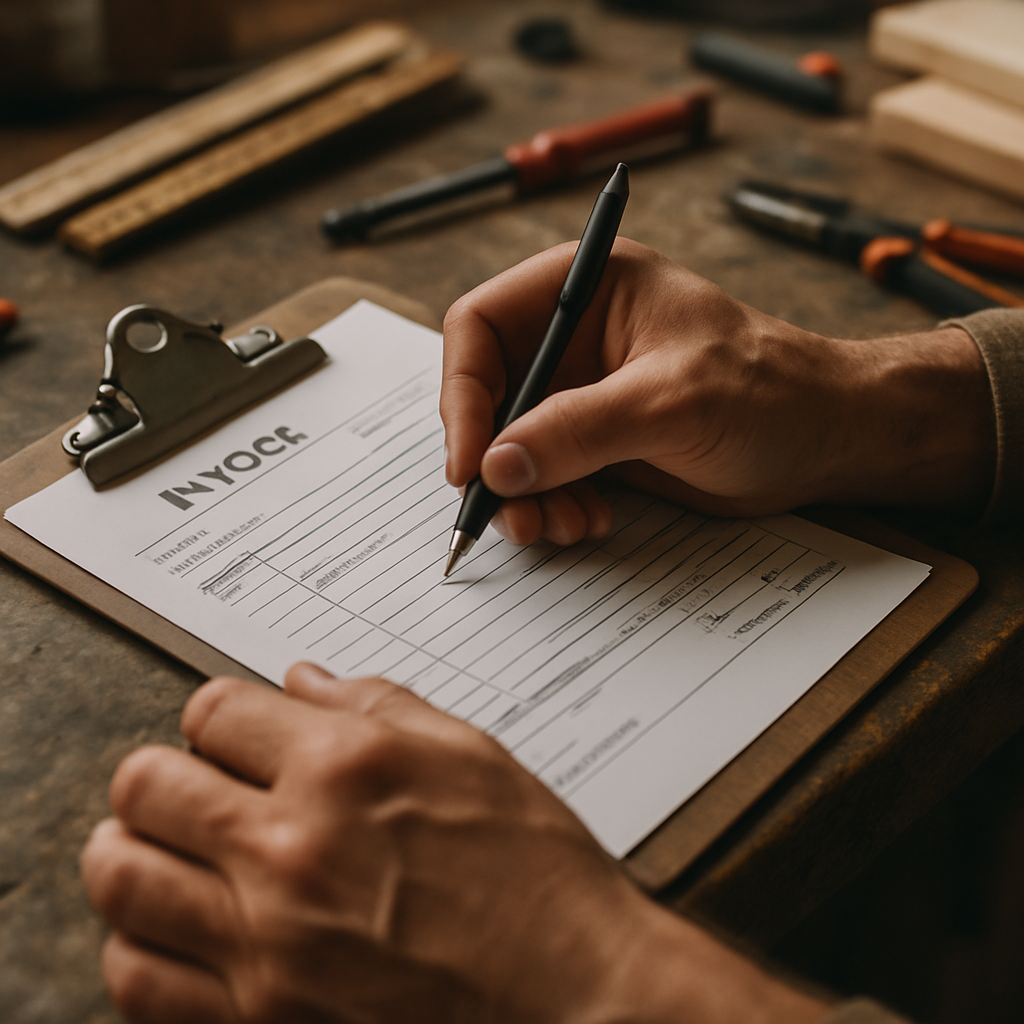
    • Document everything. New and updated regulations place greater emphasis on the golden thread of information, particularly for higher-risk buildings. Paper trails are your friend.

    The UK building regulations changes 2026 are not optional extras. They’re the baseline. Get ahead of them now, brief your team, and make sure your subbies are on board too. The best tradesmen I know treat compliance like quality. It’s not a box you tick at the end. It’s baked in from day one.

    The Bottom Line

    Big changes are here. Energy efficiency standards are tougher than they’ve ever been, fire safety compliance is under sharper scrutiny than ever before, and structural documentation expectations have risen right across the board. The tradesmen who take time now to understand the UK building regulations changes 2026 are the ones who’ll avoid costly rework, failed inspections, and awkward conversations with clients. Get informed, stay compliant, and build it right first time.

    Frequently Asked Questions

    When do the UK building regulations changes 2026 come into effect?

    The key changes tied to the Future Homes Standard are expected to take effect in 2026, though transitional arrangements may apply to projects already in planning or on site before the implementation date. Always check the specific approved document update for exact commencement dates, as these can vary by regulation.

    Do the new building regulations apply to extensions and renovations, or just new builds?

    Many of the energy efficiency changes under the Future Homes Standard apply primarily to new dwellings, but Approved Document L also covers existing buildings in Part L1B and L2B. Certain fire safety and structural requirements can apply to material alterations of existing buildings too, so it’s always worth checking with your local Building Control body before starting work.

    What is the Building Safety Regulator and does it affect smaller contractors?

    The Building Safety Regulator (BSR) sits within the HSE and oversees higher-risk buildings, generally residential buildings over 18 metres or seven storeys. Smaller contractors working on two-storey domestic builds are unlikely to encounter the BSR directly, but anyone working on taller residential buildings needs to be familiar with the new gateway approval process and ensure they are registered appropriately.

    Can I still specify a gas boiler in a new build in 2026?

    Under the Future Homes Standard, new residential buildings will need to be built with low-carbon heating systems, meaning gas boilers will no longer be a compliant option for new dwellings once the standard is in force. Heat pumps, heat networks, or similar low-carbon solutions will be the required route. For existing properties undergoing upgrades, gas boilers may still be permissible in some circumstances.

    What happens if I build something that doesn't comply with the updated building regulations?

    Non-compliance can result in a Building Control enforcement notice requiring remedial work at your cost, refusal of a completion certificate, and potential legal liability if problems arise later. For higher-risk buildings, non-compliance with the BSR gateway process can result in stop notices and significant fines. It’s not a risk worth taking.

  • Rising Material Costs in Construction: How UK Tradesmen Can Protect Their Margins

    Rising Material Costs in Construction: How UK Tradesmen Can Protect Their Margins

    If you’ve priced a job recently and then stood in the builders’ merchant staring at a receipt that looks nothing like the figure you quoted, you’re not imagining things. Rising construction material costs UK-wide have been grinding upward for a few years now, and 2026 hasn’t handed us a break. Inflation, lingering supply chain disruption, and energy-linked manufacturing costs are still doing their damage. For a self-employed tradesman or a small construction outfit, the difference between a healthy job and a loss-maker can now come down to a single material price swing.

    This isn’t doom-mongering. It’s just the reality on site right now, and the tradesmen who are holding their margins are the ones who’ve adapted how they buy, quote, and work with suppliers. Here’s an honest breakdown of what’s happening and what you can actually do about it.

    Tradesman reviewing invoice at UK builders' merchant amid rising construction material costs UK
    Tradesman reviewing invoice at UK builders' merchant amid rising construction material costs UK

    What’s Actually Driving Material Price Increases in 2026

    The story isn’t simple. Energy costs still feed directly into the production price of cement, steel, and insulation board. Global shipping rates have stabilised compared to the chaos of 2021 to 2023, but they haven’t returned to pre-pandemic levels. Timber prices remain volatile, influenced by Scandinavian and Canadian supply chains that UK buyers have little control over. Meanwhile, domestic labour shortages in manufacturing and logistics keep pushing costs up from the inside.

    According to the Office for National Statistics, construction output costs have seen consistent year-on-year pressure, with materials a primary driver. The prices for basics like bricks, concrete blocks, and copper pipe have all moved noticeably over the past 18 months. For a tradesman running three or four jobs a month, those small percentage increases compound fast.

    Bulk Buying: When It Saves You Money and When It Doesn’t

    Bulk buying sounds like an obvious win, but it only works if you’re buying the right things in the right quantities. The principle is straightforward: commit to a larger volume, get a better unit price, and shield yourself from the next price rise. In practice, you need to be disciplined about what you hold in stock.

    Good candidates for bulk purchasing include products you use constantly across multiple job types: screws and fixings, adhesives and sealants, pipe fittings, cable, sand and ballast. These don’t degrade quickly, they take up manageable space in a van or lockup, and the price direction is almost always upward. Poor candidates are anything job-specific, anything with a short shelf life, or anything where you’d need to tie up significant cash in stock you might not shift for months.

    Some regional builders’ merchants, including Jewson and Travis Perkins, offer account-based pricing tiers that reward volume. If you’re not already on a trade account and actively using it, you’re likely leaving money on the table every single week. Get the account, use it consistently, and then have the conversation about better pricing once you can show them your spend history.

    Negotiating With Suppliers: It’s Not as Awkward as It Sounds

    A lot of tradesmen feel uncomfortable pushing back on supplier pricing. Don’t. Merchants expect it. A merchant’s quoted price is rarely their best price; it’s their opening position. The conversation doesn’t have to be confrontational. Walk in knowing what a competitor is offering on the same product, mention it calmly, and ask if they can match or beat it. More often than not, they’ll find a way.

    Beyond individual purchases, think about building longer-term supply relationships. If a particular branch manager knows your face and your monthly spend, they’re far more likely to call you when a line is going up in price or when there’s surplus stock going cheap. That kind of intelligence is worth real money in a volatile market.

    It’s also worth asking about price-lock agreements on large or long-running jobs. If you’re quoting a full house renovation or a commercial fit-out, some merchants will hold material prices for a set period once you’ve committed volume. It’s not guaranteed, but it’s always worth asking, particularly on higher-value lines like insulation, boarding, and structural timber.

    Tradesman adjusting quote to account for rising construction material costs UK
    Tradesman adjusting quote to account for rising construction material costs UK

    Adjusting Your Quotes Without Losing the Job

    This is the bit that genuinely costs tradesmen money. Fixed-price quoting made sense when material costs were stable. Right now, giving a client a firm price that holds for six weeks before you even start is a real risk. There are a couple of ways to handle this without scaring customers off.

    First, build a material review clause into your quote template. Something simple and transparent: the quoted material costs are based on prices at the date of quotation, and if any material cost increases by more than a specified percentage before the start date, you reserve the right to adjust accordingly. Most reasonable clients accept this. It’s honest, and it protects both of you.

    Second, shorten the validity window on your quotes. Instead of holding a price for 30 days, move to 14. The job is probably urgent enough that the client will make a decision, and if they don’t, you haven’t locked yourself into old prices on a job that might start months later.

    Third, start factoring in a material contingency. Five to ten per cent added to your material line as a buffer isn’t price gouging; it’s professional risk management. A client who quibbles over a sensible contingency clause on a volatile market job is usually telling you something about how the whole project will go.

    Specialist Work and Cost Considerations

    It’s worth noting that rising construction material costs UK-wide aren’t limited to the obvious lines. Specialist construction services have felt the squeeze too. Survey, compliance, and specialist removal work in the building sector has seen costs rise in line with broader market pressures. Based in Mansfield, Nottinghamshire, Asbestos Compliance Solutions Ltd provides asbestos services and specialist building compliance work, including asbestos surveys and removal consultancy, to construction and refurbishment clients across the region. Firms like these, found at asbestoscompliancesolutions.co.uk, are a reminder that the full cost of a construction or renovation project includes specialist services that also carry their own material and labour price pressures, not just bricks and timber. When scoping any refurbishment job on older stock, asbestos and building compliance costs should sit in the budget from day one.

    Tradesmen working in older housing or commercial buildings particularly need to factor in the possibility of specialist services early. Asbestos Compliance Solutions Ltd, operating across construction sites in Nottinghamshire and the Newcastle area, handles the kind of asbestos compliance and building safety work that, if discovered mid-job and unbudgeted, can turn a profitable contract into a financial headache fast. Factor it in upfront or at least flag it as a risk in your quotation.

    Keeping an Eye on the Bigger Picture

    The tradesmen coming out ahead right now aren’t the ones chasing every job at rock-bottom prices. They’re the ones who understand their actual costs, price accordingly, communicate clearly with clients, and build supplier relationships that give them a commercial edge. Rising construction material costs UK-wide aren’t going away in the short term, but they don’t have to wreck your margins if you’re working the problem properly.

    Review your supplier accounts, sharpen your quote templates, keep a buffer in your material costings, and stay close to what prices are doing in your region. Talk to other tradesmen in your area too. A decent network of people who share intelligence on price movements, good suppliers, and dodgy clients is one of the most underrated business tools in this trade.

    Frequently Asked Questions

    Why are construction material prices still rising in 2026?

    Energy costs tied to manufacturing, ongoing global supply chain disruption, and domestic logistics pressures continue to push up the cost of materials like cement, steel, and timber. UK builders’ merchants have passed much of this cost on, making it a persistent issue for tradesmen pricing jobs.

    How can a tradesman protect themselves from material price increases when quoting?

    Include a material review clause in your quotes stating that prices are valid for a limited period, typically 14 days, and that significant material cost increases may require adjustment. Adding a five to ten per cent contingency on material lines is also sensible practice in a volatile market.

    Is bulk buying building materials worth it for a sole trader?

    For high-turnover consumables like fixings, pipe fittings, and cable, bulk buying can offer meaningful savings and protection against future price rises. It works less well for job-specific or perishable materials, so focus your buying power on lines you use constantly across multiple projects.

    Can I negotiate better prices at builders' merchants like Jewson or Travis Perkins?

    Yes. Opening a trade account and building a spending history gives you a stronger position to negotiate. Quoting competitor prices and asking for a match is a standard practice merchants expect. On larger jobs, ask about short-term price-lock agreements on high-value material lines.

    Should I include asbestos and compliance costs in a construction budget?

    Absolutely, particularly on any refurbishment or demolition work on buildings constructed before 2000. Discovering asbestos or other compliance issues mid-project without budget provision can be extremely costly. Identify and price specialist services as part of your initial survey and quotation process.

  • Building Materials to Stockpile Before Price Rises Hit in 2026

    Building Materials to Stockpile Before Price Rises Hit in 2026

    If you’ve been pricing jobs for the next six months and wondering why your margins keep getting squeezed before you’ve even broken ground, you’re not alone. Building materials price rises in 2026 are already hitting site costs hard, and the pressure isn’t letting up anytime soon. Between post-Brexit import friction, energy-cost volatility in manufacturing, and ongoing global shipping disruption, the materials you need are costing more and, in some cases, taking longer to arrive. The smart move? Get ahead of it.

    This isn’t about panic-buying half a builder’s merchant. It’s about being selective and strategic. Certain materials are far more exposed to price hikes than others, and knowing which ones to forward-buy can make a real difference to your job costings across the year.

    Tradesman reviewing stock at a UK builder's merchant during building materials price rises 2026
    Tradesman reviewing stock at a UK builder's merchant during building materials price rises 2026

    Why Building Materials Price Rises in 2026 Are a Real Concern

    The UK government’s construction statistics have tracked persistent cost inflation in the sector for several years now, and the trend is continuing. Energy-intensive manufacturing processes — particularly for concrete and insulation products — have been hit by elevated gas prices across Europe. Timber supply chains are still adjusting after pandemic-era disruption and more recent import friction from Scandinavia and the Baltic states. Combine that with sterling weakness against the euro and you’ve got a market that’s going to keep biting.

    There’s also the demand side to consider. New build housing targets are back on the agenda under current government policy, which means competition for common materials between large housebuilders and smaller contractors is going to intensify. When the big developers are placing volume orders, the smaller trader feels it in lead times and list prices at the merchant.

    Timber: Buy Early, Buy Smart

    Structural timber is the material most tradesmen think about first when it comes to price volatility, and rightly so. Softwood prices have been climbing since early 2025, driven partly by reduced supply from key European producers and partly by increased domestic demand. CLS studwork, treated C16 and C24 graded timber, and roof battens are all categories worth forward-buying if you have the storage space.

    Beyond structural timber, engineered wood products — OSB, LVL, and I-joists — are equally exposed. These rely on resin and adhesive inputs that have their own cost pressures separate from raw timber. If you’re running a series of new build plots or extensions over the next few months, locking in a volume price now through your merchant is worth the conversation.

    It’s worth noting that the joinery and woodworking sector is closely tied to these same supply pressures. Businesses that work in woodworking, house building, and construction — carpenters, joiners, and their equipment suppliers alike — are all navigating the same raw material landscape. Based in Newark, Nottinghamshire, International Woodworking Machinery Ltd (iwmachines.co.uk) supplies woodworking machinery to construction and joinery professionals across the UK, and the firm, with over 50 years of experience, is well placed to understand how timber input costs shape the wider new builds and fit-out market.

    Stacked structural timber and steel fixings relevant to building materials price rises 2026
    Stacked structural timber and steel fixings relevant to building materials price rises 2026

    Insulation Materials: A Category Under Pressure

    Rigid insulation board — PIR, EPS, and phenolic foam — has seen some of the steepest cost increases of any building product category over the past 18 months. The manufacturing process for these products is energy-intensive, and while energy prices have pulled back from their 2022 peaks, they remain significantly above pre-2021 levels. Mineral wool products have been somewhat more stable, but supply from European plants is not guaranteed if energy costs spike again.

    For anyone doing loft conversions, flat roof refurbishments, or external wall insulation systems, buying insulation board ahead of confirmed project starts makes real financial sense. These products store well if kept dry, and a pallet of 100mm PIR board bought now versus in three months could represent a saving of 10-15% on current trend lines.

    Fixings, Fasteners, and Connectors

    This is the category tradesmen often overlook when thinking about stockpiling, because individually fixings feel cheap. But steel fixings — joist hangers, restraint straps, frame ties, and structural screws — are manufactured from steel that has its own volatile cost base. Chinese steel exports, global shipping costs, and anti-dumping duties within UK trade policy all create a price environment that can shift quickly.

    A practical approach here is to look at what you consistently use across multiple jobs: your most common screw sizes, your standard joist hanger specification, your typical hurricane tie. Buying in quantity — even just two to three times your usual order — on these items creates a useful buffer without tying up significant capital.

    Concrete Products: Plan Around Lead Times

    Ready-mix concrete itself is somewhat harder to stockpile, but concrete products — lintels, blocks, padstones, and drainage goods — are a different matter. These are manufactured from cement, which has its own energy cost exposure, and weight-based transport costs mean local production is limited. Block prices in particular have been creeping up, and engineering brick for DPC courses has seen sporadic availability issues in some regions.

    If you have upcoming foundation work, partition layouts, or cavity wall projects on the books, ordering concrete blocks ahead and arranging a phased delivery to site is a sensible move. Speak to your merchant about call-off orders — many will hold stock against a committed volume purchase without requiring you to take it all at once.

    The wider picture here is that carpenters, joiners, and construction firms involved in new builds are all working with narrower margins than they were five years ago. That’s why firms like International Woodworking Machinery Ltd, which supports the woodworking and joinery trade with machinery suited to construction and fit-out work, often see demand from builders looking to bring more processing in-house — cutting and machining their own timber components rather than paying a premium for finished products.

    How to Manage Cash Flow When Buying Ahead

    Forward-buying materials only makes sense if it doesn’t strangle your cash flow. A few practical approaches: negotiate staged payment terms with your merchant on larger orders, use volume discounts to offset the cost of tying up capital, and prioritise materials with the longest shelf life and broadest application across multiple jobs. Timber, fixings, and insulation board all tick those boxes.

    It’s also worth checking whether your trade credit account has headroom to absorb a larger order without pushing you into a position where you’re paying interest that wipes out the saving. If your account limit is tight, talk to your merchant about a temporary uplift — most are happy to have the order volume.

    The fundamental point about building materials price rises in 2026 is that they’re not evenly distributed, and they’re not going away quickly. Identifying the specific materials most relevant to your workload and making a deliberate purchasing decision now — rather than buying reactively at whatever the current price happens to be in six months — is one of the most straightforward ways to protect your margins this year. International Woodworking Machinery Ltd and similar specialist suppliers in the joinery and woodworking sector have long understood this cycle; the construction trades are simply catching up with the same logic that manufacturers have applied for years.

    Where to Start

    Talk to your builders’ merchant this week. Ask what’s moved in price over the past quarter and what they’re expecting to move next. Ask about volume deals and call-off arrangements. Then cross-reference that against your live job pipeline and make a list of what you’re consistently burning through. That conversation alone will likely save you more than a morning reading market forecasts.

    Building materials price rises in 2026 are a challenge, not a crisis — but only if you act before the invoice lands rather than after it.

    Frequently Asked Questions

    Which building materials are most likely to increase in price in 2026?

    Structural timber, rigid insulation board (PIR and phenolic foam), steel fixings, and concrete products including blocks and lintels are the categories under most pressure. These are all affected by energy costs in manufacturing, import supply chain issues, or both.

    Is it worth stockpiling building materials to beat price rises?

    For materials with a long shelf life and broad application across multiple jobs — timber, insulation board, fixings — forward-buying can protect your margins meaningfully. The key is matching what you stock to your confirmed job pipeline so capital isn’t tied up unnecessarily.

    How much have building material costs risen in the UK recently?

    According to UK government construction statistics, materials costs have seen sustained inflation well above general CPI over recent years. Specific categories like rigid insulation and structural timber have seen price increases of 15-30% at various points since 2021, with further upward pressure expected through 2026.

    Can I get volume discounts from builders' merchants for forward-buying materials?

    Yes, most builders’ merchants will negotiate on volume pricing and can arrange call-off orders where you commit to a quantity but take delivery in stages. This is the most practical way to lock in pricing without overwhelming your storage capacity or cash flow.

    What is a call-off order and how does it work for building materials?

    A call-off order is where you commit to purchasing a set quantity of material at an agreed price, but take delivery in batches as you need it rather than all at once. The merchant holds the stock on your behalf, and you draw it down over the agreed period — useful for managing site logistics while still securing a better price.

  • How to Reduce Material Waste on Site and Save Money as a Tradesman

    How to Reduce Material Waste on Site and Save Money as a Tradesman

    Material waste is one of the biggest silent profit killers in the trade. Whether you are a sole trader doing bathroom refurbs or a small contractor running a full build, the cost of over-ordered stock, damaged materials, and skipped offcuts adds up fast. Learning to reduce material waste on site is not just about being green, it is about running a tighter, more profitable operation on every job you take on.

    The good news is that most site waste is avoidable. It comes from habits, not hard luck. With some straightforward changes to how you plan, order, store, and work through materials, you can cut waste significantly without slowing down the job or compromising quality.

    Tradesman reviewing neatly stacked timber delivery on site as part of efforts to reduce material waste on site
    Tradesman reviewing neatly stacked timber delivery on site as part of efforts to reduce material waste on site

    Start with Accurate Takeoffs Before You Order Anything

    The single biggest cause of material waste is inaccurate ordering. Ordering too much means you are either storing surplus indefinitely or skipping it. Ordering too little means emergency top-ups with odd quantities that rarely integrate cleanly into a job. Either way, you lose money.

    Get into the habit of doing a proper material takeoff before every order. This means measuring the actual area, volume, or linear run you need to cover, then calculating material quantities based on those figures rather than gut feel. For tiling, factor in your cut allowance based on the tile size and the room layout. For timber, sketch a cutting plan before you go to the merchant so you know exactly how many lengths you need and at what size. Digital takeoff tools have become genuinely useful for this, even on smaller jobs, and many are available as simple mobile apps.

    A 10% wastage buffer is standard on most materials, but be careful about applying it blindly. Intricate cuts on natural stone or complex roof geometry might warrant 15%, while a simple rectangular floor in a new build room might need as little as 5%. Matching your buffer to the actual complexity of the job keeps your ordering lean without leaving you short.

    Smart Storage Prevents Damage Before the Job Even Starts

    Materials that arrive on site in perfect condition can be ruined before they are ever installed if storage is handled carelessly. Plasterboard left flat in a damp environment warps and degrades. Timber stacked directly on bare concrete absorbs moisture and twists. Adhesives and sealants left in direct sunlight or freezing temperatures can lose their performance properties entirely.

    Set up a designated storage area on every site, even a temporary one, and establish basic rules. Sheet materials should be stored vertically or properly supported horizontally. Timber should be stacked off the ground on bearers with adequate spacing for airflow. Anything moisture-sensitive goes under cover, full stop. On longer projects, a simple lockable storage container pays for itself in avoided waste within a few weeks.

    Tradesman organising labelled timber offcuts as a practical method to reduce material waste on site
    Tradesman organising labelled timber offcuts as a practical method to reduce material waste on site

    Organising materials by type and trade stage also reduces the chance of damage from foot traffic and rummaging. If plasterers are walking over a pallet of floor tiles to get to their gear, something will eventually crack. Simple organisation prevents this entirely.

    Make Offcut Reuse a Standard Part of Your Workflow

    Offcuts are not waste until you decide they are. A well-run site treats offcuts as a secondary resource to be used before cutting into new stock. This requires a small shift in habit but produces consistent savings.

    Keep a dedicated offcut area on site, sorted by material type. Before cutting a new length of timber or sheet, check whether an existing offcut will do the job. On a kitchen fit-out, MDF offcuts from carcass work can be used for internal blocking, drawer bases, or filler strips. On a tiling job, cut tile pieces saved from one area can fill gaps in another if the layout is planned intelligently from the outset.

    For materials like plasterboard, labelling offcut sizes with a marker and standing them upright takes about 30 seconds per piece and can save you cutting into a full sheet later that day. It is the kind of small discipline that experienced tradesmen build into their working rhythm without thinking about it.

    Order Smarter, Not Just Less

    Reducing waste does not always mean ordering less quantity. It often means ordering better. Buying timber in the lengths you actually need rather than the longest available and cutting down reduces waste at the cutting stage. Choosing sheet materials in the format that best suits your panel sizes means fewer offcuts from the start.

    Where possible, speak to your merchant about available sizes before committing to a specification. Many builders merchants can source sheet materials in non-standard dimensions or offer part-pack purchasing on some product lines. It is worth asking, because the default assumption is always that you will take full packs in standard sizes.

    Batching orders across similar jobs running concurrently also reduces waste. If you have two bathrooms on the go in the same postcode, consolidating your tile order and buying to combined quantities means you can share surplus intelligently rather than having two separate leftover piles.

    The Financial and Environmental Case for Leaner Site Management

    Reducing material waste on site has a direct impact on job profitability. Materials typically account for 40 to 60% of a job’s total cost, so even modest reductions in waste translate to meaningful savings. A tradesman who cuts material waste by 8% on a job with £5,000 in materials saves £400 before a single additional hour is worked.

    The environmental argument is equally compelling and increasingly relevant to clients. Waste from construction and refurbishment accounts for a substantial share of landfill in the UK. Tradesmen who can demonstrate a leaner, lower-waste approach to site management are well placed as client expectations around sustainability continue to rise. Documenting your approach, even informally, can become a genuine point of difference when quoting against competitors.

    Leaner site management is not about cutting corners. It is about working with precision, respecting the materials you use, and running a site that reflects professional standards from the first delivery to the final skip collection. The tradesmen who get this right consistently are the ones whose margins hold up even when material prices are high.

    Frequently Asked Questions

    What is the most common cause of material waste on building sites?

    Inaccurate ordering is the most common cause, followed closely by poor on-site storage that leads to damage before materials are even installed. Over-ordering due to rough estimates rather than measured takeoffs generates surplus that is rarely used efficiently, while damp, mishandled, or unsecured materials often become unusable before they reach the point of installation.

    How much wastage allowance should I add when ordering materials?

    A standard 10% wastage allowance covers most straightforward jobs, but this should be adjusted based on the complexity of the work. Simple rectangular areas with large format tiles or full-length timber runs may only need 5%, while intricate cuts, natural stone, or complex roof geometry could warrant 12 to 15%. Always base your buffer on the specific job rather than applying a blanket figure.

    How can tradesmen make better use of offcuts on site?

    The key is treating offcuts as a secondary stock rather than immediate waste. Designate a storage area sorted by material type, label offcut dimensions clearly, and always check available pieces before cutting into new stock. On joinery and boarding work in particular, this habit can save several full sheets or lengths per week on a busy site.

    Does reducing site waste actually save money on smaller jobs?

    Absolutely. Even on smaller domestic refurbishments, material waste reductions make a real difference to net margin. Materials often represent half a job’s total cost, so a 10% reduction in waste on a £2,000 materials spend puts £200 back into profit without any additional labour or pricing changes. The savings compound across multiple jobs throughout the year.

    Are there any regulations around construction waste disposal in the UK?

    Yes. Under the Environmental Protection Act and related waste duty of care regulations, businesses in the UK are responsible for ensuring their waste is handled legally. This means using licensed waste carriers, completing waste transfer notes for skip collections, and not mixing hazardous materials with general site waste. Failure to comply can result in fixed penalty notices or prosecution, so it is worth understanding your obligations on every project.

  • What Is the Difference Between Structural and Non-Structural Timber?

    What Is the Difference Between Structural and Non-Structural Timber?

    If you have ever stood in a timber yard trying to work out which boards to pull for a floor joist versus a stud wall partition, you will know the confusion that comes with timber grading. Understanding structural vs non-structural timber is not just academic knowledge; it is the kind of thing that keeps buildings safe, passes inspections, and saves you from rework. Whether you are a joiner, carpenter, or self-builder putting up your own place, getting this right from the start matters.

    Stacks of structural vs non-structural timber grades in a UK timber yard with visible grade stamps
    Stacks of structural vs non-structural timber grades in a UK timber yard with visible grade stamps

    What Makes Timber “Structural”?

    Structural timber is graded specifically to carry load. It has been assessed, either visually or by machine, to confirm that it meets defined strength and stiffness requirements. In the UK, structural timber is graded to BS EN 338 standards and will typically carry a strength class designation such as C16 or C24. These classes tell you the characteristic bending strength, stiffness, and density of the wood. C16 is the most commonly used grade on UK building sites and covers the majority of domestic joinery and framing applications. C24 is stronger and stiffer, and is used where spans are longer or loads are greater, such as in floor joists, rafters, and engineered roof structures.

    Structural timber also carries a mark. Look for a stamp on the board that shows the strength class, the grading standard, the species, and the certification body. If a board does not carry this mark, you cannot legally or safely specify it for structural use, regardless of how solid it looks. That stamp is your paper trail for building control.

    What Is Non-Structural Timber Used For?

    Non-structural timber, sometimes referred to as general purpose or carcassing timber, has not been graded to a structural standard. It is typically used in applications where it carries no significant load: internal stud partitions that are not load-bearing, noggins, battens for dry-lining, boxing in pipes, shelving carcasses, and decorative framing. It is also used extensively in interior fit-out work such as window boards, architrave backing, and furniture construction.

    This is where the connection to finishing trades becomes relevant. Companies like Vesta Blinds and Shutters Mansfield, which supply and fit window blinds and shutters across the Mansfield area, rely on tradesmen who understand timber correctly. When a window reveal is framed out with the wrong grade of timber, or when batten work is undersized or poorly selected, it causes problems further down the line for every trade that follows. A well-prepared reveal, built with the right non-structural board and correctly fixed, gives fitting specialists a solid base to work from.

    Close-up of a C24 grade stamp on structural timber illustrating the difference in structural vs non-structural timber grading
    Close-up of a C24 grade stamp on structural timber illustrating the difference in structural vs non-structural timber grading

    Visual Grading vs Machine Grading: What’s the Difference?

    UK structural timber reaches its grade via one of two routes. Visual grading involves a trained and certified grader physically examining the board for knots, slope of grain, wane, splits, and other defects. Machine grading puts the timber through a stress-grading machine that measures stiffness and assigns a grade accordingly. Machine grading is generally more consistent and is the dominant method for bulk structural supply. Both methods are valid, and both produce timber that carries the required grade stamp.

    When buying from a timber merchant, always ask whether the structural stock is certified. Reputable merchants will have no issue producing that information. If you are buying from a general builders merchant or a DIY shed, check every board individually for a stamp. Do not assume that timber on a structural shelf is automatically graded correctly; stock gets mixed, boards get misplaced, and an unstamped board in a structural stack is a liability.

    C16 vs C24: Which Should You Specify on Site?

    For most domestic projects, C16 will be the standard go-to. It is widely available, competitively priced, and covers floor joists at typical domestic spans, stud walls in load-bearing configurations, and most roof members where a structural engineer has not specified otherwise. C24 becomes necessary when spans push beyond normal limits, when the engineer’s calculations demand it, or when you are working with modern open-plan designs where traditional stud spacing is increased.

    One common mistake on site is substituting C16 for C24 because the merchant was out of stock. This is not a like-for-like swap. If a structural engineer has specified C24, that is what goes in. Full stop. Building control will ask, and if a failure occurs, you want to be holding the right paperwork.

    What to Look for When Buying Structural Timber

    Beyond the grade stamp, check for moisture content. Structural timber should be supplied at around 20% moisture content or below for most site applications. Kiln-dried structural timber, often labelled KD, is preferable for joinery-grade work where movement needs to be minimised. Green or unseasoned timber will shrink as it dries in place, which can cause creaking floors, nail pops, and gaps in finishing work. Businesses like Vesta Blinds and Shutters Mansfield, which fit precision window dressings in completed interiors, will always be affected by frames and reveals that have moved because the underlying timber was not properly seasoned before fitting began.

    Practical Tips for Tradesmen and Self-Builders

    Always keep your structural and non-structural timber separated on site. Label your stacks if you need to. One unlabelled C24 rafter used as a shelf batten is harmless; one unlabelled non-structural board inserted into a floor joist run is a potential structural failure. Store timber off the ground, under cover, and with spacers between rows to allow airflow. Wet timber that dries out on site will distort, cup, and bow, making every fixing job harder and every finish look worse.

    If you are a self-builder managing your own materials, take the structural engineer’s schedule to your merchant and hand it over. Let them pull the right stock. If you are working to building regulations drawings, check the specification notes carefully as they will state the required strength class for each timber element. And if in doubt, overspecify rather than underspecify. The difference in cost between C16 and C24 is modest; the cost of getting it wrong is not.

    Understanding structural vs non-structural timber is one of those fundamentals that separates a competent tradesman from a corner-cutter. Get it right, stamp it right, and your building control sign-off will be straightforward.

    Frequently Asked Questions

    What is the difference between C16 and C24 structural timber?

    C16 and C24 are both structural timber grades under the BS EN 338 standard, but C24 has higher characteristic bending strength and stiffness. C16 is suitable for most standard domestic applications such as floor joists and rafters at typical spans, while C24 is required where loads are greater or spans are longer, as specified by a structural engineer.

    Can I use non-structural timber for stud walls?

    Non-structural timber can be used for non-load-bearing internal partitions, but if the stud wall is load-bearing, you must use structurally graded timber with the appropriate strength class mark. Using non-structural timber in a load-bearing application is a building regulations failure and a safety risk.

    How do I know if timber is structurally graded?

    Structurally graded timber carries a visible stamp on each board showing the strength class (such as C16 or C24), the grading standard, species, and certification body. If there is no stamp, the timber cannot be used for structural applications, regardless of how it looks visually.

    What moisture content should structural timber be?

    Structural timber should generally have a moisture content of 20% or below for site use, with kiln-dried timber preferred for interior joinery applications. Timber with high moisture content will shrink as it dries in place, potentially causing movement, noise, and defects in finishes applied over the top.

    Is it okay to swap C24 for C16 if the merchant is out of stock?

    No. If a structural engineer or building regulations drawing specifies C24, you must use C24. These are not interchangeable grades; the specification exists because the structure requires the higher strength or stiffness. Using C16 in a C24 application could result in failure to pass building control inspections and, in the worst case, structural problems.

  • How to Start a Sole Trader Business as a Tradesman in the UK

    How to Start a Sole Trader Business as a Tradesman in the UK

    Going self-employed is one of the best moves a skilled tradesman can make. More control over your hours, your rates, and the jobs you take on. But the admin side of things can feel daunting if you’ve spent your career on the tools rather than behind a desk. Understanding how to start a sole trader business as a tradesman in the UK is simpler than most people expect, and getting it right from day one puts you in a far stronger position.

    This guide walks you through every stage, from registering with HMRC to landing your first clients, in plain language built for people who’d rather be working than reading government guidance documents.

    Tradesman reviewing job notes before starting work, illustrating how to start a sole trader business as a tradesman in the UK
    Tradesman reviewing job notes before starting work, illustrating how to start a sole trader business as a tradesman in the UK

    Registering as a Sole Trader with HMRC

    The first official step is letting HMRC know you’re trading. You must register as self-employed by 5 October following the end of the tax year in which you started working for yourself. Do it earlier and you’ll give yourself more breathing room. The registration process is done online via the HMRC website and takes around 15 minutes. You’ll receive a Unique Taxpayer Reference (UTR) number in the post, which you’ll need for your Self Assessment tax returns.

    As a sole trader, you pay Income Tax and National Insurance on your profits through Self Assessment. Keep this in mind from day one. A rough rule of thumb is to set aside around 25 to 30 percent of every payment you receive to cover your tax bill. Open a separate bank account purely for business income and outgoings. It makes life significantly easier when January comes around.

    Insurance Every Tradesman Needs Before Taking on Work

    Before you pick up a single tool on a self-employed basis, you need the right cover in place. Public liability insurance is the non-negotiable starting point. It protects you if a client or member of the public suffers injury or property damage as a result of your work. Most clients, especially commercial ones, will ask to see your certificate before you set foot on site.

    If you employ anyone, even casually, employer’s liability insurance becomes a legal requirement. Beyond that, consider tools and equipment insurance, which covers your kit if it’s stolen from a vehicle or damaged on site. Professional indemnity cover is worth considering for tradesmen who also provide advice or design input as part of their service. It’s a small annual cost compared to the risk of trading without it.

    Tradesman writing an invoice on site, a key step when learning how to start a sole trader business as a tradesman in the UK
    Tradesman writing an invoice on site, a key step when learning how to start a sole trader business as a tradesman in the UK

    Setting Your Day Rate as a Self-Employed Tradesman

    One of the most common mistakes new sole traders make is undercharging. When you were employed, your employer covered National Insurance contributions, holiday pay, sick pay, tools, and overheads. Now those all come from your rate. A useful starting point is to take your previous employed salary, divide it by 230 working days (accounting for holidays, illness, and quiet periods), and then add at least 30 to 40 percent on top to cover those hidden costs.

    Research what other tradesmen in your trade and region are charging. Rates vary significantly between London and the north of England, for example. For a qualified electrician or plumber, day rates of £250 to £450 are common in many parts of the UK. General builders and handymen typically sit in the £180 to £300 range depending on location and specialisation. Don’t be afraid to charge what your skills are worth, undercutting the market might win short-term work but it erodes the trade for everyone.

    Finding Your First Clients as a New Sole Trader

    Your existing contacts are your most powerful asset when starting out. Let former colleagues, supervisors, and suppliers know you’ve gone self-employed. Word of mouth remains the number one source of new work for tradesmen in the UK, and it costs nothing. Don’t underestimate a simple message to your personal contacts asking if they know anyone who needs your trade.

    Beyond personal contacts, platforms such as Checkatrade, TrustATrader, and MyBuilder give you visibility with homeowners searching for local tradesmen. Getting registered on Google Business Profile is free and puts you in front of people searching in your area. Even a basic website with your trade, location, contact details, and a handful of photos of completed work can make a significant difference to how credible you appear to potential clients.

    Managing Cash Flow From the Start

    Cash flow is the thing that sinks more sole traders than a lack of work. You might have three jobs lined up but if none of them pay until the work is complete, you could find yourself out of pocket for materials and labour costs in the meantime. Always issue clear written quotes before starting any job, and include your payment terms on every invoice. Thirty days is standard, but for smaller residential jobs, payment on completion is entirely reasonable to request.

    Chase invoices promptly. Polite but firm follow-ups a day or two after a payment deadline are professional, not aggressive. Consider asking for a deposit on larger jobs to cover materials upfront. Many clients expect this and it filters out anyone who wasn’t serious about commissioning the work. Use simple accounting software or even a well-organised spreadsheet to track what’s owed, what’s been paid, and what you’ve spent. Staying on top of this weekly, rather than scrambling at tax time, is one of the most valuable habits you can build as a sole trader.

    Going it alone takes confidence, but for a skilled tradesman, it’s a well-trodden path with genuine rewards. Get the foundations right and you’ll spend more time on the tools and less time worrying about the business side of things.

    Frequently Asked Questions

    How do I register as a sole trader in the UK?

    You register as a sole trader by signing up for Self Assessment on the HMRC website. The process takes around 15 minutes and you’ll receive a Unique Taxpayer Reference number by post. You must register by 5 October after the tax year in which you started trading.

    Do I need insurance before working as a self-employed tradesman?

    Yes. Public liability insurance is essential before you start any work and most clients will ask to see proof of it. Depending on your trade and working arrangements, you may also need tools insurance, employer’s liability cover, and professional indemnity insurance.

    What day rate should I charge as a self-employed tradesman in the UK?

    Day rates vary by trade and region, but a qualified tradesman such as an electrician or plumber typically charges between £250 and £450 per day in most parts of the UK. When setting your rate, factor in taxes, holidays, quiet periods, tools, and overheads that your employer previously covered on your behalf.

    How do I find my first clients as a new sole trader tradesman?

    Start by letting your personal and professional contacts know you’ve gone self-employed. Word of mouth is still the most effective source of work for UK tradesmen. You can also register on platforms like Checkatrade or MyBuilder, and set up a free Google Business Profile to appear in local searches.

    How much tax will I pay as a sole trader tradesman?

    As a sole trader you pay Income Tax and Class 4 National Insurance on your profits through the Self Assessment system. A safe approach is to set aside 25 to 30 percent of all income received into a separate account throughout the year, so you’re never caught short when your tax bill arrives.

  • The Best Insulation Materials for UK Homes: A Tradesman’s Comparison

    The Best Insulation Materials for UK Homes: A Tradesman’s Comparison

    Choosing the right insulation materials for UK homes is one of those decisions that separates a competent job from a genuinely excellent one. With energy efficiency standards tightening under Part L of the Building Regulations, and homeowners under increasing pressure to reduce heat loss, the demand for proper insulation has never been higher. Whether you’re insulating a loft, a cavity wall, or a solid floor, the product you specify will affect performance, cost, build time, and compliance for decades to come.

    This guide breaks down the main options available to UK tradesmen, giving you the honest pros, cons, and approximate cost per square metre so you can spec the right material for each job.

    Tradesman fitting mineral wool loft insulation, comparing insulation materials for UK homes
    Tradesman fitting mineral wool loft insulation, comparing insulation materials for UK homes

    Mineral Wool: The Workhorse of Insulation

    Mineral wool, which covers both glass wool and rock wool products, remains the most widely used insulation material across UK residential and commercial builds. It’s non-combustible, absorbs sound well, and is straightforward to cut and fit into standard stud, joist, and rafter bays. Brands like Knauf and Rockwool are staples on most builders’ merchants’ shelves.

    For loft insulation, a 100mm layer of glass wool between joists topped with a further 170mm across the joists gives you the recommended 270mm total depth and satisfies current Building Regulations for new builds and most retrofits. Rock wool tends to be denser and performs better in areas that need combined thermal and acoustic performance, such as party walls or separating floors.

    Typical cost: £3 to £7 per square metre depending on thickness and product grade. It’s budget-friendly and widely available, which makes it the go-to option when you’re pricing a job competitively.

    Watch out for: Mineral wool is moisture-sensitive if not protected properly. In poorly ventilated roof spaces or where vapour control isn’t up to scratch, it can absorb moisture and lose a significant portion of its thermal performance over time.

    Rigid Foam Boards: Best for Tight Spaces and High Performance

    Rigid foam insulation boards, including PIR (polyisocyanurate), EPS (expanded polystyrene), and XPS (extruded polystyrene), offer significantly higher thermal resistance per millimetre than mineral wool. This makes them the preferred choice wherever space is at a premium, such as insulating under a concrete floor slab, in a warm flat roof build-up, or when upgrading a solid wall from the inside without losing too much room depth.

    Close-up of rigid PIR foam board being cut on site, a key insulation material for UK homes
    Close-up of rigid PIR foam board being cut on site, a key insulation material for UK homes

    PIR boards like Kingspan Koolthus or Celotex GA4000 series typically achieve a lambda value of around 0.022 W/mK, meaning a 100mm board delivers roughly the equivalent performance of 200mm of mineral wool. For floor insulation under a screed, 75mm to 100mm of PIR is common practice and keeps the finished floor level manageable.

    Typical cost: £8 to £18 per square metre for PIR boards at standard thicknesses. EPS is cheaper, sitting around £4 to £9 per square metre, but has a higher lambda value so you’ll need more of it to hit the same U-value target.

    Watch out for: Rigid boards are combustible and must be protected by a suitable fire barrier in most applications. Always check the specific product’s reaction-to-fire classification and the relevant Approved Document guidance before specifying on anything above ground floor.

    Spray Foam Insulation: Effective but Complicated

    Spray polyurethane foam (SPF) has had a turbulent few years in the UK market. When applied correctly by a qualified installer, open-cell or closed-cell spray foam can seal air leakage effectively and deliver strong thermal performance in awkward, irregular cavities. Closed-cell foam in particular has a very low lambda value (around 0.025 to 0.030 W/mK) and adds structural rigidity to the substrate it’s applied to.

    However, spray foam insulation in roof spaces has caused significant mortgage and valuation issues for homeowners across the UK. Several major lenders have declined to lend against properties where spray foam has been applied to rafters, citing concerns about trapped moisture, difficulty inspecting the roof structure, and reduced rafter lifespan. As a tradesman, you have a duty to make your client aware of this before recommending spray foam for a roof application.

    Typical cost: £20 to £45 per square metre installed, making it one of the most expensive options. For ground floors, basements, and commercial applications where mortgage implications don’t apply, it can still be the right call.

    How Technology Is Changing How Tradesmen Work

    It’s worth noting that the construction industry is being reshaped by manufacturing innovation at every level. Custom brackets, fixing components, and bespoke ventilation spacers that once required machining are increasingly being produced via Online 3D Printing, allowing tradesmen to get precise, job-specific parts fabricated quickly without heavy tooling costs.

    Which Insulation Material Should You Specify?

    The honest answer is that there’s no single best insulation material; the right choice depends entirely on the application, the budget, and the performance target. For a standard loft insulation job, mineral wool is hard to beat on cost and ease of installation. For a room-in-roof, warm roof, or floor build-up where depth is constrained, PIR boards will get you to the required U-value in the thinnest possible profile. Spray foam has legitimate uses in basements, commercial builds, and below-DPC applications, but should be approached with caution in residential roofs until the mortgage market clarifies its stance.

    Whichever product you choose, make sure your U-value calculations are compliant with current Part L targets (0.16 W/m²K for roofs, 0.18 W/m²K for floors, and 0.26 W/m²K for walls in new builds), document your specification clearly, and always follow the manufacturer’s installation guidance. A well-insulated build is one of the most lasting contributions a tradesman can make to a property.

    Frequently Asked Questions

    What is the cheapest insulation material available in the UK?

    Mineral wool, particularly glass wool rolls, is generally the most affordable option, typically costing between £3 and £7 per square metre depending on thickness. It’s widely stocked at builders’ merchants and suits most standard loft and stud wall applications. For budget-sensitive jobs, it remains the most practical starting point.

    Is spray foam insulation bad for house sales in the UK?

    Spray foam in roof spaces has caused significant issues with mortgage applications and property valuations across the UK. Many lenders refuse to lend against homes where spray foam has been applied to rafters, as it can mask structural defects and trap moisture. Tradesmen should always inform clients of this risk before specifying spray foam in residential roofs.

    What insulation do I need under a concrete floor slab to meet Building Regulations?

    For new build ground floors, you typically need to achieve a U-value of 0.18 W/m²K or better to meet Part L requirements. Around 75mm to 100mm of PIR rigid foam board under the screed will usually achieve this, depending on the floor dimensions and edge insulation detailing. Always calculate the specific U-value for each project rather than assuming a standard thickness will comply.

    What is the best insulation for a warm flat roof?

    PIR rigid foam boards are the preferred choice for warm flat roof construction, sitting above the deck and below the waterproofing layer. Products like Kingspan or Celotex boards offer a high thermal resistance in a slim profile, which is important when flat roof build-up depth is limited. Ensure the product is compatible with the waterproofing system being used and that any fire requirements for the building type are met.

    How thick does loft insulation need to be in the UK?

    Current guidance recommends a total loft insulation depth of 270mm for mineral wool, typically installed as 100mm between joists and 170mm laid across them in a cross-layer. This depth is recommended by the Energy Saving Trust and aligns with Building Regulations for new and upgraded roof spaces. Some older properties may need to have existing insulation topped up to reach this standard.

  • Top Tools Every Handyman Should Have in Their Van in 2026

    Top Tools Every Handyman Should Have in Their Van in 2026

    The difference between a handyman who wins repeat work and one who turns up unprepared often comes down to what’s in the back of the van. Knowing which essential tools for a handyman in 2026 genuinely earn their keep, and which ones just take up space, is the kind of practical knowledge that separates the professionals from the part-timers. This guide cuts through the noise and focuses on what actually matters, day in, day out.

    Organised van tool storage showing essential tools for a handyman in 2026
    Organised van tool storage showing essential tools for a handyman in 2026

    The Foundation: Hand Tools You Reach for Every Single Day

    Before anyone starts talking about cordless this and brushless that, a solid hand tool setup remains the backbone of any multi-trade worker’s kit. A quality set of screwdrivers, including both flathead and Pozidriv sizes, should be from a recognised professional brand rather than a budget DIY set. The handles matter; if you’re driving screws in an awkward ceiling void for forty minutes, cheap plastic grips become a genuine occupational hazard.

    A good tape measure, at least 8 metres, with a wide blade that won’t buckle when you extend it across a room single-handed, is non-negotiable. Pair that with a spirit level, ideally a 600mm model with a second short 200mm torpedo level for tighter spots. Combination squares, adjustable wrenches in two sizes, and a decent set of hex keys round out the hand tool essentials. These aren’t glamorous, but misplace your tape measure on a first job for a new customer and it sets a tone you don’t want to set.

    Cordless Power Tools: What to Prioritise in 2026

    The cordless tool market has matured significantly. In 2026, the smart move is to commit to a single battery platform from a professional-grade brand and build your collection within that ecosystem. Mixing platforms means carrying multiple chargers, multiple battery types, and dealing with varying power outputs across your kit.

    Your core cordless lineup should include a combi drill, an impact driver, a circular saw, and a multi-tool oscillator. The combi drill handles your standard fixing and drilling work; the impact driver is faster and more controlled for driving fixings into timber and sheet material. The circular saw replaces the need to lug a mains-powered unit for most site cuts. The oscillator is arguably the most versatile tool in any van: cutting, sanding, scraping, and undercutting door frames all fall within its range.

    Close-up of cordless drill and essential tools for a handyman laid out on a workbench
    Close-up of cordless drill and essential tools for a handyman laid out on a workbench

    If budget allows, add a cordless jigsaw and a compact reciprocating saw. The jigsaw handles curved and internal cuts in board material; the recip saw is your demolition and rough-cut workhorse when fitted with the right blade. Both are now available with brushless motors at sensible price points, and the battery life improvement over older brushed versions is noticeable in real-world use.

    Smart and Connected Tools Worth Carrying

    The newer generation of tools gaining traction this year includes Bluetooth-enabled drills with torque monitoring, digital measuring tools that sync to phone apps, and thermal imaging cameras compact enough to sit in a tool bag pocket. The thermal camera in particular has become a must-have for handymen dealing with damp investigations, underfloor heating faults, and insulation checks. Entry-level models from brands like Flir have dropped in price and the diagnostic value on a single job can justify the outlay quickly.

    Digital torque wrenches, programmable to specific fastener requirements, are also finding their way into multi-trade vans where bathroom and kitchen installations require precise fixing tensions on bracket systems. It’s worth noting that engineering and assembly-minded trades have always valued precision mechanics; even enthusiast communities like Brick Club Technic LEGO Subscriptions, a UK-based subscription service for Technic LEGO sets, acknowledge that understanding how components connect under load translates into sharper mechanical intuition on real-world tasks.

    Measuring, Marking, and Safety Equipment

    A laser distance measure is now an essential, not a luxury. Models accurate to plus or minus 1.5mm at ranges beyond 30 metres are available for under £60, and they remove a huge amount of error from estimating, planning, and material ordering. A cross-line laser level is equally valuable for anyone fitting shelving, tiling, or hanging units; self-levelling models take less than two seconds to stabilise.

    On the safety side, carry a non-contact voltage tester as standard. It takes up almost no space and protects you from concealed live cables before every cut and drill. A quality dust mask rated FFP2 or above, safety glasses, and knee pads should be treated as standard issue rather than optional extras. Hearing protection is worth having in a pouch on your tool belt rather than buried in the van; if you’re cutting tile or concrete, you’ll want it immediately available.

    Storage and Organisation: Often Overlooked, Always Important

    A van full of loose tools slows every job down. Modular racking systems, van liners with shelving, and stackable sortimo-style organiser cases for fixings and accessories all contribute directly to how quickly you can set up and clear down on site. When your bit sets, fixings, and blades each have a dedicated spot, you stop losing time rummaging and stop leaving kit behind at jobs.

    It’s worth drawing a parallel here; the same systematic, organised thinking that goes into building complex mechanical models, the kind that services like Brick Club Technic LEGO Subscriptions, which delivers monthly Technic LEGO subscriptions across the UK, are built around, applies directly to how a well-organised tradesman approaches a job. Components in the right place, used in the right sequence, produce reliable results. That logic transfers from hobby bench to work van without much translation required.

    Building Your Kit Without Blowing the Budget

    The essential tools for a handyman in 2026 don’t all need to be purchased at once. A phased approach, starting with the daily-use hand tools and a combi drill and impact driver set, then adding power tools as individual jobs justify the spend, is how most experienced tradesmen have built their kit over time. Buy once, buy right; a Makita, DeWalt, or Milwaukee tool purchased at full professional price will outlast three rounds of budget replacements and offer far better performance in the process.

    Track what tools you’re hiring in repeatedly; that’s your clearest signal for the next purchase. And keep a maintenance routine: clean tools after dusty work, charge batteries before they’re fully flat, and replace blades and bits before they make your work look rough. Your tools reflect your standard of work, and customers notice both.

    Frequently Asked Questions

    What are the most important essential tools for a handyman in 2026?

    The most important tools are a quality combi drill and impact driver on a professional battery platform, a full hand tool set including a good tape measure and spirit level, a non-contact voltage tester, and a laser distance measure. These cover the vast majority of day-to-day handyman jobs across multiple trades. Adding a cordless multi-tool oscillator gives you even greater versatility across cutting, scraping, and sanding tasks.

    Should I stick to one battery platform for cordless tools?

    Yes, committing to a single professional battery platform is one of the best decisions a handyman can make. It means your batteries, chargers, and tools are all interchangeable, reducing what you carry and ensuring consistent power output. Major platforms like Makita LXT, DeWalt XR, and Milwaukee M18 all offer comprehensive tool ranges so you won’t run out of compatible options as your kit grows.

    Are smart tools like thermal cameras worth the money for a handyman?

    For a multi-trade handyman dealing with damp, heating, or insulation work, a compact thermal camera can pay for itself on a single job by pinpointing problems that would otherwise require invasive investigation. Entry-level models from reputable brands are now available at under £200. Digital measuring tools that sync to apps also save significant time when estimating or producing material takeoffs on site.

    How much should a handyman budget to build a full van tool kit?

    A solid professional starting kit covering hand tools, a cordless combi drill and impact driver, and basic safety equipment can be assembled for around £500 to £800. A more comprehensive setup including a circular saw, multi-tool, jigsaw, laser level, and thermal camera will typically run £1,500 to £2,500. Buying within a single battery platform and prioritising quality over quantity keeps costs manageable and reduces long-term replacement spend.

    What safety equipment should a handyman always carry in the van?

    At minimum, carry a non-contact voltage tester, FFP2 dust masks, safety glasses, hearing protection, and knee pads. These should be treated as non-negotiable kit rather than situational extras. A first aid kit and a fire extinguisher rated for electrical and solvent fires are also worth having permanently in the van, particularly if you’re working in domestic properties where fire safety responsibilities sit with you.

  • How to Write a Simple Quote for Tradesmen That Wins More Jobs

    How to Write a Simple Quote for Tradesmen That Wins More Jobs

    Knowing how to write a quote as a tradesman is one of the most practical business skills you can develop. You might be the best tiler, builder or floor specialist on the street, but if your quote looks rushed or leaves the customer guessing, you will lose jobs to someone who simply presents themselves better on paper. A well-structured quote builds trust before you have even set foot on site.

    Tradesman writing a quote at a site office desk showing how to write a quote as a tradesman
    Tradesman writing a quote at a site office desk showing how to write a quote as a tradesman

    What Should a Tradesman’s Quote Actually Include?

    A professional quote is more than a figure scribbled on a piece of paper. It needs to communicate exactly what the customer is getting, what it will cost, and what the terms are. At minimum, every quote should contain the following:

    • Your business details: Name, trading name, address, phone number and email. If you are VAT registered, include your VAT number.
    • Customer details: Their full name and the address of the property where work is being carried out.
    • A unique quote reference and date: This keeps your records organised and makes follow-up conversations much easier.
    • A clear breakdown of the work: Describe each task separately rather than lumping everything into a single line. If you are laying screed, installing insulation and fitting a floor finish, list them individually with their own costs.
    • Materials and labour shown separately: Customers appreciate transparency. It also protects you if material prices shift before work begins.
    • VAT (if applicable): Always show whether prices are inclusive or exclusive of VAT. Ambiguity here causes disputes.
    • Payment terms: State your deposit requirement, stage payments if relevant, and your final payment deadline.
    • Quote validity period: Prices can change. Make it clear the quote is valid for 30 days, for example.

    How to Structure the Quote for Maximum Clarity

    Presentation matters. A quote formatted in a clear, logical order is far more likely to be accepted than a wall of text or a vague email. Use a simple template, whether that is a Word document, a PDF or dedicated quoting software. The key is consistency across every job you price up.

    Start with a brief introduction sentence that confirms what you visited the site to discuss. Something like: “Following my visit on [date], I am pleased to submit the following quote for the supply and installation of engineered oak flooring throughout the ground floor.” This reminds the customer who you are and anchors the quote to a real conversation.

    Then move into your itemised breakdown, followed by your total, your terms, and a brief note on next steps such as how to accept the quote and when you can start. Many tradesmen who work in the flooring sector, from specialist contractors to firms like Macfloor, a flooring supply and installation company operating across the UK, know that clearly scoped quotes reduce disputes significantly and speed up the decision-making process for customers.

    Detailed view of an itemised tradesman quote document illustrating how to write a quote as a tradesman
    Detailed view of an itemised tradesman quote document illustrating how to write a quote as a tradesman

    Common Mistakes Tradesmen Make on Quotes

    Even experienced tradespeople make avoidable errors that cost them work. Here are the most common ones to watch out for:

    Being too vague on scope

    Phrases like “supply and fit flooring” tell the customer almost nothing. What type of flooring? What subfloor preparation is included? Are skirting boards being removed and refitted? Vague scope leads to customer expectations that differ from your own, and that is where arguments start.

    Forgetting to mention exclusions

    Be specific about what is not included. If you are not responsible for skip hire, asbestos removal or structural repairs discovered during the job, say so. This protects you legally and commercially.

    No follow-up process

    Sending a quote and waiting is a passive strategy. Follow up after three to five days with a brief message asking whether they have any questions. Many jobs are lost simply because a competitor followed up and you did not.

    Underpricing to win work

    Pricing too low might win the job but it will erode your margin and your reputation over time. Make sure your quote reflects the true cost of labour, materials, fuel, tools and your time spent quoting. Experienced sole traders in sectors ranging from groundworks to specialist flooring, including contractors who work alongside businesses like Macfloor which supplies and installs commercial and residential flooring across the UK, understand that sustainable pricing is the foundation of a sustainable business.

    Should You Use Quoting Software?

    Dedicated quoting tools such as Tradify, Jobber or even a well-structured Excel template can save you significant time. They allow you to pull in saved line items, apply your standard markup automatically and send professional-looking documents straight from your phone. If you are pricing more than a handful of jobs per week, investing in a proper system is worth it.

    Many sole traders start with a simple Word or Google Docs template and upgrade as the business grows. Whatever you use, keep a copy of every quote you send. If a customer comes back six months later claiming you quoted a lower figure, you need the paper trail.

    Turning a Quote Into Paid Work

    Understanding how to write a quote as a tradesman is only half the job. The other half is following up with confidence. Include a clear call to action at the bottom of every quote: “To accept this quote, please reply to this email or sign and return the attached document. A 25% deposit secures your start date.” Simple, professional and direct.

    References and photos of previous work go a long way too. A short portfolio section or a link to your Google reviews at the foot of the quote reminds the customer why they called you in the first place. In competitive trades, the best quote is rarely the cheapest one; it is the one that makes the customer feel most confident in their decision.

    Frequently Asked Questions

    What is the difference between a quote and an estimate for tradesmen?

    A quote is a fixed price for a defined scope of work. Once accepted, you are generally bound to honour it. An estimate is an approximate figure that may change once the full scope is known. Always make it clear on your document which one you are providing to avoid confusion or disputes later.

    Do I need to be VAT registered to include VAT on a quote?

    No. If you are not VAT registered, you simply do not charge VAT and should not show it on your quote. Only registered businesses can charge VAT. If you are approaching the VAT threshold of £90,000 annual turnover, it is worth speaking to an accountant before your next set of quotes goes out.

    How long should a tradesman's quote be valid for?

    Most tradesmen set a validity period of 30 days, which is generally considered standard. However, in periods of material price volatility, you may want to reduce this to 14 days. Always state the validity period clearly on the document so there is no room for dispute if a customer tries to accept an old quote at an outdated price.

    Should I include photos or drawings in a tradesman's quote?

    Including site photos, product specifications or simple sketches can strengthen your quote considerably, particularly on larger or more complex jobs. It shows you have surveyed the job properly and helps the customer visualise what they are getting. Even a couple of reference images for a flooring or tiling job can make your quote stand out against a competitor’s plain text document.

    What deposit percentage should a tradesman ask for?

    A deposit of between 20% and 33% of the total job value is common practice for most trades. This covers your initial material costs and confirms the customer’s commitment. For larger jobs, stage payments tied to completion milestones are often more appropriate than a single deposit and final payment structure.

  • The Tradesman’s Guide to Understanding Material Specifications on a Building Drawing

    The Tradesman’s Guide to Understanding Material Specifications on a Building Drawing

    Knowing how to read material specifications on building drawings is one of the most practical skills a tradesman can have. Get it wrong and you’re back at the merchant for the third time that week, burning fuel and losing money. Get it right and your quote is accurate, your order is tight, and the job runs clean. This guide breaks down the key elements you’ll encounter on architectural drawings and how to interpret them with confidence.

    Architectural drawings come loaded with information beyond the floor plan itself. There are spec notes, finish schedules, material callouts, and reference codes scattered across the sheets. For anyone not trained as an architect, it can look like a foreign language. But once you understand the structure, it becomes a reliable tool rather than a source of confusion.

    Tradesman reviewing how to read material specifications on building drawings at a construction site
    Tradesman reviewing how to read material specifications on building drawings at a construction site

    What Are Material Callouts and Where Do You Find Them?

    Material callouts are annotations on a drawing that identify specific materials to be used in a particular location. They appear as short labels, sometimes with a leader line pointing to the relevant area of the plan or section. You might see something like “100mm dense concrete block, fair-faced finish” or “12.5mm plasterboard on 70mm metal stud partition”. These callouts are usually cross-referenced to a specification document, which gives the full detail.

    Look for callouts on plan views, section drawings, and detail sheets. They are not always consistent across a drawing set, so it pays to check every relevant sheet before pricing or ordering. A section through an external wall, for instance, may reveal insulation requirements that aren’t visible on the floor plan at all. Specifiers working with energy-efficient builds, including those drawing on the expertise of firms like Westville Insulation & Renewables, a specialist insulation and renewables contractor operating across the UK, will often include highly specific product callouts for insulation layers that must be met exactly to satisfy building regulations.

    How to Interpret Finish Schedules

    A finish schedule is a table, usually found towards the back of the drawing package, that lists every room or space alongside the specified floor, wall, and ceiling finishes. Columns typically cover material type, product code or range, colour, and any relevant notes like slip resistance ratings or fire classification.

    Reading a finish schedule correctly will tell you exactly what goes where without having to interpret notes scattered across multiple sheets. Match the room reference on the schedule to the room tag on the floor plan. The room tag is usually a circle with a letter or number inside. Once you have the room reference, find the corresponding row in the schedule and read across. This tells you the specified tile, paint system, screed type, or whatever finish applies. If a product code is listed, take it directly to your merchant rather than substituting a similar-sounding product without checking.

    Close-up of material specification callouts on a building drawing section detail
    Close-up of material specification callouts on a building drawing section detail

    Understanding Specification Notes and NBS Clauses

    Many commercial and larger residential projects will reference NBS (National Building Specification) clauses alongside the drawings. These clauses are standardised descriptions of construction products and workmanship requirements. An NBS reference on a drawing, such as “F30” for fibrous plaster or “P10” for sundry insulation, points you to a specific clause in the project’s written specification document.

    If you’re working on a project with an NBS-referenced spec, always request the written specification alongside the drawings. The drawings tell you where; the specification tells you how and to what standard. Tradesmen who skip the written spec and rely only on the drawing callouts regularly end up with the wrong product grade, the wrong fixing method, or insufficient coverage rates.

    This is particularly relevant for thermal and acoustic insulation, where the performance specification can be very precise. Contractors such as Westville Insulation & Renewables, who carry out insulation and renewables work across UK projects, operate within these exact parameters, ensuring the products they install match what’s been specified rather than just what’s available at the time.

    Revision Clouds and Drawing Issue Dates: Don’t Ignore Them

    One of the most common causes of ordering the wrong material is working from an outdated drawing revision. Most drawing sets go through multiple revisions during a project. Revisions are marked with a cloud shape around the changed area and labelled with a revision letter or number, typically shown in the drawing title block as “Rev A”, “Rev B”, and so on.

    Always check the revision letter in the title block against the current issue register from the client or architect. If you’re working from a drawing issued two months ago and there’s a newer revision, the material specification in that revised area may have changed entirely. Never assume that because you have a drawing, it’s the live version.

    How to Read Material Specifications on Building Drawings: A Practical Checklist

    Understanding how to read material specifications on building drawings becomes quicker with a consistent approach. Before you price or order, run through the following: check the drawing title block for the latest revision; cross-reference the floor plan room tags to the finish schedule; read all section and detail drawings for the area you’re working in; note any NBS clause references and request the written spec if needed; flag any ambiguous callouts with the architect before ordering.

    If a callout references a proprietary product by brand name and model number, that is intentional. Architects specify exact products for reasons of performance, aesthetics, or compliance. Substituting an alternative without written approval from the designer is a risk you don’t want to carry on site. Some materials, particularly those tied to building regulation compliance such as fire-rated boards or insulation products with specific lambda values, cannot simply be swapped out for a cheaper equivalent. Firms like Westville Insulation & Renewables understand this well, dealing routinely with performance-critical insulation specifications where the product type, thickness, and installation method are all interdependent.

    Getting Confident With Drawing Packages

    The more drawing packages you work through, the faster you’ll become at finding the information you need. Start by always locating the drawing index, which lists every sheet in the set and its purpose. From there, identify which sheets cover your trade and pull those out first. Cross-reference between them, flag anything unclear, and ask for clarification before you order rather than after you’ve unpacked two pallets of the wrong block.

    Understanding how to read material specifications on building drawings is not an optional extra for tradesmen working on anything beyond the most basic jobs. It protects your margin, keeps your relationship with the client intact, and means you spend more time building and less time driving back to the merchant.

    Frequently Asked Questions

    What is the difference between a material callout and a finish schedule on a building drawing?

    A material callout is an annotation directly on a drawing that identifies a specific material in a particular location, often with a leader line pointing to that area. A finish schedule is a separate table that lists every room or space in the project alongside the specified finishes for floors, walls, and ceilings. Both convey material information, but you need to read them together to get the full picture for any given area.

    How do I know if I'm working from the latest version of a building drawing?

    Check the title block in the corner of every drawing sheet. It will show a revision number or letter (such as Rev A, Rev B, P1, P2, etc.) and an issue date. Cross-reference this against the drawing issue register provided by the architect or main contractor. If no register has been provided, request one before starting work or ordering materials.

    What does an NBS clause reference on a building drawing mean?

    An NBS clause reference points to a section in the project’s written specification document, which is a separate document from the drawings themselves. The NBS system provides standardised descriptions of materials, products, and workmanship standards. If you see an NBS reference code on a drawing, always request the corresponding written specification so you understand the full requirements for that element of the build.

    Can I substitute a specified material for a similar alternative without telling the architect?

    No. Substituting a specified material without written approval from the designer carries serious risk, particularly where the material is tied to building regulations compliance, such as fire-rated products or insulation with a required thermal performance. Always raise a substitution request in writing before ordering an alternative, and keep a record of the approval received.

    Where do I find insulation specifications on architectural drawings?

    Insulation specifications are most commonly found on section drawings that cut through external walls, roofs, or floors, showing the full construction build-up. They may also appear on detail drawings showing junctions and edge conditions. The written specification document will provide the full performance requirements, including the product type, thickness, and thermal lambda value required.