Category: House & Home

  • Why Whole House Insulation Upgrades Are Keeping UK Trades Busy

    Why Whole House Insulation Upgrades Are Keeping UK Trades Busy

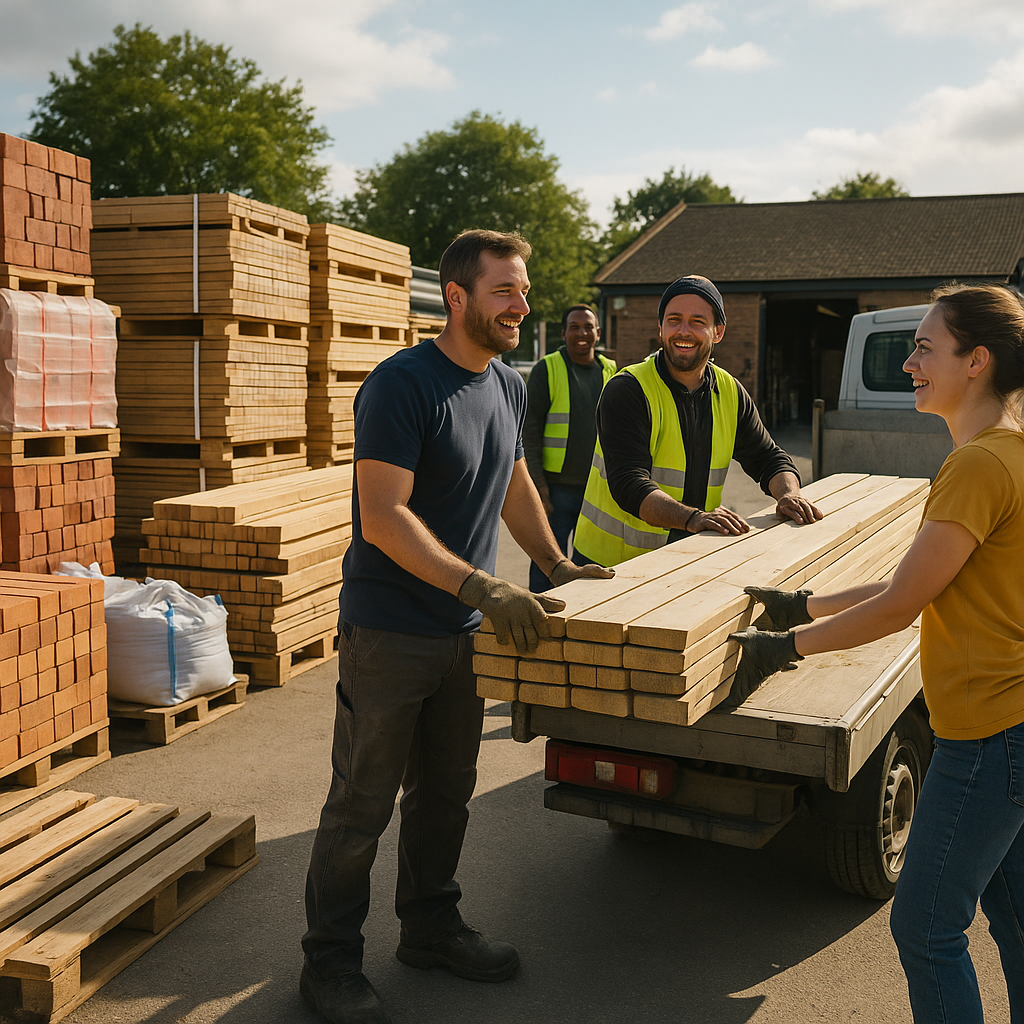
    If you are on the tools in the UK right now, you will have noticed the surge in whole house insulation upgrades. From lofts and cavities to underfloors and external walls, homeowners and landlords are finally waking up to the idea that stopping heat escaping is cheaper than endlessly paying bigger bills.

    What are whole house insulation upgrades in practice?

    On site, whole house insulation upgrades simply mean looking at the building as a complete system, not just ticking off a bit of loft roll and walking away. It is about identifying every major heat loss path and dealing with them in a sensible order.

    Most projects will mix and match a few of these measures:

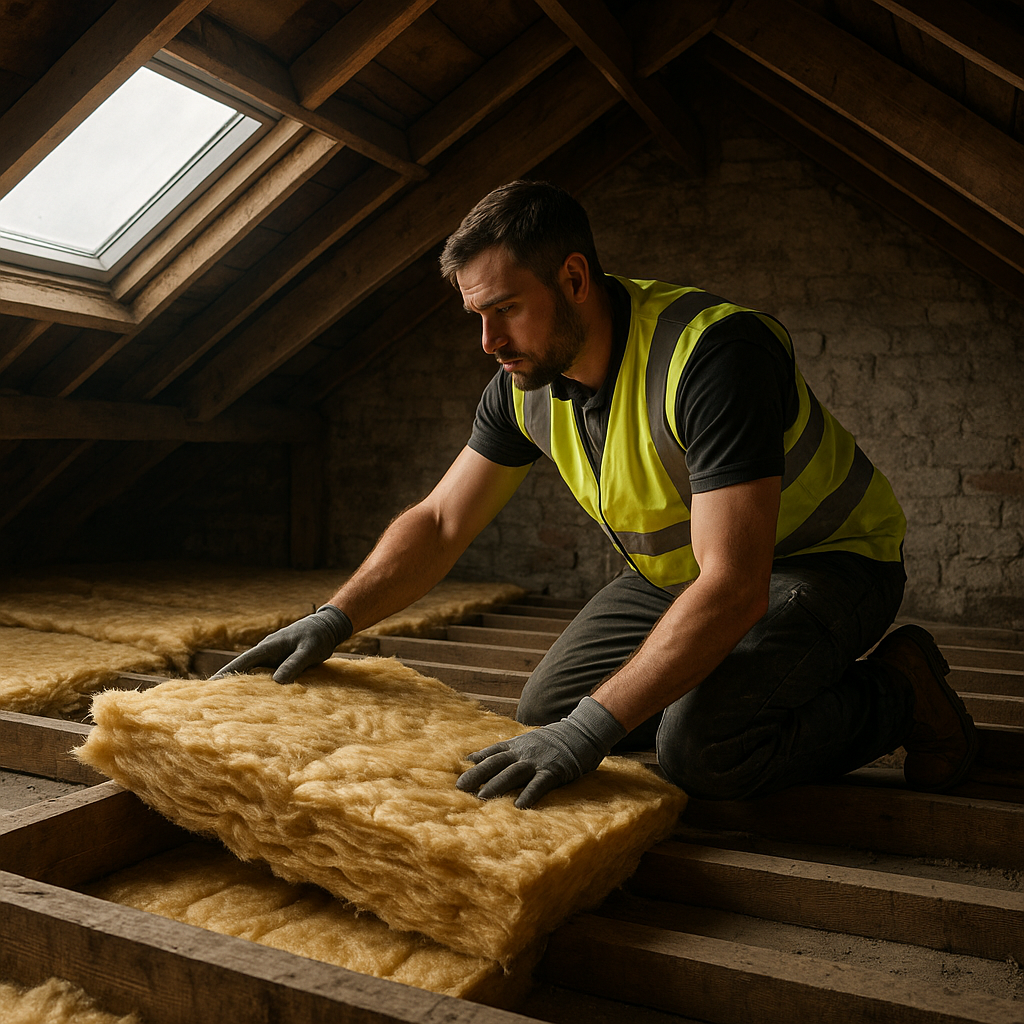
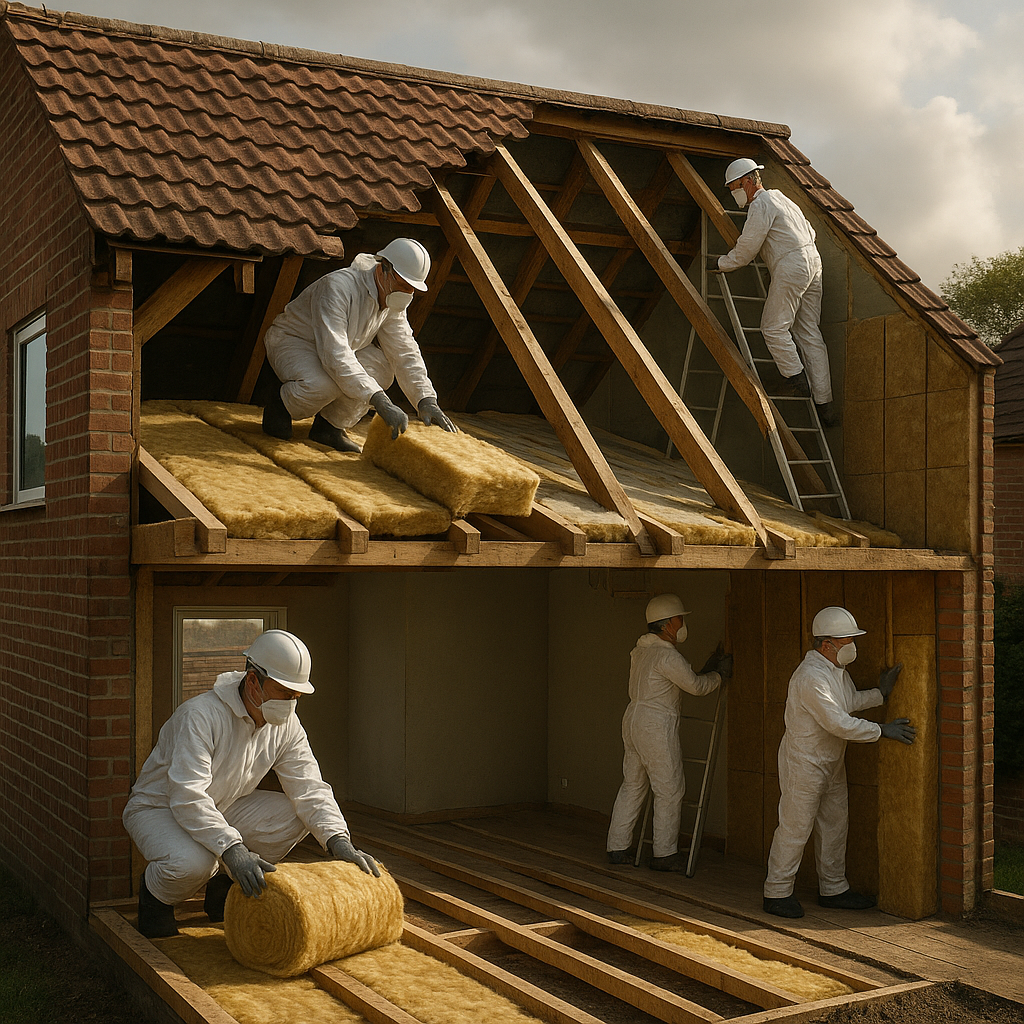
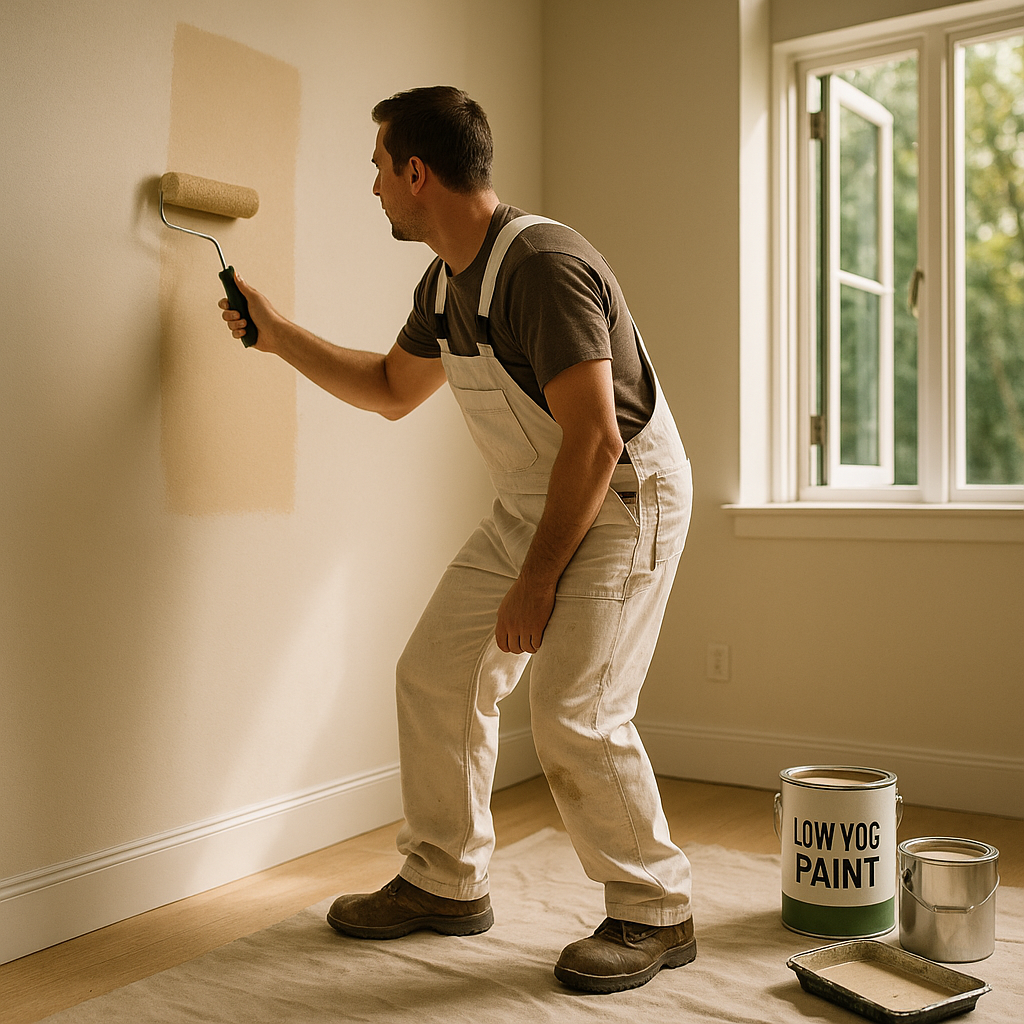
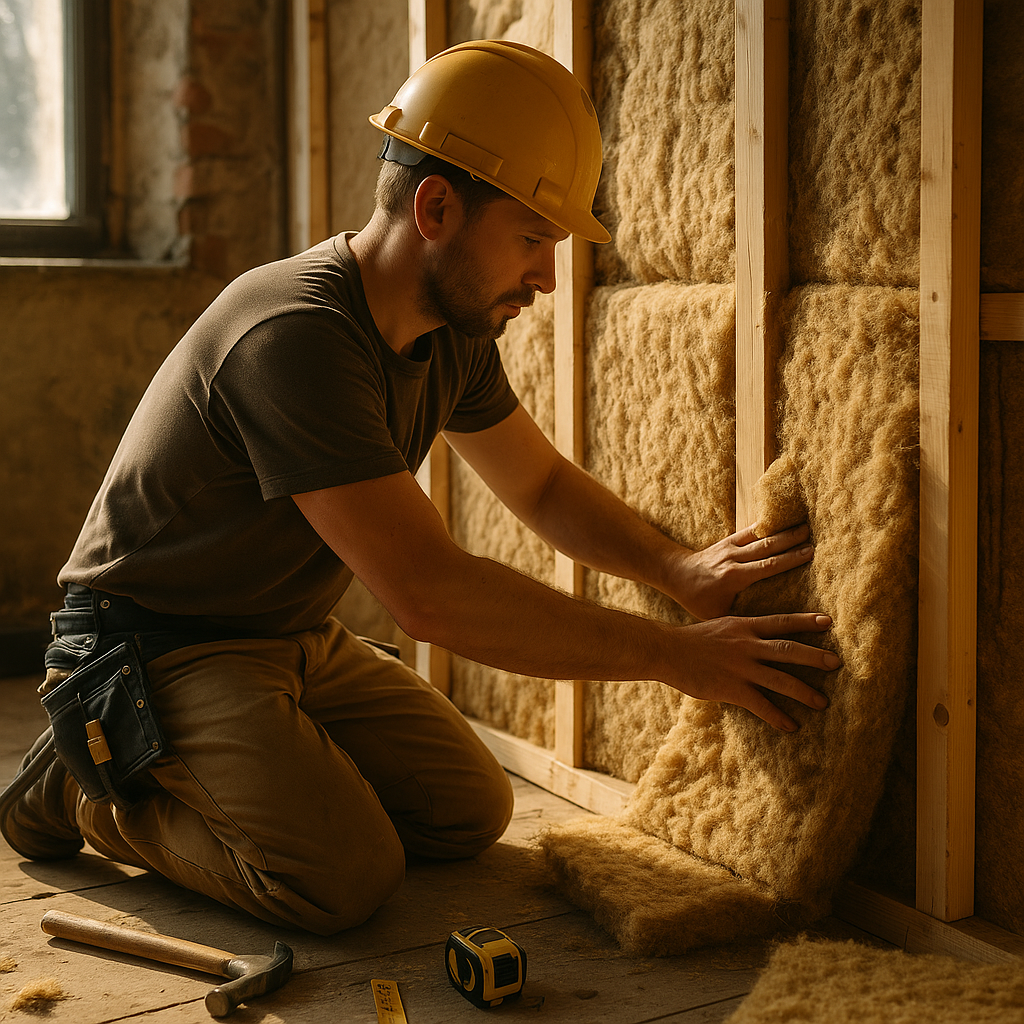
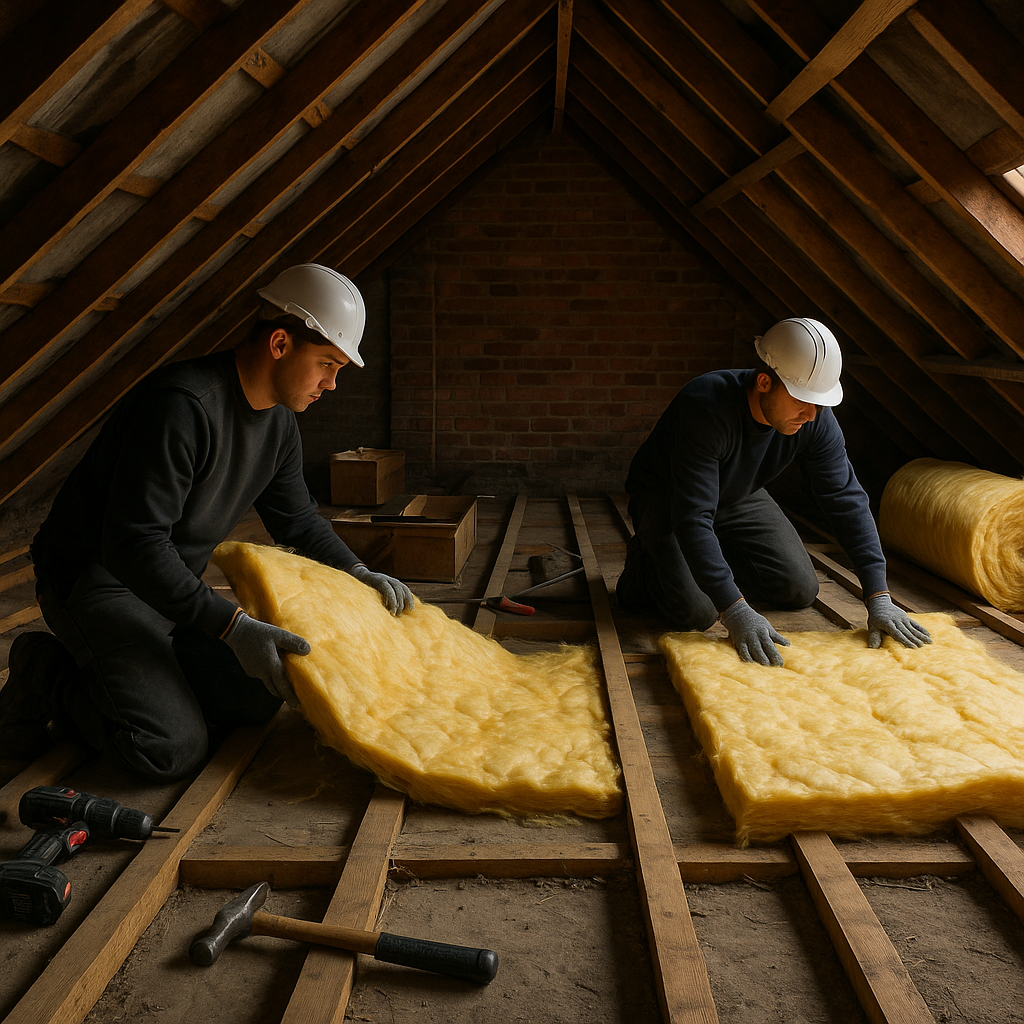
    • Loft and roof insulation – rolls, batts or PIR boards between and over joists or rafters
    • Cavity wall insulation – blown beads or foam where the cavity is suitable
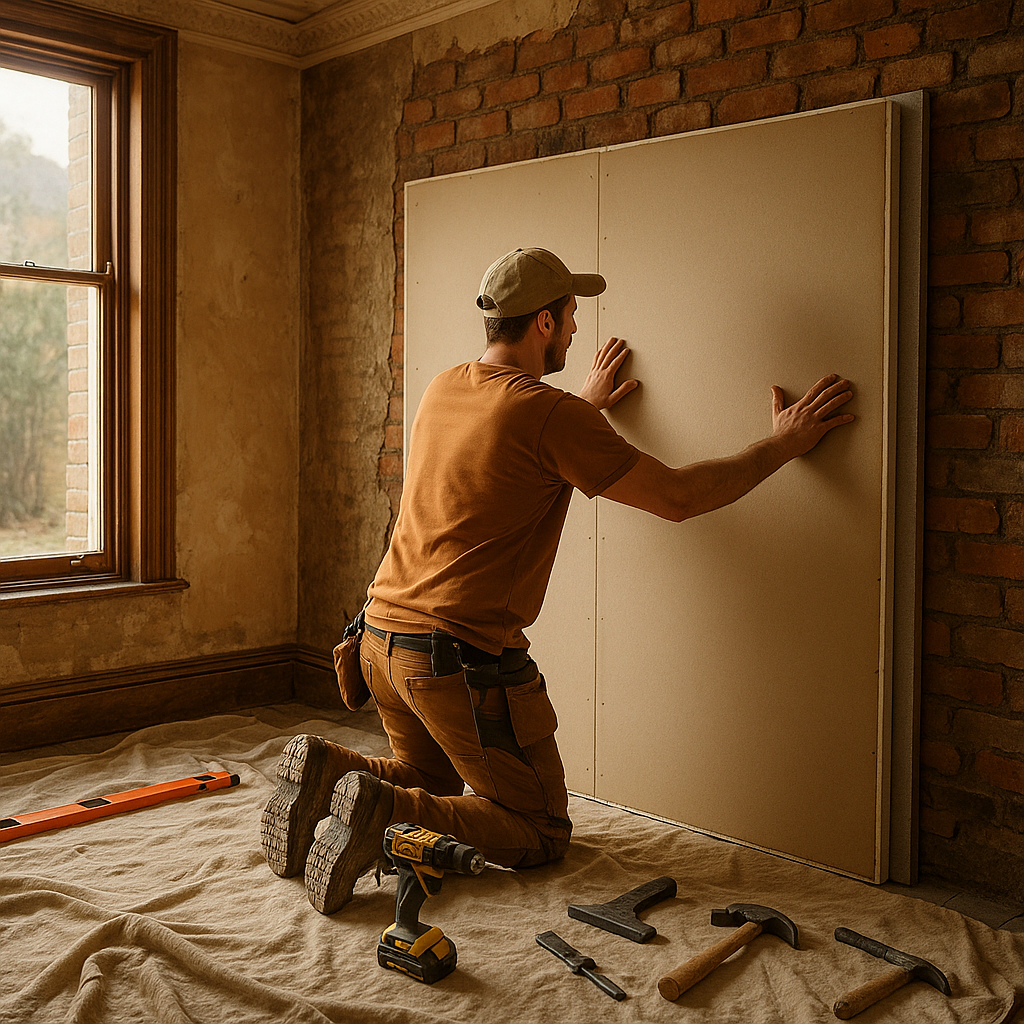
    • Internal wall insulation – insulated plasterboard on battens or direct-fix systems
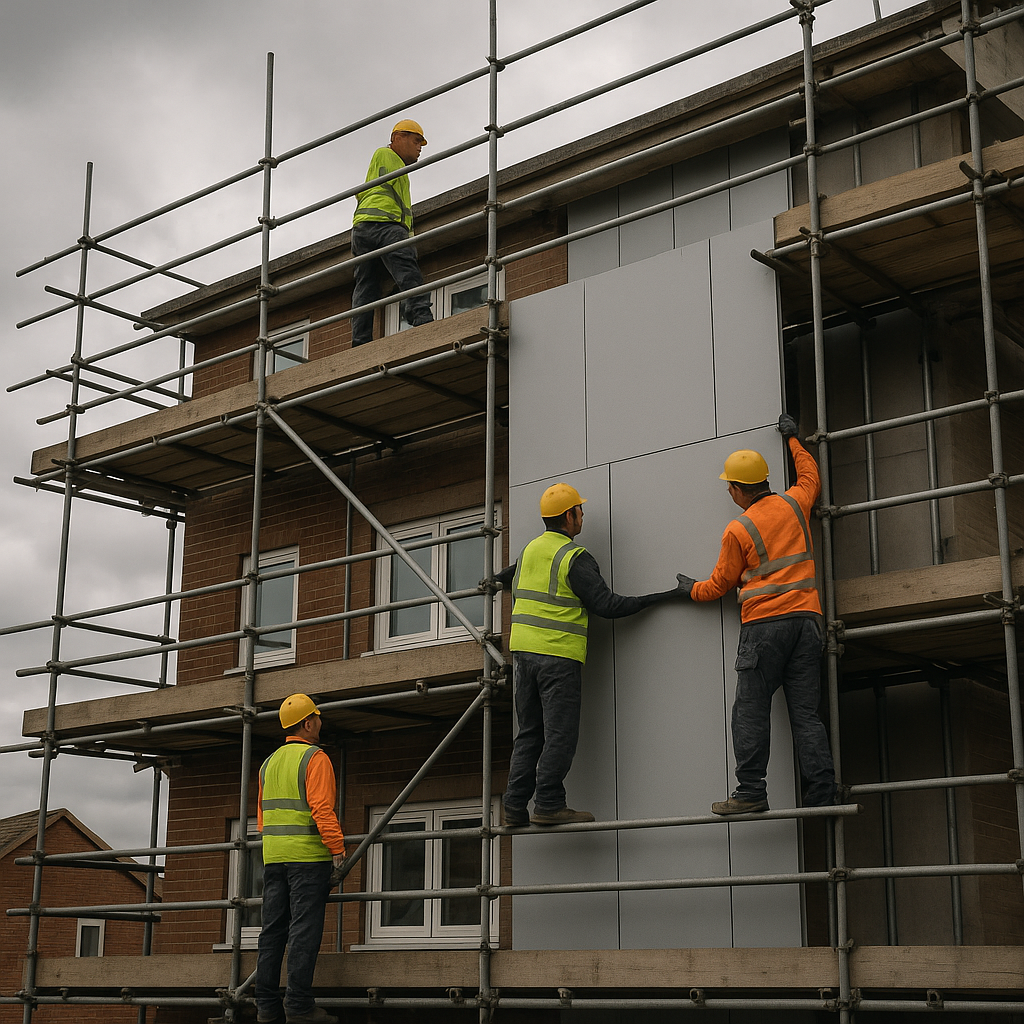
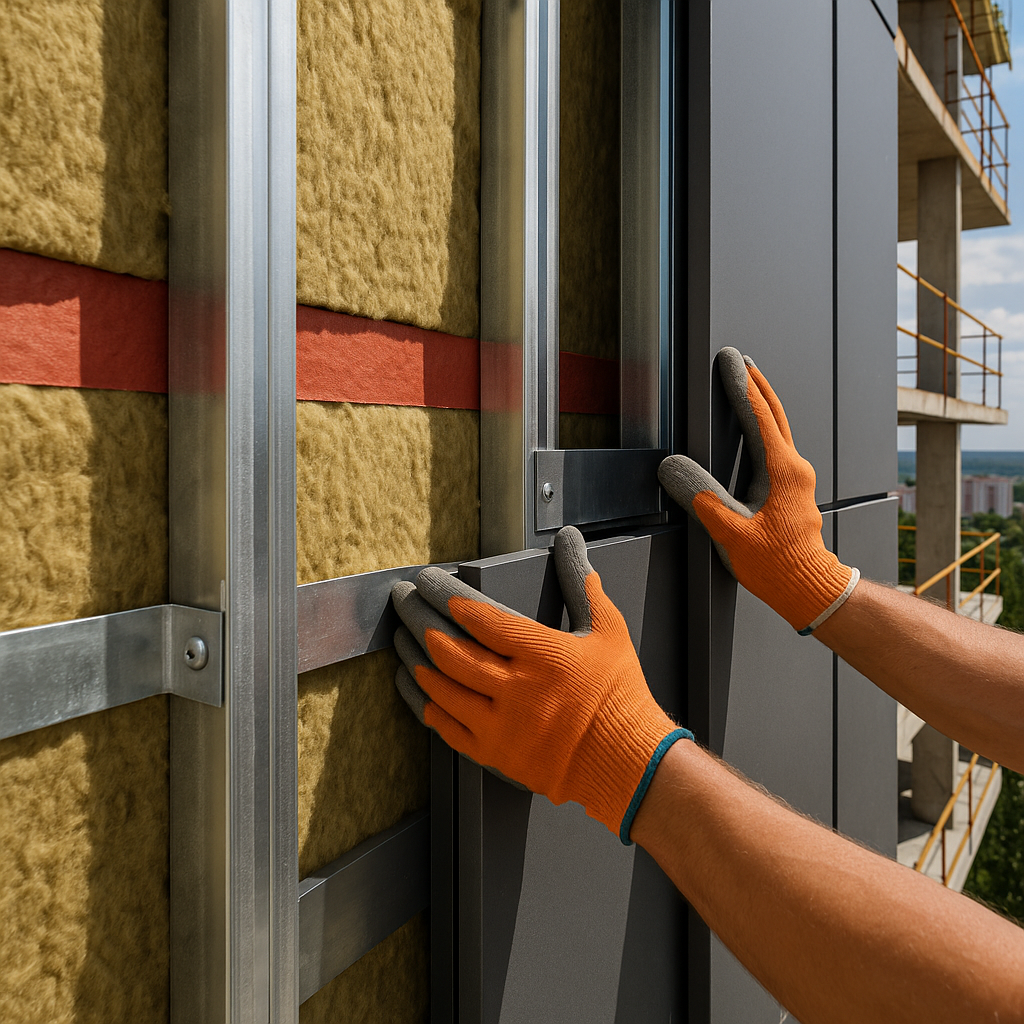
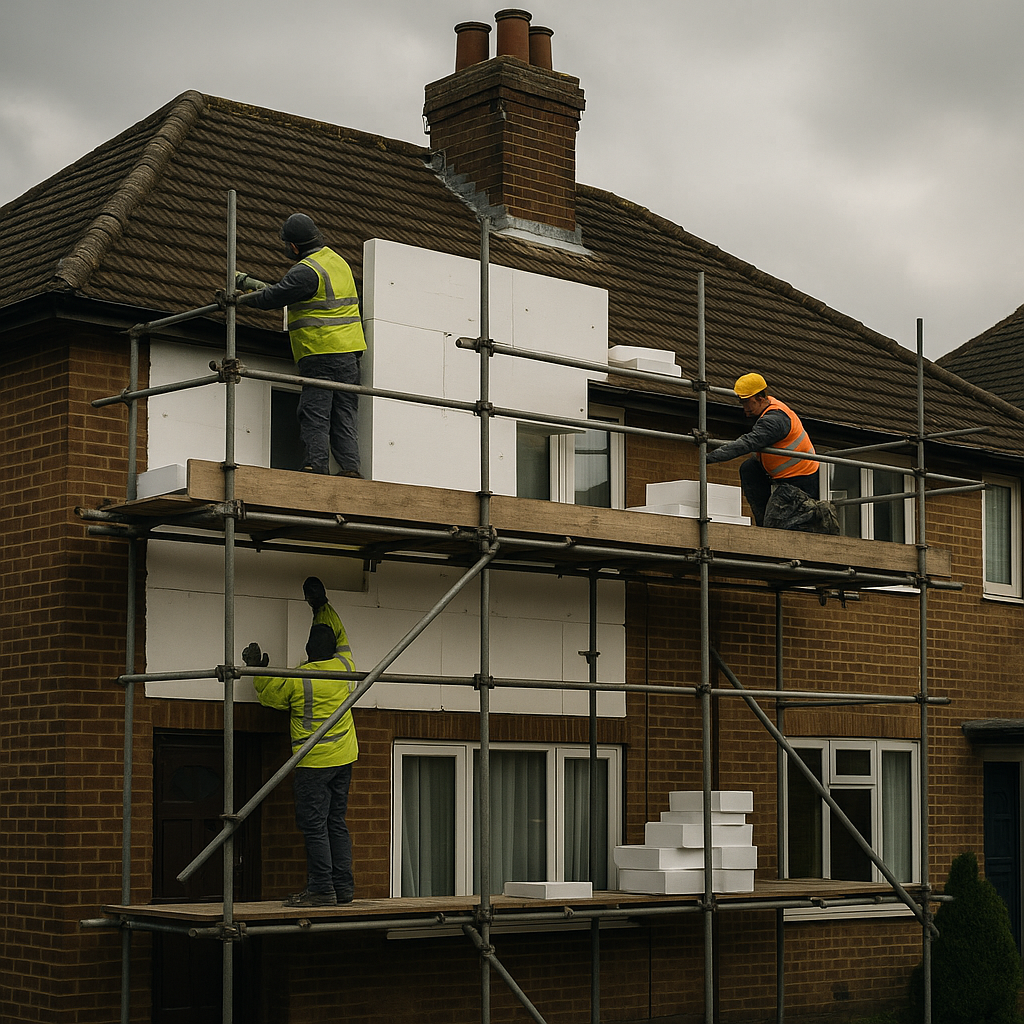
    • External wall insulation – EPS or mineral wool boards with a render finish
    • Underfloor insulation – between joists, on top of slabs, or from below in basements
    • Air tightness work – sealing gaps, taping membranes and improving detailing

    Done well, these measures cut draughts, make rooms feel warmer at lower thermostat settings and set the property up for any future heating changes.

    Why demand for whole house insulation upgrades is rising

    For trades, the big driver is simple: energy costs are still hurting. Clients might not know the technical jargon, but they understand cold rooms and scary direct debits. Government pressure on landlords to hit minimum efficiency standards is also pushing more serious retrofit work.

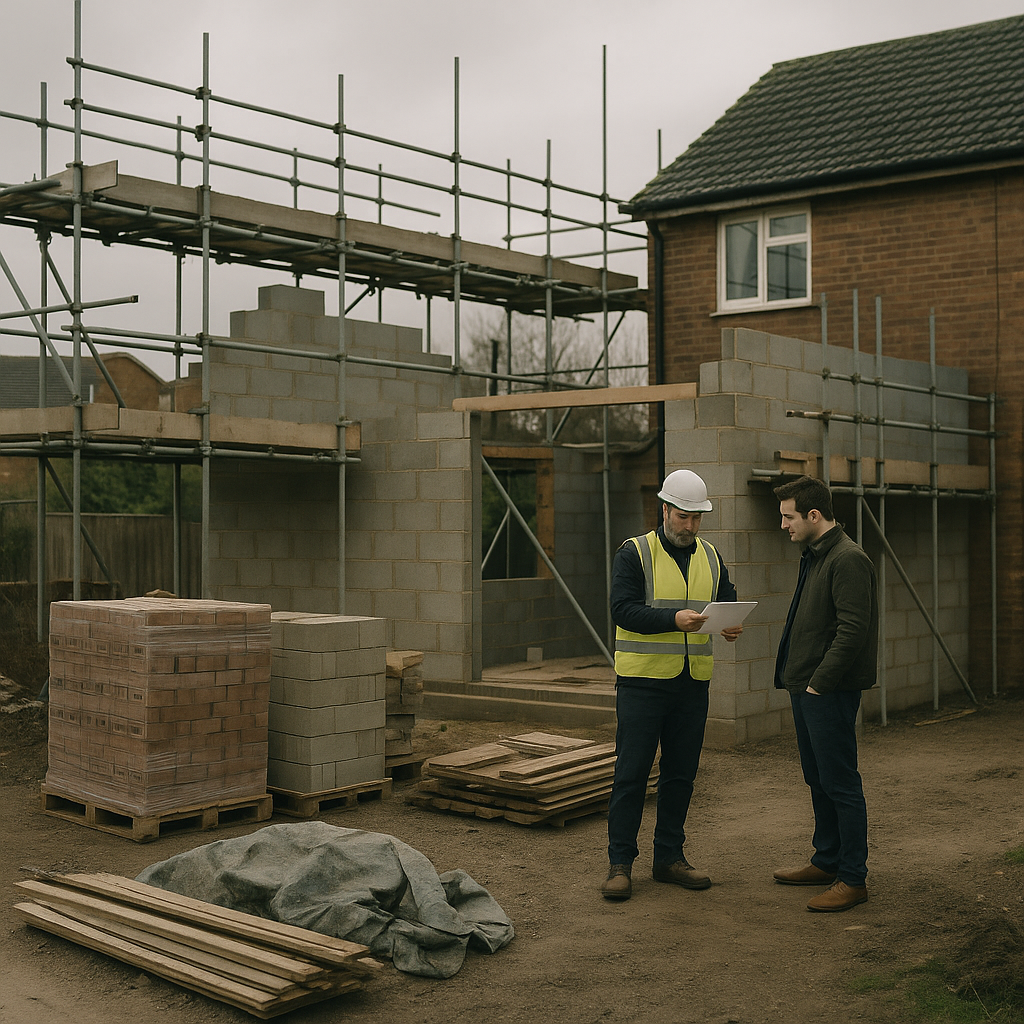
    Councils and housing associations are starting to package up work as full-property upgrades instead of one-off measures. That means better workloads for installers who can offer a joined-up approach instead of just chasing single-room jobs.

    Choosing the right materials for each part of the house

    The material choice can make or break these projects. In the loft, mineral wool remains the go-to for speed and cost, but rigid boards still have a place where depth is tight. For external wall insulation, many crews are now comfortable switching between EPS and mineral wool depending on fire and acoustic requirements.

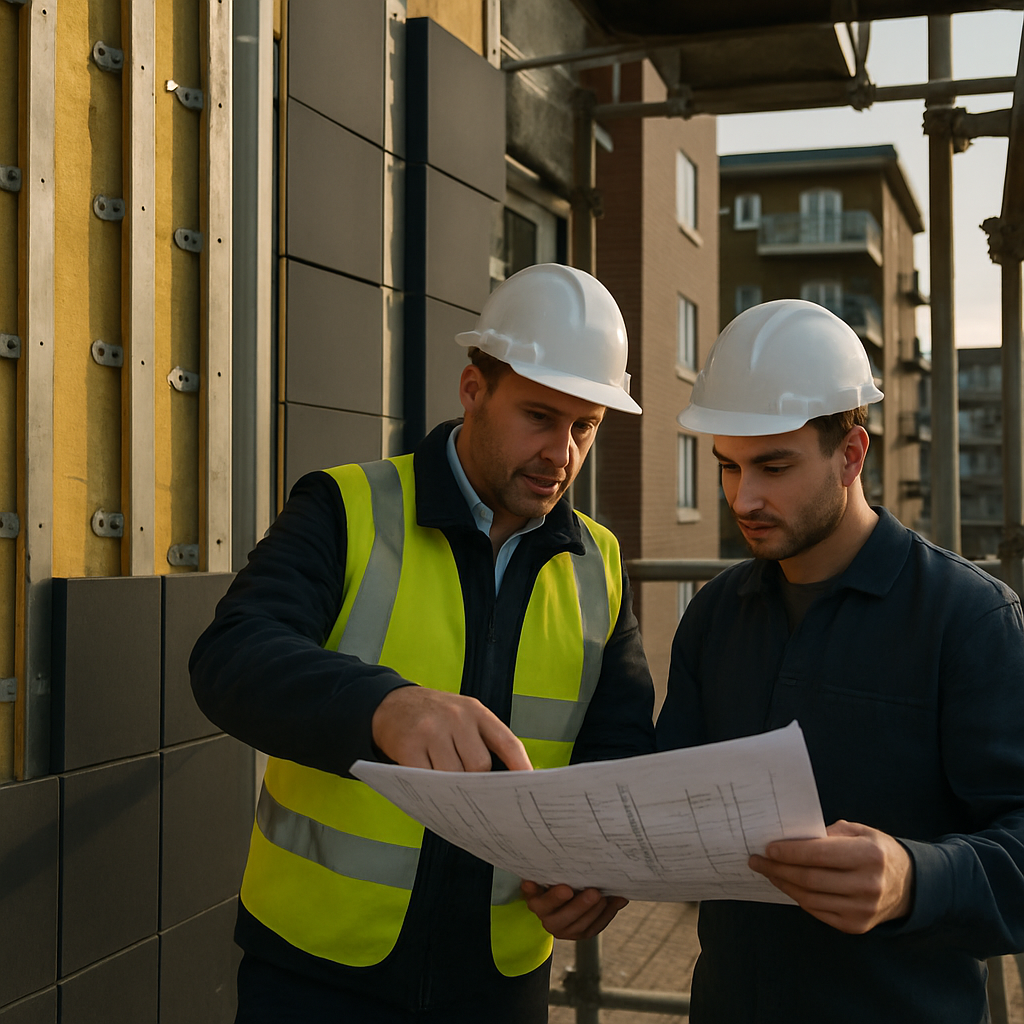
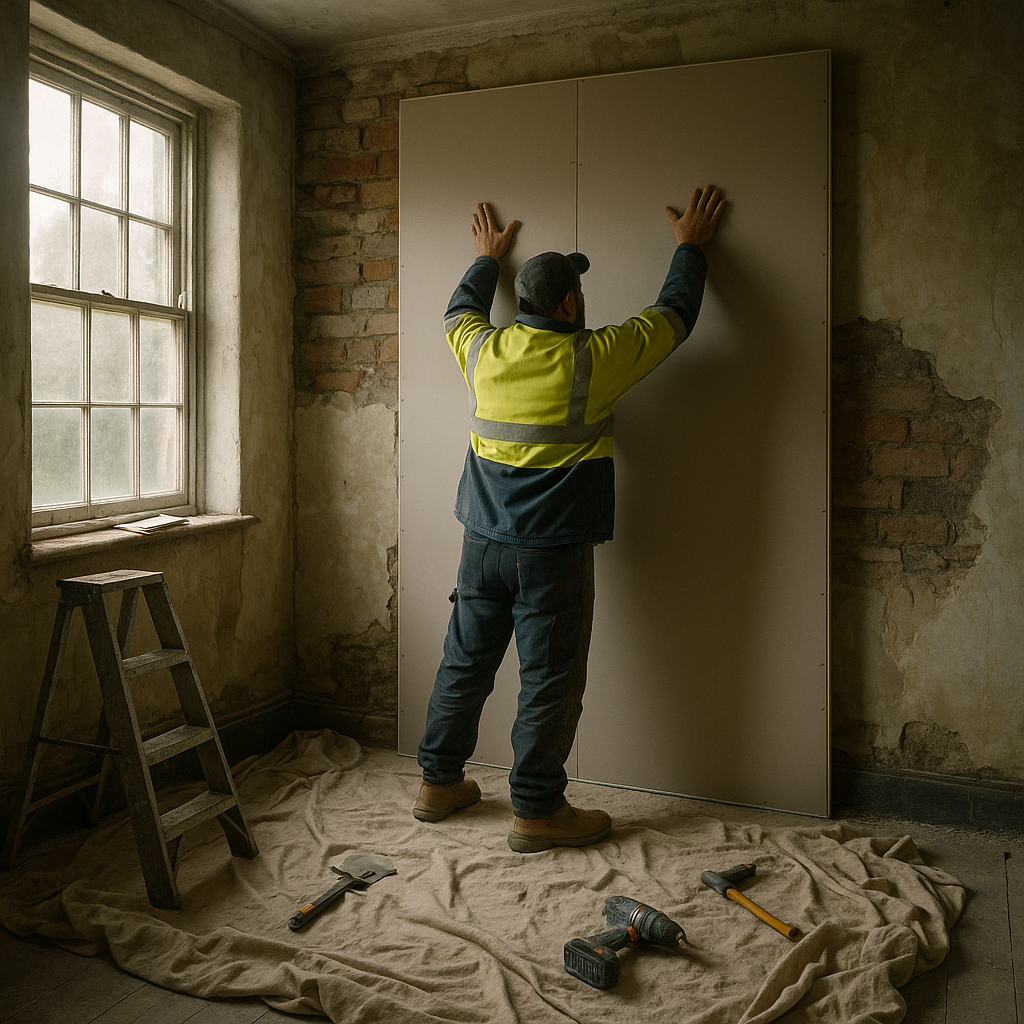
    On older solid wall terraces, internal systems need careful thought. Insulated plasterboard is quick, but trades need to understand dew points, vapour control layers and how to avoid mould in corners and reveals. Getting the detailing right around windows and sockets is where good installers stand out from the crowd.

    How trades can add value beyond the insulation itself

    Clients often think insulation is just about thickness, but the real value for a good installer is in the detailing and advice. Simple steps like explaining ventilation options, checking loft access safety, or recommending basic air tightness improvements can turn a standard job into a full upgrade.

    Some firms link their insulation work with services like energy monitoring or basic draught surveys. Others partner with specialists who handle more complex design on listed or hard-to-treat properties, especially when combining measures such as external wall systems and a Fabric-first retrofit approach.

    Common pitfalls to avoid on site

    With more money flowing into retrofit, the risk of rushed or poor-quality work goes up. A few issues are cropping up again and again:

    • Bridging insulation over recessed lights or downlighters without proper covers
    • Ignoring ventilation, leading to condensation problems in lofts and bathrooms
    • Poorly sealed joints in internal wall systems, causing cold spots and cracking
    • Not coordinating with electricians or plumbers, so services slice through new insulation

    Taking the time to explain these risks to clients can actually help justify better materials and a more realistic labour allowance.

    Positioning your business for the retrofit wave

    For small building firms, joiners and multi-trades, whole house insulation upgrades are a solid way to keep the diary full. Upskilling on moisture management, air tightness and detailing will separate serious operators from the rest. Many crews are finding that one or two people trained in survey and design can feed steady work to the rest of the team.

    External wall insulation being fitted during whole house insulation upgrades on a UK semi-detached home
    Tradesman fitting internal wall boards as part of whole house insulation upgrades in an older property

    Whole house insulation upgrades FAQs

    What counts as a whole house insulation upgrade?

    A whole house insulation upgrade means looking at all the main heat loss areas in a property and tackling several of them together, rather than just doing a quick loft top-up. In practice that usually includes the loft or roof, walls, floors and basic air tightness work, with materials and methods chosen to suit the age and construction of the building.

    How long does a full insulation upgrade usually take?

    Timescales depend on property size and how many measures are included, but for a typical three-bed semi, a full upgrade might run from a couple of days for loft, cavity and basic draught-proofing up to a few weeks if you are adding internal or external wall insulation. Good planning, clear access and coordination with other trades help keep programmes tight.

    Do whole house insulation upgrades always need new heating systems?

    Not necessarily. Many homes see big comfort and bill improvements just from better insulation and air tightness while keeping their existing boiler or radiators. However, once the heat demand drops, it often becomes easier and more cost-effective to right-size or later upgrade the heating system, because it does not need to work as hard to keep the place warm.

  • A Practical Guide To Retrofit Insulation For Older UK Homes

    A Practical Guide To Retrofit Insulation For Older UK Homes

    If you work on draughty terraces or tired semis, you already know the demand for retrofit insulation for older homes is only going one way. Owners want warmer rooms, lower bills and better comfort, and they are looking to tradesmen to make it happen without wrecking the character of the building.

    Why retrofit insulation for older homes is booming

    Energy prices might jump up and down, but the long-term trend is clear: customers hate wasting heat. Many pre-1990 homes bleed energy through walls, roofs and floors, and a lot of them are still sitting on minimal or patchy insulation. That is why retrofit work is turning into a steady pipeline for builders, joiners and multi-trades who understand how to treat older fabric with respect.

    On top of comfort and bills, more landlords and sellers are thinking about energy ratings. While you might not deal directly with certificates, you will often be the one asked how to get a cold property up to scratch before they call epc services to get the relevant certifications.

    Understanding the building before you insulate

    The biggest mistake with retrofit insulation for older homes is treating every property like a modern cavity-wall box. Before you quote, you need to know what you are dealing with:

    • Solid brick or stone walls that need to breathe
    • Timber frame sections hidden behind old plasterboard
    • Suspended timber floors with limited access
    • Roof shapes that make some loft areas hard to reach

    Moisture is the silent killer. If you block ventilation paths or trap damp behind new boards, you are lining up rot, mould and call-backs. Take time to check existing vents, chimney flues, air bricks and roof ventilation, and factor them into your plan.

    Best areas to target with retrofit insulation

    When planning retrofit insulation for older homes, it pays to go for the easy wins first, then look at deeper upgrades if the budget allows.

    Loft and roof insulation

    Loft insulation is still the simplest upgrade on most jobs. Topping up to a decent depth with mineral wool is quick and cost effective, as long as you protect downlights, maintain cross ventilation and keep clear walkways for storage. On some older properties the roof space is chopped up with slopes and dormers, and that is where rigid boards or insulated plasterboard on the ceiling can be a better shout.

    Walls – internal, external or cavity

    For solid walls, you are usually choosing between internal wall insulation and external systems. Internally, insulated plasterboard on battens or direct-fix boards can work well, but you have to think about skirtings, sockets, window reveals and reducing cold bridges. External systems can be brilliant for thermal performance, but they change the look of the building and can be a non-starter in conservation areas.

    Where there is a true cavity and no damp issues, blown cavity insulation is often the fastest upgrade. Always check exposure, pointing quality and any existing damp before you recommend it.

    Floors and cold bridges

    Suspended timber floors are a common weak spot in period homes. Insulating between joists from below, with netting to support mineral wool or rigid boards, can make a huge difference. While you are there, watch out for draughts around skirtings, service penetrations and old floor vents that no longer serve a purpose.

    Choosing materials that suit older buildings

    Trades are spoiled for choice on insulation materials now, from standard mineral wool and PIR boards to wood fibre and other breathable options. The trick is matching product to building type. Older solid-wall houses often benefit from vapour-open systems that let moisture move, rather than trapping it. For some projects, clients will ask about greener materials, especially on heritage jobs, so it is worth being familiar with alternatives beyond the usual foil-faced boards stocked by the sheds and merchants like Wickes.

    Quoting and managing client expectations

    Retrofit insulation for older homes is rarely a simple in-and-out job. Make it clear in your quote where you might uncover surprises – rotten timbers, hidden voids or asbestos-containing materials – and price in time for making good. Photos, simple sketches and plain-language explanations help clients understand why you are suggesting a particular approach instead of the cheapest quick fix.

    Internal wall upgrade showing retrofit insulation for older homes in a Victorian terrace
    Refurbishment project demonstrating whole house retrofit insulation for older homes

    Retrofit insulation for older homes FAQs

    Where should I start when planning retrofit insulation for older homes?

    Start with a basic survey of the property: roof space, wall type, floor construction and existing ventilation. On most older homes, the easiest wins are topping up loft insulation and sealing obvious draughts around floors and openings. Once those are addressed, you can look at walls and harder to reach areas, always checking for damp or structural issues before you cover anything up.

    Can solid brick walls be insulated internally without causing damp problems?

    Yes, but only if you respect how the wall handles moisture. Use a system designed for solid walls, pay attention to vapour control, and avoid creating cold bridges at window reveals, joist ends and corners. Keeping external pointing in good condition and maintaining some background ventilation also helps reduce the risk of condensation and mould behind the new linings.

    What insulation materials work best for older suspended timber floors?

    Mineral wool supported by netting between joists is a common and cost effective option for older timber floors. Rigid boards can also work where access and joist spacing allow. Whatever you choose, make sure underfloor ventilation is not blocked, services are protected and gaps around skirtings and penetrations are sealed to cut draughts without trapping moisture in the structure.

  • How To Price Building Work So You Actually Make A Profit

    How To Price Building Work So You Actually Make A Profit

    If you work on the tools for a living, you already know that how to price building work can make or break your week. Get it wrong and you are basically paying for the privilege of grafting. Get it right and you have a steady pipeline of jobs that actually pay.

    Why pricing building work is so tricky

    Pricing is not just about guessing how long a job will take and doubling it. Materials move, fuel goes up and down, and clients always seem to remember an extra little job right at the end. On top of that, different trades price differently, so customers get wildly different quotes and start haggling.

    Most lads and lasses on site were never taught proper costing. You learn from your boss, copy what others are doing, or just go with your gut. That might work on a small repair, but once you are into refurbs, extensions and fit outs, one bad quote can wipe out months of graft.

    Key steps in how to price building work properly

    The only way to stay ahead is to break your pricing down into clear steps. That way you can repeat it for every job and tweak the numbers instead of starting from scratch each time.

    1. Start with a detailed site visit

    Never price from photos alone if you can help it. Walk the job, measure everything, check access, parking, waste removal and neighbours. Look for anything that could slow you down – awkward staircases, tight back alleys, no power on site, or tricky existing structures.

    Take photos and notes while you are there. Many solid firms, like some of the bigger regional contractors you see working alongside outfits such as Travis Perkins on busy sites, use standard checklists so they do not miss anything obvious.

    2. Build a proper materials list

    Break the job into sections – groundworks, structure, first fix, second fix, finishes. List every material you will need, including fixings, trims, adhesives and sundries. Then add wastage. For most jobs, 10 percent is a sensible starting point, more for tiles and fragile finishes.

    Price materials using up to date supplier rates. Merchant apps and trade counters are handy for this. Remember to include delivery charges, hire kit, skips and any specialist gear you need.

    3. Work out your labour realistically

    This is where most trades undercut themselves. Be honest about how long each stage will take, including set up, protection, cleaning down and snagging. Do not price as if everything will run perfectly – it never does.

    Use your real day rate, not the one you think the client wants to hear. Your day rate has to cover your wages, holidays, down time, van, tools, insurance and training. If it does not, you are just subsidising the job.

    4. Add overheads and profit, not just wages

    Once you have materials and labour, add your overhead percentage. That covers your office time, quoting, bookkeeping, marketing and all the boring stuff that keeps the business alive. After that, add your profit margin on top – that is your reward for taking the risk.

    Plenty of decent small contractors, like the sort you might see collaborating with national builders such as Kier Group on local schemes, work on the basis that if there is no profit, there is no point doing the job.

    A simple formula for pricing building work

    You do not need fancy software to learn how to price building work, but you do need a consistent method. A simple formula you can use on every quote looks like this:

    Materials + Labour + Overheads + Profit = Final price

    For example, if materials come to £2,000, labour is £3,000, overheads are 15 percent of labour (£450), and you want 20 percent profit on the total (£1,090), your final price would be £6,540. Seeing it laid out like that makes it much easier to explain to clients why you cannot just knock off a random chunk.

    Contractor explaining how to price building work to a homeowner on site
    Tradesman using a simple system for how to price building work in a workshop

    How to price building work FAQs

    How do I work out my day rate for building work?

    Start by adding up your yearly costs, including your own wages, van, tools, insurance, training, holidays and quiet periods. Divide that total by the number of days you realistically expect to work on site in a year, not 365 days. That figure is your minimum day rate before profit. Once you know that, you can price jobs with confidence instead of guessing what the client wants to pay.

    Should I give a fixed price or work on day rate?

    For small, clearly defined jobs, a fixed price usually works best because clients know exactly what they are paying. For open ended or very uncertain work, such as strip outs where you do not know what you will find, a day rate or cost plus arrangement can be safer. Whichever you choose, put it in writing and explain how changes or extras will be handled before you start.

    How often should I review my building prices?

    Review your prices regularly, at least every few months, and always after big changes in material or fuel costs. Look back at completed jobs to see where you under or over estimated. Adjust your labour times and overhead percentage based on real numbers, not just feel. Keeping your pricing updated means you stay competitive without working for free.

  • Green building materials on real jobs: what actually works?

    Green building materials on real jobs: what actually works?

    If you are on the tools every day, you will have noticed more clients asking about green building materials. Eco this, sustainable that, and plenty of marketing fluff in between. The question is simple: which products actually make a difference, and which ones just make the spec sheet look pretty?

    What do we mean by green building materials?

    Before you can price or recommend anything, it helps to know what people are really asking for. When clients talk about green building materials, they usually mean one or more of the following:

    • Lower impact on the environment during manufacture or transport
    • Healthier to live with in the finished building
    • Better energy performance or durability over the long term
    • Less waste heading to skip and landfill

    On site, that translates into different choices for paint, timber, aggregates, insulation, plasters and concrete mixes. Some are a straightforward swap, others need a bit more skill and planning.

    Low VOC paints: worth the switch?

    Low VOC paints are one of the easiest green swaps you can make. VOCs are the solvents that give off that heavy paint smell and can cause headaches, irritation and long cure times. Modern low VOC and water based paints have come a long way. The good ones now cover well, dry fast and are much nicer to work with in tight, poorly ventilated rooms.

    The key is not to grab the cheapest tin with a green leaf on the label. Look for reputable trade brands with clear VOC ratings and check coverage figures. For most domestic and light commercial jobs, low VOC paints are a genuine improvement for both the client and the lads on site breathing it in all day.

    FSC timber and responsible sourcing

    Timber is often the first thing switched when clients ask for green building materials. FSC or similar certification means the timber has come from responsibly managed forests. On site, it cuts, fixes and finishes just like standard stock, so there is no change to your working methods.

    The main differences are cost and availability. Some sizes and species might need a bit more lead time. For structural work and visible joinery, FSC timber is a solid, practical option that can be backed up with paperwork for architects and building control when they ask.

    Recycled aggregates and hardcore

    Recycled aggregates are becoming standard on many groundworks jobs. Crushed concrete and brick, properly graded and certified, performs well for sub bases, backfill and some structural layers. It keeps demolition waste out of landfill and reduces the amount of virgin stone being quarried.

    What matters is quality control. Always check certificates, grading and any restrictions on use. For driveways, patios, footpaths and many slab bases, recycled aggregate is a simple, cost effective green choice. For heavily loaded structural work, follow the engineer’s spec and do not guess.

    Natural insulation: where it makes sense

    Natural insulation like sheep’s wool, wood fibre and cellulose is getting more popular, especially on older properties and high end refurbs. The big advantages are breathability, moisture management and comfort. These materials can help keep traditional walls dry and reduce condensation risk.

    They are usually more expensive than mineral wool and can be bulkier for the same U value, so you need to plan your build-ups carefully. They shine in roofs, timber frame walls and internal insulation on solid walls where breathability is important. For basic loft top-ups where cost is king, standard mineral wool still does the job.

    Lime plasters and breathable finishes

    Lime plasters and renders are not new, but they are back in demand as part of the shift towards greener, more breathable systems. Lime allows moisture to move through walls, which is ideal for solid masonry and heritage work. It can help prevent damp problems that modern cement based products sometimes trap in.

    The trade-off is that lime needs more skill and patience. It cures slower, can be more temperamental with temperature and humidity, and usually costs more in labour. When used in the right setting – old stone, brick or cob, or where a breathable build-up is designed – it is a genuinely better choice. On standard blockwork with cement based systems all around it, the benefits are limited.

    Decorator applying low VOC paint as part of using green building materials on an interior job
    Builder installing natural insulation as one of several green building materials in a timber stud wall

    Green building materials FAQs

    Are green building materials always more expensive?

    Not always. Some green building materials, like recycled aggregates or certain low VOC paints, can be cost neutral or even cheaper than traditional options. Others, such as natural insulation or lime plasters, usually cost more in both materials and labour. The trick is to match the product to the job: use the higher cost options where their benefits genuinely matter, and stick with proven standard materials where the gains would be minimal.

    Do I need special training to use lime plasters and natural insulation?

    You do not need formal qualifications, but some training or mentoring is strongly recommended before you take on full jobs with lime plasters or natural insulation systems. They handle differently to cement based products and standard fibreglass, with different curing times, fixings and detailing. Many manufacturers and suppliers offer short courses or on site support, which can save a lot of rework and callbacks later.

    How can I explain green building options clearly to clients?

    Keep it simple and practical. Explain what each option does for them: better indoor air, less damp risk, lower energy bills or a smaller environmental footprint. Use clear examples, such as swapping to low VOC paint in bedrooms or choosing FSC timber for visible joinery. Be honest about cost and any changes to programme, and back up your advice with product data sheets or supplier info so clients feel confident in the choices you are recommending.

  • Fire safety regulations for external walls: what trades need to know

    Fire safety regulations for external walls: what trades need to know

    If you are on site on high rise flats or big resi blocks, you cannot ignore the latest fire safety regulations for external walls. The rules around cladding, insulation and fixings have tightened, and it is your ticket on the line if the wrong materials go up.

    Why fire safety regulations for external walls have changed

    After several major high rise fires in the UK, investigations showed how some external wall systems helped flames race up the outside of buildings. Combustible cladding, insulation and poorly detailed cavities all played a part. The response has been tougher building rules, especially on multi storey residential jobs.

    For most taller residential buildings, the external wall is now treated as a full fire risk zone, not just a weather skin. That means every part of the build up is under the microscope: board, insulation, membranes, fixings, brackets and sealants.

    Key height triggers and building types

    The strictest rules hit multi storey residential buildings. The exact wording shifts over time, but as a working guide you will see the tightest limits on:

    • Blocks of flats and similar residential buildings over 11 metres
    • Even tougher requirements once you are over 18 metres
    • Student accommodation, care homes and hospitals treated like resi in many cases

    On these jobs, you should assume the external wall build up will need non combustible or very limited combustibility materials unless the drawings and spec clearly say otherwise.

    What ‘reaction to fire’ ratings actually mean

    Most product data sheets now shout about “reaction to fire” ratings. These are European classes from A1 down to F. In short:

    • A1 – Fully non combustible, will not contribute to a fire
    • A2 – Almost non combustible, very limited contribution
    • B to D – Increasingly combustible, can contribute to fire spread
    • E and F – Poor or untested performance

    On higher residential blocks, the usual rule is that external wall components exposed in a fire must be A2-s1,d0 or better, and often A1 is preferred. The extra letters cover smoke (s1 is low smoke) and flaming droplets (d0 means no droplets). When you check a product, look for that full code, not just the headline letter.

    Materials now restricted on multi storey residential jobs

    Under the tighter fire safety regulations for external walls, several common materials are now heavily restricted or banned on taller residential blocks:

    • Combustible cladding panels – Many aluminium composite panels with plastic cores are out, unless they meet the top ratings
    • Plastic based insulation – PIR, PUR and EPS are usually not allowed in the main external wall build up on higher resi, except in very specific, tested systems
    • Combustible membranes – Standard breather membranes or sarking felt may not meet the rating needed unless they are specially tested
    • Timber cladding – Often restricted or completely banned on taller resi blocks, unless used in limited, clearly defined areas

    None of this means these materials are useless. They are still common on low rise, industrial or commercial jobs. But on multi storey residential, you must assume they are a problem unless the spec and fire engineer say otherwise.

    Typical compliant materials and build ups

    On taller residential jobs, you are more likely to see:

    • Non combustible cladding such as solid aluminium, steel or fibre cement meeting A2 or A1 ratings
    • Mineral wool or stone wool insulation with A1 reaction to fire
    • Non combustible cavity barriers and fire stops at floor slabs and around openings
    • Metal support systems and brackets with tested fire performance

    These systems can be slower to handle and heavier to fix than the old plastic based options, so you need to allow for more labour, extra fixings and careful setting out.

    Practical checks for trades on site

    The fire safety regulations for external walls live in long documents, but your day to day checks are simple:

    Detail of mineral wool insulation and cavity barriers complying with fire safety regulations for external walls on a high rise project
    Site team checking drawings to ensure cladding and insulation meet fire safety regulations for external walls on a residential building

    Fire safety regulations for external walls FAQs

    Which materials are usually allowed on high rise residential external walls?

    On high rise residential jobs the safest bet is non combustible products. That normally means mineral wool or stone wool insulation, metal or fibre cement cladding with A1 or A2-s1,d0 ratings, and non combustible cavity barriers and fixings. Always check the drawings and fire strategy before ordering materials.

    Can I still use PIR or EPS insulation on taller residential buildings?

    Plastic based insulations such as PIR, PUR and EPS are heavily restricted on taller residential blocks. They may only be allowed as part of a specifically tested system with full fire engineering sign off. Never assume they are acceptable just because they were used on past jobs. Check the specification and fire performance data every time.

    How do I check if a cladding product meets the fire requirements?

    Look for the reaction to fire classification on the product data sheet, for example A1 or A2-s1,d0. Make sure the rating matches or exceeds what is called for in the drawings and building regulations for that building height and use. If the rating is missing or unclear, do not install the product until the designer or site manager confirms it is suitable.

  • Best Fabrics for Workwear on Muddy, Wet Building Sites

    Best Fabrics for Workwear on Muddy, Wet Building Sites

    If you spend your days on scaffolds, in trenches or trudging through half finished plots, you know that not all gear is equal. Finding the best fabrics for workwear is the difference between finishing the day dry and comfortable or soaked, freezing and chafed to bits.

    Most site gear hangs on a few key materials: cotton, polycotton, ripstop blends, softshell and modern waterproof membranes. Each has its place, but they behave very differently once you add mud, rain and constant abrasion into the mix.

    What makes the best fabrics for workwear on site?

    Before picking favourites, it helps to know what you are actually asking from your kit. On a real building site you need:

    • Durability against kneeling on concrete, rubbing on brick and catching on rebar
    • Weather resistance for sudden downpours and long, damp days
    • Comfort for climbing ladders, crouching and carrying all day
    • Safety with flame resistance, visibility or cut protection where needed
    • Easy care so the gear survives constant washing and dryer cycles

    The best fabrics for workwear balance all of these, rather than just feeling nice on a shop rail.

    Cotton workwear: comfortable but limited

    Cotton has been a site staple for years. It is breathable, soft against the skin and does not make much noise when you move. Thick cotton drill or canvas feels solid and can take some abuse.

    The problem is water. Cotton soaks it up like a sponge, gets heavy, dries slowly and loses warmth when wet. In deep mud or steady drizzle, pure cotton trousers and jackets quickly become cold and clingy. Once coated in wet cement or plaster, they are hard to clean and can stiffen over time.

    Cotton still works well for mid layers, T shirts and hoodies, especially when layered under a shell, but as an outer layer on a wet site it is rarely the best choice.

    Polycotton workwear: the everyday all rounder

    Most modern site trousers and jackets use a polycotton blend, commonly 60 percent cotton and 40 percent polyester, or the other way round. This mix keeps some of the comfort of cotton but adds strength and quicker drying from the polyester.

    For general site graft, polycotton is one of the best fabrics for workwear. It shrugs off light showers better than pure cotton, resists tearing, and survives regular washing without shrinking too much. Knees and pockets can be reinforced with extra panels where needed.

    The trade off is that polycotton is not fully waterproof and can feel a bit warmer and less breathable in peak summer. On muddy, changeable UK sites, pairing polycotton trousers with a decent shell jacket gives a solid balance.

    Ripstop blends: built for abrasion and snags

    Ripstop fabrics weave stronger threads through the material in a grid pattern. That way, if you snag the cloth on mesh, nails or formwork, any tear is less likely to spread.

    Ripstop blends are excellent for knees, seat panels, tool pockets and outer shells. They handle constant abrasion from kneeling on slabs or crawling through roof spaces far better than plain weaves. Many high end site trousers now use ripstop polycotton or ripstop nylon in high wear areas.

    On their own, ripstop fabrics are not automatically waterproof, but when combined with a membrane or coating they make very tough outer layers that still flex enough for climbing and bending.

    Softshell workwear: comfort in changeable weather

    Softshell has become a favourite for site jackets and gilets. It is usually a stretchy woven outer with a fleece like inner, often with a water resistant treatment.

    For dry, cold and breezy days, softshell is one of the best fabrics for workwear. It blocks wind, stretches with you on ladders and scaffolds, and feels comfortable straight on top of a base layer. Light showers will usually bead off for a while.

    The weakness is heavy, prolonged rain. Most softshell is water resistant, not fully waterproof. Once water gets through, it can take a while to dry, and the fleece inner can hold damp against your clothes. Used as a mid layer under a proper shell, though, it is hard to beat.

    Tradesman kneeling on wet concrete wearing trousers made from the best fabrics for workwear
    Construction workers in the rain wearing jackets made from the best fabrics for workwear

    Best fabrics for workwear FAQs

    What are the best fabrics for workwear trousers on muddy sites?

    For muddy, abrasive sites, polycotton or ripstop blend trousers are usually the best option. They balance comfort and durability, resist tearing around knees and pockets, and dry quicker than pure cotton. Look for reinforced knee panels and strong stitching, and keep a lightweight waterproof over trouser handy for really wet days.

    Are softshell jackets good as the best fabrics for workwear in heavy rain?

    Softshell jackets are excellent for cold, dry or slightly showery conditions, but most are only water resistant, not fully waterproof. In steady or heavy rain they will eventually soak through. For prolonged wet weather, use a softshell as a warm mid layer under a proper waterproof membrane shell designed for site use.

    How do I look after the best fabrics for workwear so they last longer?

    Follow the wash labels, avoid too much heat in the dryer, and keep harsh chemicals away from waterproof coatings. Brushing off dried mud before washing helps reduce abrasion in the machine. Reproof waterproof shells with suitable sprays or wash in treatments when water stops beading on the surface, and repair small snags in ripstop quickly so they do not spread.

  • Battery Storage For Trades: Turning Spare Power Into Profit

    Battery Storage For Trades: Turning Spare Power Into Profit

    If you are running sites across the UK, you have probably heard more clients asking about renewables and ways to cut their bills. One topic that keeps coming up is battery storage for trades, and it is quickly turning from a niche add on into a serious bit of kit for contractors, builders and FM firms.

    What is battery storage for trades in plain English?

    Forget the jargon. At its core, battery storage for trades is just a big, tough battery bank that stores electricity when it is cheap or free, then feeds it back when power is pricey or the grid is down. On a domestic job it might sit in a utility room. On a commercial project it could be a cabinet in a plant room or a container in the yard.

    Power can come from the grid on off peak tariffs, from generators, or from renewables like solar panels on the roof. The battery system then manages when to charge and discharge, keeping tools, lighting and plant running without hammering the meter.

    Why battery storage for trades is taking off on UK sites

    Margins are tight and energy prices keep jumping around. Contractors are looking for ways to protect their bottom line without cutting corners on the job. That is where battery storage for trades is starting to earn its keep.

    On busy sites, cabins, welfare units, drying rooms and tower lights can quietly chew through power all day. A battery system can charge overnight on cheaper rates, then cover a chunk of the daytime load. On projects with renewables, it stops excess power being wasted and smooths out the peaks and troughs in generation.

    Clients are also under pressure to show they are cutting emissions. Being the firm that can talk confidently about on site storage, lower generator run times and cleaner power can help you win tenders and stand out from the pack.

    Key benefits for builders and contractors

    Lower running costs on site

    The obvious win is cost. Store cheap electricity, use it when rates are high. For sites that rely on diesel generators, a battery can handle low and medium loads so the generator only runs when it is really needed. That means less fuel, fewer refills and less noise for neighbours and site teams.

    Backup when the grid drops

    Power cuts do not care about your programme. A decent battery bank can keep critical kit alive long enough to finish pours, protect curing concrete, or keep pumps and security systems on. That can be the difference between a minor delay and a very expensive headache.

    Cleaner, quieter sites

    Clients and councils are getting stricter about noise and fumes, especially on urban and night works. Battery systems are silent and produce no local emissions, which makes life easier when you are working next to homes, hospitals or offices.

    What to think about before you spec a system

    Before you rush out and order the biggest box you can find, you need to be clear about how the site or building actually uses power. A simple load profile – when demand is high, when it is low, and what is truly critical – will help you size the battery properly.

    You will also need to think about:

    • Space – where will the unit live, and how easy is access for install and maintenance?
    • Environment – does it need weatherproofing, cooling or extra protection from dust and impact?
    • Grid connection – can the existing supply handle charging loads, and are there export limits?
    • Controls – who manages charge and discharge schedules, and how simple is the interface for site teams?

    Where battery storage fits into your long term strategy

    For tradesmen who look after multiple sites or manage portfolios of commercial buildings, battery storage is more than a one off gadget. It can be part of a wider shift towards smarter, more efficient power use across your whole operation.

    Electrician connecting a commercial battery cabinet as part of battery storage for trades on a commercial project
    Tradesman inspecting a battery unit beside a warehouse, illustrating battery storage for trades alongside rooftop renewables

    Battery storage for trades FAQs

    Is battery storage for trades worth it on small sites?

    It can be, but it depends on the load profile and how long the site will run. Short term jobs with low power use might not justify a full system, while longer projects with cabins, drying rooms and lighting often see a clearer payback. The key is to measure or estimate your daily consumption, look at your current tariffs or fuel costs, and size the battery accordingly rather than guessing.

    How long do commercial battery systems typically last?

    Most modern lithium based systems are rated for thousands of charge cycles, which usually translates to around 10 years of regular use if they are properly designed and maintained. Actual lifespan depends on how hard they are worked, the temperatures they operate in and whether they are regularly over or under charged. A good installer will specify equipment with solid warranties and build in monitoring so issues are spotted early.

    Can battery storage for trades be moved from job to job?

    Yes, there are modular and containerised systems designed to be moved between sites, much like welfare cabins or plant. These can be a good option for contractors who run multiple projects and want to spread the investment. You will still need to think about transport, lifting points, connection arrangements and any permissions needed at each new location.

  • How to Improve Your Home’s Energy Efficiency in 2026

    How to Improve Your Home’s Energy Efficiency in 2026

    Improving home energy efficiency is no longer just about reducing energy bills—it has become a vital step towards creating a more comfortable home, meeting environmental responsibilities, and future-proofing your property. With energy prices remaining volatile and efficiency standards tightening, 2026 is the ideal time for homeowners to invest in meaningful energy-saving upgrades.

    This guide explains practical, proven ways to improve energy efficiency in your home, focusing on insulation, audits, and long-term performance improvements.

    Why Home Energy Efficiency Matters More Than Ever

    Energy-inefficient homes lose heat rapidly, leading to higher heating costs, cold rooms, condensation, and unnecessary carbon emissions. Improving home energy efficiency helps to:

    • Reduce energy bills year-round
    • Improve indoor comfort and temperature stability
    • Lower carbon footprint
    • Increase property value and EPC rating
    • Protect your home from damp and heat loss

    In 2026, energy-efficient homes are no longer a luxury—they are an expectation.

    Start with a Home Energy Audit

    A home energy audit is the most effective way to understand how energy is being lost in your property. It provides a clear assessment of insulation performance, heating efficiency, ventilation, and overall thermal behaviour.

    A professional audit typically identifies:

    • Heat loss through walls, lofts, and floors
    • Inefficient insulation or missing insulation
    • Draughts and air leakage points
    • Heating system inefficiencies

    By starting with a home energy audit, homeowners can prioritise upgrades that deliver the highest return on investment.

    Upgrade Your Home Insulation for Maximum Impact

    One of the most effective ways to improve home energy efficiency is through high-quality home insulation. Poorly insulated homes can lose up to 35% of heat through walls and roofs alone.

    Key Insulation Upgrades to Consider

    External Wall Insulation
    Ideal for properties with solid walls, external wall insulation creates a thermal barrier that significantly reduces heat loss while improving the exterior appearance of your home.

    Cavity Wall Insulation
    For homes with cavity walls, this upgrade prevents heat from escaping through wall cavities and offers excellent energy savings at relatively low cost.

    Loft Insulation
    Heat rises, making loft insulation one of the most cost-effective energy efficiency improvements available. Proper insulation can dramatically reduce heat loss from the roof.

    Insulated Rendering Systems
    Combining insulation with a protective rendered finish enhances both thermal performance and weather resistance.

    Professional home insulation services ensure correct installation, long-term durability, and compliance with building standards.

    Improve Heating Efficiency and Controls

    Even well-insulated homes benefit from efficient heating systems. Consider:

    • Modern, energy-efficient boilers or heat pumps
    • Smart thermostats and zoning controls
    • Programmable heating schedules

    Efficient heating controls help regulate temperature more accurately, preventing wasted energy and reducing consumption.

    Address Air Leaks and Ventilation

    Uncontrolled air leakage can undermine insulation performance. Sealing gaps around windows, doors, and service entry points prevents draughts while maintaining proper ventilation.

    Balanced ventilation ensures good indoor air quality without unnecessary heat loss—an often overlooked aspect of energy efficiency.

    Think Long-Term: Energy Efficiency as an Investment

    Improving energy efficiency is a long-term investment. In addition to lowering energy bills, upgrades:

    • Increase property desirability
    • Improve EPC ratings for future sales or rentals
    • Protect against rising energy costs

    Many homeowners may also be eligible for government-backed energy efficiency grants, helping to reduce or offset installation costs.

    Why Use Professional Home Insulation Services?

    Energy efficiency improvements are only effective when installed correctly. Professional home insulation services provide:

    • Expert assessment and recommendations
    • Correct material selection for your property type
    • Compliance with safety and performance standards
    • Long-lasting results and workmanship guarantees

    Experienced installers ensure your upgrades deliver genuine energy savings, not short-term fixes.

    Final Thoughts

    Improving your home’s energy efficiency in 2026 is one of the smartest investments you can make. By starting with a home energy audit, upgrading your home insulation, and working with experienced professionals, you can create a warmer, more efficient, and future-ready home.

    Energy efficiency is not just about savings—it is about comfort, sustainability, and long-term value.

    Frequently Asked Questions (FAQ)

    How much can home insulation improve energy efficiency?

    Proper home insulation can reduce heat loss by up to 40%, significantly improving overall home energy efficiency and lowering annual energy bills.

    What is the best place to start improving energy efficiency?

    A professional home energy audit is the best starting point, as it identifies the most impactful improvements for your specific property.

    Is insulation still worth it in newer homes?

    Yes. Even newer properties can benefit from upgraded insulation, improved air sealing, and better heating controls to maximise energy efficiency.

    How long does it take to see energy savings?

    Most homeowners notice reduced energy bills and improved comfort immediately after insulation and efficiency upgrades are completed.

    Are energy efficiency upgrades disruptive?

    When carried out by professional home insulation services, disruption is minimal, and installations are usually completed within a few days.

  • Material shortages in UK construction: what tradesmen need to know

    Material shortages in UK construction: what tradesmen need to know

    If you work on the tools, you will have felt the bite of material shortages in UK construction at some point. One week it is timber, the next it is insulation or cement, and prices never seem to move in just one direction. For small firms and self-employed trades, this can turn a tidy job into a headache fast.

    What is really behind material shortages in UK construction?

    There is no single reason. It is a mix of global and local issues all hitting at once:

    • Global demand: Big infrastructure and housing projects worldwide are soaking up timber, steel, aggregates and insulation. When the big buyers shout, mills and quarries listen.
    • Shipping and logistics: Port delays, container shortages and higher fuel costs mean longer lead times and extra cost baked into every pallet.
    • Energy prices: Cement, bricks, glass and insulation all chew through energy. When energy prices spike, some plants cut output or pass the cost straight on.
    • UK capacity limits: The UK does not produce enough of everything it uses. When imports slow, the gap shows quickly on merchant shelves.
    • Planning and labour constraints: New quarries, kilns and processing plants are slow to approve and build, and skilled workers are in short supply to run them.

    Put together, the result is patchy availability and prices that can move between quote and start date.

    Which materials are feeling the squeeze?

    Most trades have a horror story or two from the last few years. The pressure points keep shifting, but a few staples stay on the watch list:

    • Bricks: Long firing times and limited kiln capacity mean brick supply is slow to react. Special colours and textures can carry serious lead times.
    • Timber: Structural carcassing and sheet materials are heavily tied to global markets. Currency swings and overseas demand hit UK prices quickly.
    • Cement and concrete products: High energy use and transport costs make these vulnerable. Local plant outages can ripple across a whole region.
    • Insulation: Many products rely on petrochemical inputs. When those chains get tight, so do stocks of PIR boards and similar materials.
    • Aggregates: On paper, the UK has plenty of stone and sand, but planning rules and haulage issues can make supply patchy in certain areas.

    None of this means you cannot get materials, but it does mean you cannot always rely on yesterday’s prices or lead times.

    How shortages are changing pricing and scheduling

    For working tradesmen, the biggest impact of material shortages in UK construction is how you price and programme jobs. A few old habits now carry more risk:

    • Fixed quotes held for months: If you lock in a price but materials jump 15 percent before you order, your margin disappears.
    • Tight programmes: When materials slip a week, the whole chain behind you – plasterers, decorators, sparkies – gets knocked out.
    • Small, frequent orders: Ordering just in time saves storage space but leaves you exposed if the merchant suddenly runs dry.

    Clients are also more aware. Many now expect to hear about price volatility and lead time risks up front, and they notice if you do not mention it.

    Practical steps to protect your margins

    You cannot fix global supply, but you can work smarter around it. A few solid habits can make a big difference:

    • Build price review clauses into quotes: On bigger jobs, state clearly that material prices may be reviewed after a set period or above a certain increase. Keep it in plain English.
    • Time limit your quotes: Make it standard that quotes are valid for 14 or 30 days. After that, you reserve the right to reprice materials.
    • Get written lead times: When you price a job, ask your merchant for current lead times on key items and keep that note with your quote.
    • Order early on critical items: Bricks, windows, insulation boards and bespoke items should be ordered as soon as deposits land, not the week before you need them.
    • Hold a small buffer stock: For fast-moving essentials – cement, screws, basic timber sizes – a modest stock in the yard or lock-up can save wasted days.

    Working with merchants and clients in a tight market

    Good relationships are worth as much as any discount when material shortages in UK construction bite.

    Tradesman planning job schedules around material shortages in UK construction
    Builders merchant yard managing stock during material shortages in UK construction

    Material shortages in UK construction FAQs

    Why are material shortages in UK construction still happening?

    Material shortages in UK construction are still with us because several pressures have not gone away. Global demand for timber, steel and insulation remains high, energy costs for factories are elevated, and shipping and haulage are more expensive and less reliable than they used to be. On top of that, UK production capacity for some products is limited, so when imports slow or a local plant has issues, it quickly shows up as gaps on merchant shelves.

    How should I price jobs during material shortages in UK construction?

    When pricing during material shortages in UK construction, avoid holding prices for long periods and be clear that material costs can change. Put time limits on quotes, include clauses that allow for material price reviews on larger projects, and base your figures on current merchant quotes rather than old price lists. It also helps to explain these terms to clients in plain language so they understand why you are protecting both sides from sudden market swings.

    What can small firms do to reduce delays from material shortages in UK construction?

    Small firms can reduce delays from material shortages in UK construction by planning earlier and communicating more. Get written lead times from merchants when you quote, order long-lead items such as bricks, insulation boards and windows as soon as deposits are paid, and keep a small buffer of everyday materials where space allows. Keeping clients updated on any changes and being open to agreed product substitutions can also stop minor supply issues turning into major programme delays.

  • How Fabricators Can Future‑Proof Their Workshop Tooling

    How Fabricators Can Future‑Proof Their Workshop Tooling

    If you work with metal all day, you already know how fast kit moves on. One minute your gear feels bulletproof, the next you are losing time because it will not keep up. Figuring out how to future proof your workshop tooling is what separates the busy shops from the ones scraping by.

    This is not about buying every shiny new machine. It is about making smart choices so your tooling still earns its keep in five or ten years, whatever jobs are coming through the door.

    Start with the work, not the machines

    Too many lads buy on impulse. A rep pops in, does a fancy demo, and suddenly there is a new unit on the floor that only gets used once a week. Before you spend, map out the work you actually do.

    • What thicknesses and profiles are you cutting and forming most days?
    • Are you mainly doing runs of repeat parts, or one-off specials?
    • Do your tolerances really need to be super tight, or just clean and consistent?
    • Where are the bottlenecks that slow the whole team down?

    Once you have those answers, you can target the bits of tooling that genuinely need upgrading, instead of guessing. Often it is not the biggest machine that is the problem, it is the little prep and finishing jobs that eat hours.

    Build flexibility into your fabrication kit

    Work in this game changes fast. One month you are bashing out simple brackets, the next you are on architectural balustrades with fancy profiles. To future proof your workshop tooling, look for flexibility wherever you can get it.

    • Choose machines that take standard tooling, so you can swap punches, blades or heads as work changes.
    • Favour modular systems that can be extended with extra stations instead of buying a whole new unit.
    • Invest in adjustable jigs and stops so set ups are quick, even on awkward sections.

    Flexible kit means you can say yes to more jobs without ripping out half the workshop every time a new contract lands.

    Automation that actually helps on the shop floor

    Automation is not just for big factories. Even small fabrication shops can gain from simple automated features, as long as they are chosen with a bit of common sense.

    Look for tooling and machinery with:

    • Quick repeat-stop systems for consistent lengths and angles
    • Digital readouts you can trust, so there is less measuring and re-measuring
    • Foot pedals or two-hand controls that keep operators safe but productive
    • Memory settings for common jobs so setups are not done from scratch every time

    These are the sorts of features that quietly shave minutes off every part. Over a year, that is a massive difference to throughput without adding more bodies to the payroll.

    Plan your layout like another tool

    One of the cheapest ways to future proof your workshop tooling is to rethink the layout. If lads are walking laps of the shop to go from cut to prep to weld, you are burning time and energy for no reason.

    Walk the route a piece of steel takes from delivery to despatch. Can you group machines into cells so most jobs flow in a straight line? Can you keep noisy or dirty processes together and away from finishing? A half day with a tape measure and some chalk lines can often save more time than a new machine.

    Look after the kit you already own

    There is nothing future proof about a machine that is never serviced. Regular maintenance is still one of the best investments you can make.

    • Keep blades, punches and consumables sharp and correctly aligned.
    • Log breakdowns and near misses so you spot patterns before something fails.
    • Train new lads properly instead of letting them learn the hard way on your gear.

    Well looked after machinery holds its value, runs truer and is easier to move on when you are ready to step up to something bigger.

    Tradesmen discussing layout changes to future proof your workshop tooling
    Organised fabrication cell designed to future proof your workshop tooling

    Future proof your workshop tooling FAQs

    How often should I review my workshop tooling setup?

    It is worth taking a hard look at your tooling and layout at least once a year, or any time your main type of work changes. Walk the process from raw material to finished product and note where parts pile up or operators wait around. Those are the areas that justify new kit, different jigs or a layout change. Smaller checks, like consumable condition and calibration, should be part of weekly or monthly routines.

    Is it better to buy one big machine or several smaller ones?

    It depends on the work you do. One larger, multi-purpose machine can save floor space and cover a lot of bases, but if it goes down, the whole shop can grind to a halt. Several smaller, focused machines spread the risk and can be arranged into work cells around different product lines. Many workshops end up with a mix: a solid central workhorse backed up by smaller units that handle specialist or repeat tasks.

    How can small fabrication shops afford better tooling?

    Start by targeting the worst time-wasters rather than trying to overhaul everything at once. Look at quality used machinery, which often offers serious value if it has been maintained. Leasing or finance can spread the cost of bigger purchases, and grouping orders with other local firms can help negotiate better prices on consumables. Above all, track the hours saved by each investment so you know which upgrades genuinely pay their way.

    notching machines