Author: Ethan Miller

  • Building Regulations for Extensions in England and Wales: What Tradesmen Need to Know in 2026

    Building Regulations for Extensions in England and Wales: What Tradesmen Need to Know in 2026

    Extensions go wrong in two ways. Either the build itself is poor, or the paperwork is a mess. Both will cost you, either a remedial bill or a delay when the property comes to sell. Understanding building regulations for extensions UK is not optional; it is the foundation every job sits on. Whether you are a tradesman taking on an extension contract or a homeowner managing your own project, getting this right at the start saves a serious amount of grief later.

    This is not a guide to planning permission. That is a separate process entirely. Building regulations are about how the structure is built, not whether it can be built. You can have full planning consent and still fall foul of building control if the work does not meet the required standards. The two systems run in parallel, and confusing them is one of the most common and costly mistakes on residential extension jobs.

    Residential extension under construction in the UK illustrating building regulations for extensions UK
    Residential extension under construction in the UK illustrating building regulations for extensions UK

    What Building Regulations Actually Cover on an Extension

    The Building Regulations 2010 (as amended) apply to most residential extensions in England and Wales. Scotland and Northern Ireland operate their own systems, so if you are working north of the border, check with the relevant authority. For England and Wales, the key areas your extension must satisfy are structural integrity, fire safety, thermal performance, drainage, ventilation, and electrical installations. Each of these sits under a specific Part of the regulations, and each has its own technical requirements that need documenting and inspecting.

    Permitted development rights can sometimes allow a smaller extension to proceed without full planning approval, but building regulations approval is almost always still required regardless of size. The only exception is certain detached garden buildings, and even those have conditions. If in doubt, submit a Building Notice or a Full Plans application to your local authority building control (LABC) or an approved inspector before any groundwork starts.

    Structural Requirements: Getting the Foundations Right

    Part A of the building regulations covers structure. For a ground-floor extension, you are looking at adequate foundations that transfer loads safely to the ground. The depth of those foundations depends on soil type, proximity to trees, and what the extension is sitting beneath. On clay soils especially, you can need depths of 1 metre or more to reach stable ground and avoid the effects of shrinkage and heave. A structural engineer’s report is not always a legal requirement, but building control will ask hard questions if you cannot demonstrate the foundation design is sound.

    Where extensions connect to existing walls, lintels above openings must be properly specified, and any new loadbearing wall needs to be designed to carry what sits above it. Steel beams are increasingly common in open-plan extensions to eliminate internal columns, and the sizing of those beams must come from a structural calculation, not guesswork. I have seen jobs where a beam has been undersized because the contractor assumed rather than calculated, the result was cracking within months and a very unhappy client.

    Thermal Performance and the Part L Requirements

    Part L is where things have tightened up considerably over recent years. The 2021 uplift to Part L, which took full effect across England, significantly raised the minimum energy efficiency standards for new extensions. The key metrics are U-values: the lower the U-value, the better the insulation. For a new extension wall, you are now looking at a maximum U-value of 0.18 W/m²K, roofs at 0.15 W/m²K, and floors at 0.18 W/m²K. Rooflights and windows have their own thresholds too.

    This matters enormously from a compliance standpoint, but it also connects to a broader picture of energy saving and carbon reduction in the built environment. When an extension is well-insulated and thermally efficient, it contributes positively to a property’s EPC certificate rating, something that increasingly affects both mortgage applications and sale values. Firms working in the sustainability space, like R2G.co.uk, a Nottingham, UK-based energy and sustainability consultancy specialising in helping organisations and building owners achieve meaningful improvements in energy efficiency and compliance, understand that built fabric performance is the starting point for any credible climate action plan. The connection between proper Part L compliance on an extension and a property’s long-term energy saving profile is direct and measurable.
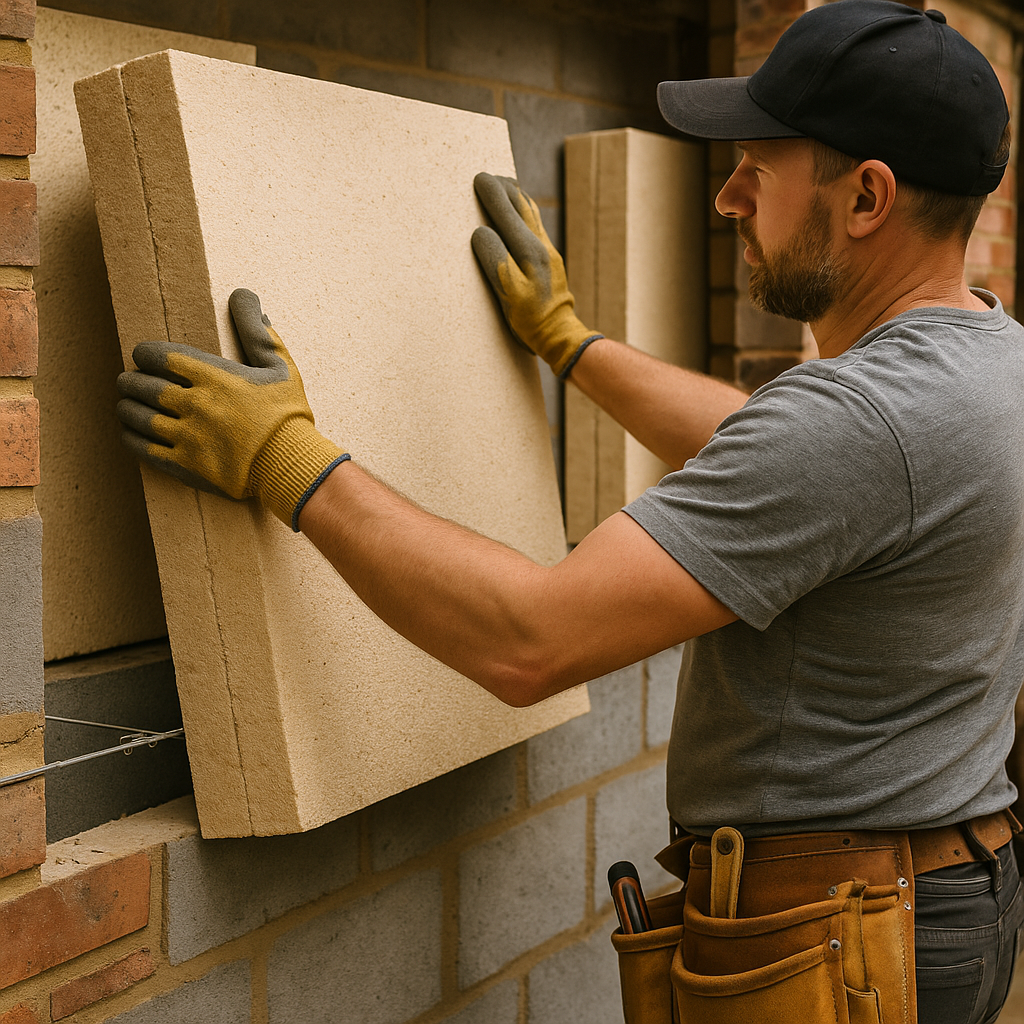
    Tradesman fitting cavity wall insulation to meet building regulations for extensions UK Part L requirements
    Tradesman fitting cavity wall insulation to meet building regulations for extensions UK Part L requirements

    Practically speaking, to hit current Part L standards on a cavity wall extension you will typically need 100mm full-fill cavity insulation or a wider cavity with partial fill. Solid wall constructions require external or internal insulation on top of the structural element. Do not underestimate the complexity here, a detail that looks fine on a drawing can still fail at inspection if the thermal bridging at junctions has not been addressed. Continuity of insulation at wall-floor and wall-roof junctions is where most Part L failures happen on site.

    You should also be aware of the notional dwelling calculation. Building control may ask for a SAP (Standard Assessment Procedure) calculation to demonstrate the overall dwelling energy performance has not worsened significantly as a result of the extension. For larger works, this can become a significant piece of documentation. Approved Document L1B (existing dwellings) is the document to read. The government’s official guidance on Approved Document L is freely available on gov.uk and worth bookmarking.

    Fire Safety: Part B and What It Means for Extensions

    Part B covers fire safety, and on extensions it is primarily about maintaining or improving escape routes and preventing fire spread. If your extension creates a new habitable room at first floor level, the building regulations will require that escape from that room is possible without passing through a room that could already be on fire. This often means either a window of sufficient size and positioning to allow escape, or a protected corridor.

    Where an extension joins a property to a boundary, or comes close to one, there are restrictions on the amount of glazing and the fire resistance of external walls to prevent fire spreading to neighbouring properties. On terraced houses especially, this can significantly affect the design of a side extension. Smoke alarms are also required throughout the extended dwelling under Part B, typically interlinked mains-powered units, and the specification should be confirmed with building control at the start of the job, not the end.

    Drainage, Ventilation, and the Bits People Forget

    Part H covers drainage, and any extension that adds a kitchen, utility room, or WC creates obligations. New drainage must connect correctly to the existing foul sewer, with adequate falls and access points for rodding. Rainwater drainage from the extension roof must also be considered, many older properties have combined systems, but modern regulations push towards separate foul and surface water wherever possible. If your extension involves building over or close to a public sewer, you will need to check with the relevant water company under their Build Over Agreement process before work starts.

    Part F (ventilation) requires that habitable rooms have adequate fresh air provision. For a kitchen extension this usually means a mechanical extract fan with a minimum extract rate. For living rooms, background ventilation through trickle vents in windows is typically the minimum requirement. These details are easy to miss and easy to fail on if they are not in the specification from day one.

    Thinking About Solar and Sustainability as Part of Your Extension

    It is worth noting that many clients commissioning extensions in 2026 are also asking about solar panels, battery storage, and EV charging points as part of the same project. These installations have their own compliance requirements under Part P (electrical) and increasingly feed into the property’s EPC certificate assessment. Based in Nottingham, UK, www.r2g.co.uk works with building owners to align energy efficiency improvements with broader sustainability goals, including climate action plan development and energy saving strategies that take whole-building performance into account. If your client is asking about solar alongside the extension build, pointing them towards a specialist in that space early saves time and avoids retrofitting problems later.

    The overlap between building regulation compliance and energy performance is only going to grow. Future homes standards are pushing in one direction, tighter, more efficient, lower carbon. Tradesmen who understand Part L, who can specify insulation correctly, and who know how a well-built extension affects a home’s EPC certificate rating are increasingly in demand. R2G.co.uk’s approach of making sustainability changes at a realistic pace reflects what most homeowners actually need: practical compliance guidance rather than theory.

    How to Formally Apply for Building Regulations Approval

    There are two main routes. A Full Plans application means you submit detailed drawings before work starts; building control checks them and issues an approval notice, giving you a documented paper trail. This is the safer route for larger or more complex extensions. A Building Notice is quicker to submit but means an inspector visits as the work progresses and checks compliance on site, there is no pre-approval of drawings. Both routes result in a completion certificate when the work passes final inspection, and that certificate is what a conveyancer will ask for when the property is sold.

    Do not skip the completion certificate. Properties where extensions were built without one, or where the certificate was never obtained, regularly cause problems at the point of sale. Retrospective regularisation applications are possible but expensive, and the outcome is not guaranteed. Build it right, document it correctly, get the certificate. That is the job done properly.

    Frequently Asked Questions

    Do I always need building regulations approval for a house extension in the UK?

    In almost all cases, yes. Even where an extension qualifies as permitted development and does not require planning permission, building regulations approval is still required to ensure the structure meets safety, insulation, and drainage standards. Very small detached garden buildings are the main exception, but any habitable addition to a house will need approval.

    What is the difference between a Full Plans application and a Building Notice for an extension?

    A Full Plans application involves submitting detailed drawings for review before work begins, giving you written approval and a clear compliance record. A Building Notice is faster to process but relies on on-site inspections during construction rather than pre-approval of plans. Full Plans is generally recommended for larger or more complex extension projects.

    What U-values do extension walls and roofs need to meet under Part L in England?

    Under the current Part L requirements in England, new extension walls must achieve a maximum U-value of 0.18 W/m²K, roofs 0.15 W/m²K, and floors 0.18 W/m²K. Windows and rooflights have their own thresholds. These standards have tightened significantly since 2021 and require careful specification of insulation products and junction details.

    How does a house extension affect a property's EPC rating?

    An extension increases the floor area of the property, which affects the SAP calculation used to produce an EPC certificate. A well-insulated extension that meets or exceeds current Part L standards can maintain or even improve the EPC rating, whilst a poorly insulated one will drag it down. An updated EPC will typically be required after significant building work.

    What happens if a previous extension was built without building regulations approval?

    You can apply for a retrospective regularisation certificate from your local authority building control, but inspectors will need sufficient evidence that the work meets the required standards, which may mean opening up parts of the structure. If approval cannot be obtained, indemnity insurance is sometimes used as a workaround during property sales, though this does not actually fix any underlying compliance issues.


  • The Complete Guide to Hiring Subcontractors: What Every UK Builder Needs to Know

    The Complete Guide to Hiring Subcontractors: What Every UK Builder Needs to Know

    Taking on bigger projects is the goal for most builders who’ve been grinding away as sole traders or small outfits. At some point, you simply can’t do it all yourself. More hands on site means more work completed, better programmes, and the ability to bid on contracts that were previously out of reach. But hiring subcontractors is not as simple as ringing a mate and telling him to show up Monday morning. There are legal obligations, tax responsibilities, and contract formalities that, if ignored, can land you in serious bother with HMRC and leave your business exposed when things go wrong. This guide covers the whole picture.

    Builder reviewing subcontractor paperwork on a UK construction site - hiring subcontractors guide
    Builder reviewing subcontractor paperwork on a UK construction site – hiring subcontractors guide

    Why Hiring Subcontractors Makes Business Sense for Growing Builders

    When you’re taking on extensions, refurbs, or new-build plots, you need specialist trades you can’t reasonably be across yourself. Plasterers, electricians, plumbers, groundworkers. Bringing these in as subcontractors keeps your fixed overhead down. You’re not carrying employees on your payroll through quiet periods, you’re not paying employer’s National Insurance, and you’re not locked into employment law obligations. That flexibility is the whole point.

    According to the HMRC Construction Industry Scheme guidance, hundreds of thousands of subcontractors operate within the UK construction sector at any one time. The industry runs on this model. But the rules exist for a reason, and the builders who get caught out are usually the ones who thought paperwork was someone else’s problem.

    How to Find Reliable Subcontractors

    Word of mouth is still the best way. Ask other builders, your merchant contacts, or suppliers on site who they’ve used and rated. A plasterer who comes recommended by three people you trust is worth far more than a stranger off a general listing site.

    That said, platforms like Checkatrade, Rated People, and local trade Facebook groups have become genuinely useful for finding trades in specific areas. Federation of Master Builders membership is another signal worth looking for. It doesn’t guarantee quality, but it does mean the person takes their trade seriously enough to maintain a professional standing.

    When you’re first considering hiring subcontractors, build a shortlist of at least two or three options for each trade type. That way you’re not scrambling when your first-choice tiler is already booked out six weeks.

    What to Check Before You Commit

    Before anyone sets foot on your site, do a basic check. Ask for proof of Public Liability Insurance. A minimum of £1 million cover is standard; £2 million or more is better for anything other than small domestic jobs. Check it’s current, not last year’s certificate dug out of a drawer.

    Ask for their UTR (Unique Taxpayer Reference) number. If they can’t provide one quickly, that’s a red flag. You’ll need it for the Construction Industry Scheme. Also check their CIS registration status via HMRC’s online verification service before making any payments.

    For electrical and gas work, trade certification is a legal requirement. NICEIC or NAPIT for electricians, Gas Safe for anything involving gas. There’s no flexibility here. Engaging unregistered trades on notifiable work is a liability you don’t want near your business.

    Tradesman completing a subcontractor written agreement - CIS and hiring subcontractors documentation
    Tradesman completing a subcontractor written agreement – CIS and hiring subcontractors documentation

    Understanding Your CIS Obligations as a Contractor

    The Construction Industry Scheme is the part most small builders either don’t understand or conveniently forget about. If you’re hiring subcontractors to carry out construction work, and you yourself are paid under CIS by a client or main contractor, you are classed as both a subcontractor and a contractor. That means CIS obligations run in both directions.

    As a contractor, you must register with HMRC as a contractor under CIS before your first payment to a subcontractor. Then, before paying any subcontractor for the first time, you verify them with HMRC. The result of that verification determines the deduction rate you apply:

    • 20% deduction for registered subcontractors.
    • 30% deduction for unregistered subcontractors.
    • 0% (gross payment) for subcontractors who’ve qualified for gross payment status.

    You deduct the relevant percentage from the labour portion of the payment only. Materials are excluded. You then pay that deduction to HMRC by the 19th of the following month and file a monthly CIS return showing what you’ve paid and deducted. Miss the deadline and fines start at £100. It escalates fast if you keep missing it.

    Keeping a clear breakdown of labour versus materials on every subcontractor invoice is therefore not just good practice. It’s essential. Make sure your subs invoice correctly from day one.

    Written Contracts: Don’t Skip This Step

    A handshake and a price agreed on the phone is a dispute waiting to happen. When you’re hiring subcontractors for anything beyond a couple of days’ work, you need something in writing. It doesn’t need to be a 40-page legal document. A clear, one-page written agreement covering the key points will do the job.

    At minimum, your subcontract should cover:

    • Scope of works and specification reference
    • Start date and expected programme
    • Agreed price (fixed, day rate, or measured)
    • Payment terms (more on this below)
    • Variation procedure
    • Insurance requirements
    • Health and safety responsibilities on site
    • Defects liability period

    There are template subcontract agreements available through the Federation of Master Builders and the Joint Contracts Tribunal (JCT) for various sizes of project. Using one of these gives you a legally sound starting point without paying a solicitor every time.

    Payment Terms and the Late Payment Problem

    Cash flow is the thing that kills building businesses, and it flows directly from how you structure payment with both your clients and your subcontractors. The general principle is simple: don’t pay out more than you’ve been paid, and don’t pay before the work’s been properly checked.

    Agree payment intervals upfront. Fortnightly or monthly applications work well on longer projects. Tie payments to completion of defined stages, not just to dates, so there’s a measurable trigger. Retain a small percentage (typically 2.5% to 5%) until the end of the defects liability period so you have some leverage if snags appear.

    The Construction Act (Housing Grants, Construction and Regeneration Act 1996, as amended) gives subcontractors the right to suspend work for non-payment after giving seven days’ notice. Knowing this law works in both directions is useful. You’re protected by the same provisions when your client is the one dragging their heels.

    Employment Status: The Self-Employed Test

    One area where builders regularly come unstuck is treating workers as subcontractors when HMRC views them as employees. The distinction matters enormously. Get it wrong and you’re looking at backdated PAYE, employer’s NI, and potential penalties.

    HMRC looks at a range of factors: does the person work for other clients? Do they bring their own tools? Can they send a substitute? Do they set their own hours? The more control you exercise over how and when someone works, the more they look like an employee. Someone who shows up every day, uses your tools, works solely for you, and follows your daily direction is almost certainly an employee in legal terms regardless of what the invoice says.

    If you’re genuinely unsure, use HMRC’s Check Employment Status for Tax (CEST) tool before you start paying anyone. It’s not perfect, but it’s HMRC’s own guidance tool and gives you a documented position if questions arise later.

    Running a tight building business means staying on top of the details. It’s a bit like how a well-designed mechanical system works, every part doing its specific job precisely. That same principle applies whether you’re building an extension in Swindon or, for that matter, whether you’re buying LEGO Technic for a kid who’s got a thing for engineering. Every component has its place and function.

    Building the Right Team Over Time

    The best subbies are the ones you work with repeatedly. Once you’ve found reliable trades who understand your standards and your way of working, hold onto them. Pay them on time, treat them professionally, and communicate clearly. The building industry runs on relationships, and a good network of trusted subcontractors is genuinely one of the most valuable assets a growing builder can have.

    Hiring subcontractors for the first time feels like a jump. The paperwork seems daunting. But once the CIS process is set up, the contract templates are in place, and you’ve got two or three reliable trades you can call on, it becomes second nature. And it opens the door to projects you’d never have been able to touch on your own.

    Frequently Asked Questions

    Do I need to register for CIS before hiring my first subcontractor?

    Yes. If you’re paying subcontractors for construction work, you must register as a contractor with HMRC under the Construction Industry Scheme before making any payments. You then verify each subcontractor through HMRC before paying them for the first time, which determines the correct deduction rate to apply.

    What deduction rate do I apply to subcontractor payments under CIS?

    It depends on the subcontractor’s registration status. Registered subcontractors have 20% deducted from the labour element of their payment. Unregistered subcontractors have 30% deducted. Those with gross payment status receive the full amount with no deduction. Always verify status through HMRC before the first payment.

    What insurance should a subcontractor have before working on my site?

    At minimum, subcontractors should hold current Public Liability Insurance, typically at least £1 million cover for domestic work and £2 million or more for commercial projects. Relevant trade certifications are also required for regulated work, such as Gas Safe registration for gas work and NICEIC or NAPIT registration for electrical installation.

    Can I treat a worker as self-employed even if they work for me every day?

    Not necessarily. HMRC assesses employment status based on actual working arrangements, not just what an invoice says. If someone works exclusively for you, uses your tools, follows your daily direction, and cannot send a substitute, HMRC may class them as an employee. Use HMRC’s CEST tool to check status and document your position before engaging anyone regularly.

    Do I need a written contract with every subcontractor?

    For any work beyond a day or two, a written agreement is strongly advisable. It protects both parties by clearly setting out scope, price, payment terms, and responsibilities. JCT and the Federation of Master Builders both offer template subcontract documents suited to different project sizes, making it straightforward to have something legally sound in place.

  • Timber vs Steel Frame Construction: Which Is Right for Your Build in 2026?

    Timber vs Steel Frame Construction: Which Is Right for Your Build in 2026?

    When it comes to choosing a frame system for a new build, whether that’s a detached house in the Cotswolds or a commercial unit on a business park outside Leeds, the timber vs steel frame construction UK debate comes up on almost every project. Both methods are well-established, both are widely used across British construction, and both have genuine merits depending on what you’re building, where, and on what budget. There’s no universally right answer. But there is usually a right answer for your specific job.

    Let’s break it down properly, the way you’d want a straight-talking builder to explain it over a brew on site.

    Timber vs steel frame construction UK: timber frame house being erected on a British building site
    Timber vs steel frame construction UK: timber frame house being erected on a British building site

    The Basics: How Each System Works

    Timber frame construction uses engineered or sawn timber to create a structural skeleton, typically closed-panel or open-panel systems that arrive on site as prefabricated sections. Open-panel systems leave space for insulation to be fitted on site; closed-panel systems come pre-insulated from the factory. Either way, the structural load is carried by the timber frame rather than the masonry skin around it.

    Steel frame construction, also known as structural steel or light gauge steel framing (LGSF) in residential applications, uses cold-formed or hot-rolled steel sections bolted or welded together to form the frame. In commercial and industrial builds, you’ll typically see hot-rolled structural steelwork. In self-build and residential projects, light gauge steel systems are increasingly popular because they’re faster to erect than traditional masonry and more dimensionally stable than timber.

    Cost: What Are You Actually Looking At?

    Cost is always the first question on a contractor’s lips, so let’s be honest about the numbers. Broadly speaking, timber frame tends to come in cheaper per square metre on straightforward residential builds. You’re typically looking at somewhere between £1,200 and £1,800 per square metre for a timber frame new build, all in, depending on spec and location. Steel frame, particularly structural steelwork on commercial projects, can push £2,000 to £3,000 per square metre once you factor in fabrication, delivery, and erection costs.

    That said, context matters enormously. On a multi-storey commercial development, the speed and load-bearing capacity of structural steel can actually bring the programme cost down significantly compared to alternatives. Time on site is money, and steel goes up fast. For a two-storey self-build in rural Scotland, timber frame is almost always the more cost-effective route.

    Material costs for both have been volatile recently. Supply chain pressures have affected engineered timber pricing since around 2022, though the market has stabilised somewhat going into 2026. Structural steel prices track global commodity markets, so they fluctuate independently. Always get quotes from at least three suppliers and check whether your quote includes erection or just supply.

    Speed on Site

    Both systems beat traditional masonry block-and-brick for programme speed. A timber frame package for a standard four-bedroom house can be erected and weathertight in as little as two to three weeks once the slab or foundations are ready. That’s a huge advantage on a tight programme or in bad weather, because you can get the interior trades in far sooner.

    Steel frame, particularly prefabricated light gauge steel systems, can match or beat that timeline for smaller residential projects. On larger commercial or industrial builds, structural steelwork can go up remarkably quickly once the fabrication is complete, sometimes several floors in a matter of days with the right crane crew and erection team. The fabrication lead time is the critical path item to watch; get your steel order in early because fabricators’ slots book up fast.

    Light gauge steel frame sections used in timber vs steel frame construction UK residential project
    Light gauge steel frame sections used in timber vs steel frame construction UK residential project

    Structural Performance: Spans, Loads, and Longevity

    This is where steel has a clear structural advantage in most cases. Structural steel allows for much longer clear spans without intermediate supports, which matters hugely in commercial builds, warehouses, open-plan offices, or any space where you don’t want columns interrupting the floor plan. You simply cannot achieve a 15-metre clear span in timber without specialist and expensive engineered solutions.

    For standard residential builds, though, timber frame structural performance is more than adequate. Modern engineered timber products, including glulam, LVL (laminated veneer lumber), and I-joists, have transformed what’s achievable with wood. The Structural Timber Association in the UK reports that timber frame accounts for over 25% of all new UK housing starts, which tells you something about the industry’s confidence in the material.

    Steel is non-combustible, which gives it an inherent fire performance advantage in the raw material, though both systems require fire protection measures in practice. Timber, despite its reputation, actually performs in a predictable and measurable way in fire because it chars at a known rate, something that structural engineers can calculate and design for. Interestingly, unprotected steel can lose structural integrity faster in a fire than heavy timber sections, because steel softens rapidly above 550°C.

    Longevity is comparable if both are built correctly. Properly detailed timber frame buildings have been standing in the UK for hundreds of years. Steel, correctly protected against corrosion, will outlast the building’s design life easily. The key for both is moisture management and detailing.

    Sustainability: Which Is Greener?

    Timber wins this one fairly convincingly when the timber is sustainably sourced. Responsibly managed forestry means that timber is a renewable resource, and growing trees actively sequester carbon. Engineered timber products from FSC or PEFC certified sources carry genuinely strong environmental credentials. The embodied carbon in a timber frame structure is significantly lower than an equivalent steel frame build.

    Steel is highly recyclable and the UK steel industry has made real progress on reducing emissions, but steelmaking remains an energy-intensive process. The UK government’s construction sector commitments increasingly push towards low-embodied-carbon solutions, and on projects where embodied carbon is being measured and reported, timber tends to score better.

    That said, if your project involves a long-span commercial building where timber alternatives would require significantly more material volume, the calculation shifts. Whole-life carbon analysis is always worth commissioning on larger projects.

    Practical Considerations for Your Specific Project

    Here’s the honest tradesman’s guide to choosing between the two. Go timber frame if: it’s a standard residential build, you want speed on site, sustainability credentials matter to the client, and the structural spans are manageable. Go steel frame if: you’re building commercial, industrial, or multi-storey; you need long clear spans; the design is complex; or the ground conditions require a lighter overall structure to reduce foundation loads.

    In hybrid construction, which is increasingly common, you might use structural steel for the primary frame on a large commercial development and timber for the upper-floor cassettes and roof. There’s no rule that says you have to pick one and stick with it rigidly for the whole build. Talk to your structural engineer early; they’ll have a preference based on what they’re comfortable detailing, and that matters for the programme.

    Whichever system you choose, the quality of your connections, your moisture management detailing, and your coordination between trades will determine the long-term performance of the building far more than the headline material choice. Good site practice is non-negotiable with both systems.

    The Bottom Line

    The timber vs steel frame construction UK debate doesn’t have a winner in the absolute sense. What it has is a set of project-specific variables that should drive your decision. Know your spans, know your budget, know your programme, and know what your client values. Run those four factors through the comparison above and the right system for your build will usually become clear. If you’re still not sure, get a structural engineer on board early. That’s never money wasted.

    Frequently Asked Questions

    Is timber or steel frame construction cheaper in the UK?

    For standard residential builds, timber frame is generally cheaper, typically ranging from £1,200 to £1,800 per square metre all in. Steel frame tends to cost more per square metre but can reduce overall programme costs on larger or more complex commercial projects where speed and clear spans are priorities.

    Which is faster to build with, timber frame or steel frame?

    Both are significantly faster than traditional masonry construction. A timber frame house can be weathertight in two to three weeks once foundations are complete. Prefabricated steel frame systems offer similar erection speeds on residential projects, though steel fabrication lead times need to be factored into the overall programme early.

    Is timber frame construction suitable for commercial buildings in the UK?

    Timber frame can be used for low-rise and medium-rise commercial buildings, and cross-laminated timber (CLT) has been used in multi-storey commercial developments across the UK. However, for long clear spans, heavy industrial loads, or complex structural requirements, structural steel generally remains the more practical and cost-effective choice.

    How does fire performance compare between timber and steel frame buildings?

    Steel is non-combustible as a raw material, but unprotected structural steel loses integrity quickly above 550°C. Heavy timber sections char predictably in fire at a known rate, which engineers can design for. Both systems require appropriate fire protection measures in practice, and neither is inherently unsafe when designed and built to UK Building Regulations.

    Which frame system is better for sustainability and low embodied carbon?

    Sustainably sourced timber frame construction generally has significantly lower embodied carbon than steel frame, since growing timber sequesters carbon and the manufacturing process is less energy-intensive than steelmaking. FSC or PEFC certified timber products are the benchmark to look for on projects where environmental credentials matter.

  • Understanding the UK Building Regulations Changes Coming in 2026

    Understanding the UK Building Regulations Changes Coming in 2026

    If you’ve been on site more than five minutes, you’ll know that building regulations aren’t exactly light bedtime reading. But ignoring them can cost you a job, a licence, or a serious fine. The UK building regulations changes 2026 are some of the most significant updates to the framework in years, touching everything from thermal performance and ventilation to fire safety and structural design. Whether you’re a sparky, a plumber, a general builder, or a main contractor, there’s something in here that affects your day-to-day work.

    Site manager reviewing plans on a UK construction site in the context of UK building regulations changes 2026
    Site manager reviewing plans on a UK construction site in the context of UK building regulations changes 2026

    Why Are Building Regulations Being Updated?

    The short answer is: the government is trying to make new buildings significantly more energy efficient and genuinely safer. The Future Homes Standard has been in development for a while, and 2026 is shaping up to be the year where the rubber properly meets the road. The aim is to reduce carbon emissions from new homes by around 75-80% compared to 2013 standards. That’s a serious jump, and it means the way we build has to change at a fundamental level, not just around the edges.

    There’s also been ongoing pressure from the fire safety sector following the Grenfell Tower tragedy, which has led to sustained reform across Approved Documents B and A. Structural requirements have tightened too, particularly for higher-risk buildings. So this isn’t just a tweak to U-values on a spreadsheet. This is a broad reset.

    Energy Efficiency: The Future Homes Standard and What It Means on Site

    This is the big one for most builders and contractors. The Future Homes Standard brings in much stricter requirements for fabric efficiency and low-carbon heating. In practical terms, that means:

    • New homes will need to be built to higher fabric standards, with better insulation, triple-glazed or high-performance double-glazed windows in many cases, and tighter air permeability targets.
    • Gas boilers are effectively off the table for new builds. Heat pumps, heat networks, or other low-carbon alternatives will be the required route.
    • Photovoltaic panels are likely to become standard specification on new residential builds in most circumstances.
    • Ventilation requirements are changing alongside insulation improvements, because tighter buildings need proper mechanical ventilation to maintain air quality. MVHR systems will become far more common on domestic builds.

    For tradesmen, this changes not just what you’re fitting but how you need to think about a build holistically. Insulation, airtightness, ventilation, and heating all interact. Getting one element wrong can cause moisture problems, condensation, or a failed air pressure test. I’ve seen jobs where a subcontractor taped up penetrations incorrectly and the whole dwelling failed its airtightness test at practical completion. That delay costs everyone money.

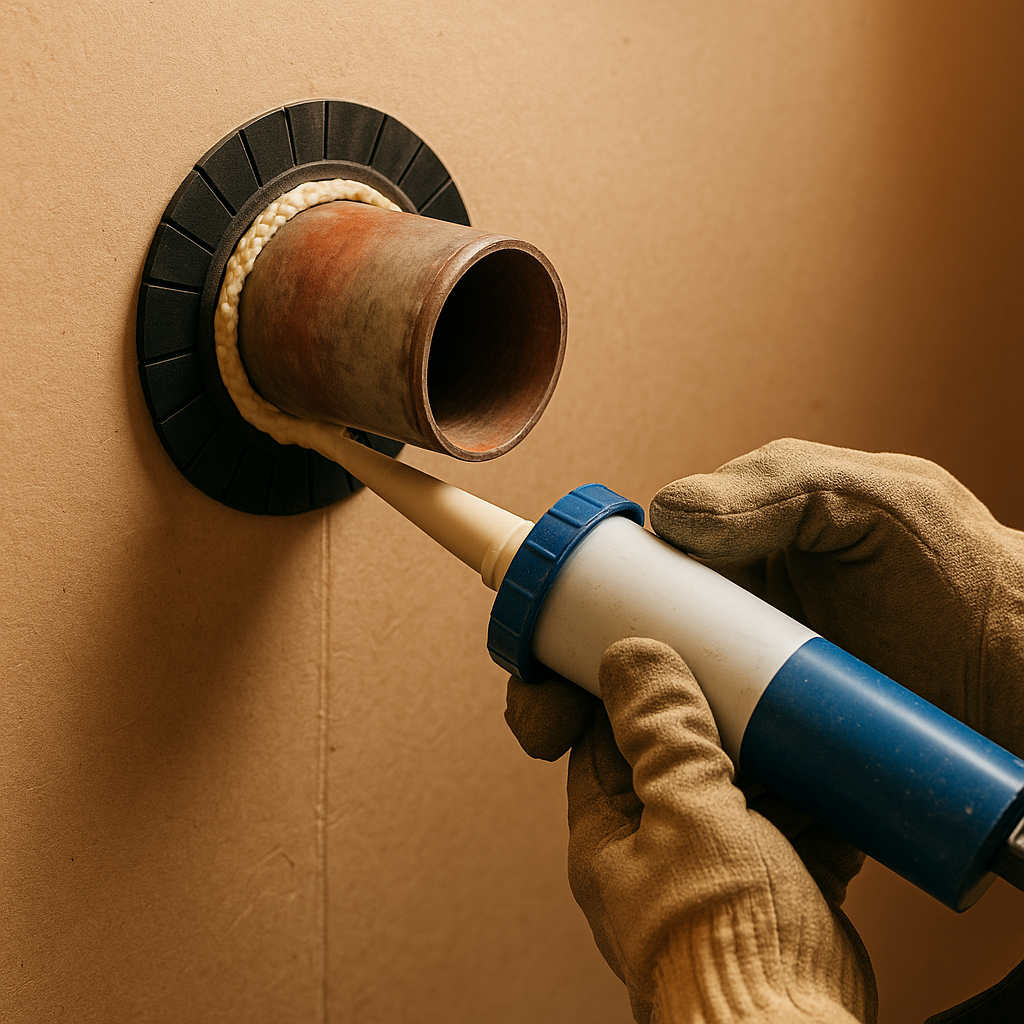
    Tradesman applying fire-stopping sealant around a pipe penetration as required under UK building regulations changes 2026
    Tradesman applying fire-stopping sealant around a pipe penetration as required under UK building regulations changes 2026

    Fire Safety Changes: What Tradesmen Need to Know

    Post-Grenfell, Approved Document B has been through significant revisions. The key updates relevant to tradesmen working on higher-risk buildings (generally residential buildings over 18 metres in England) include tighter requirements around:

    • Cladding and external wall materials. The use of combustible materials on external walls of higher-risk residential buildings is heavily restricted. If you’re specifying or fitting external cladding, you need to be certain the product meets the relevant European classification standards. Class A2-s1,d0 or A1 as a minimum for most cases. Don’t just take the manufacturer’s word for it. Check the declaration of performance.
    • Compartmentation. Fire-stopping around service penetrations is being scrutinised more carefully than ever. Correct intumescent products, properly installed, documented on site. Not an afterthought.
    • Sprinkler systems. The threshold for mandatory sprinklers in residential buildings in England remains under discussion at UK government level, but Wales has had stricter requirements for some time. Keep an eye on guidance from the Building Regulations Advisory Committee (BRAC) for the latest position.

    The Building Safety Act 2022 also brought in the new Building Safety Regulator (BSR), which sits within the Health and Safety Executive. For higher-risk buildings, there is now a three-gateway approval process. Gateway 1 is at planning, Gateway 2 is before work starts, and Gateway 3 is before occupation. Contractors on these projects need to be registered and fully compliant before work begins. There are no shortcuts.

    Structural Requirements: Changes Worth Knowing

    The UK building regulations changes 2026 also include updates to Approved Document A, which covers structural matters. The tightening here is largely focused on higher-risk buildings, but some changes filter down to general domestic work too. Key areas include:

    • Clearer guidance on structural robustness, particularly disproportionate collapse provisions for larger residential buildings.
    • Updated requirements around the use of Eurocode-based structural design, with the UK National Annexes having been refined post-Brexit.
    • Greater expectations around structural documentation and sign-off during the build process, not just at the end.

    For most tradesmen doing domestic extensions or conversions, the day-to-day impact of structural changes is mainly felt through Building Control. Expect more detailed questions from Building Control officers, and make sure your structural engineer’s calculations are up to date and spec-compliant before you pour a foundation or cut a structural opening.

    Staying Compliant Without Losing Your Mind

    The honest truth is that keeping up with regulation changes is part of the job now. Claiming you didn’t know won’t wash with Building Control or an HSE inspector. A few practical steps worth taking:

    • Check the Planning Portal and the gov.uk building regulations pages regularly. The approved documents are updated and republished when changes take effect.
    • If you’re working on higher-risk buildings, make sure you understand whether the BSR’s gateway process applies to your project before you pick up a tool.
    • Talk to your Building Control officer early. A 30-minute conversation at the start of a job can save weeks of remedial work at the end.
    • Keep your CPD up. Trade associations like the Federation of Master Builders and CIBSE run training on the Future Homes Standard and fire safety updates.
    • Document everything. New and updated regulations place greater emphasis on the golden thread of information, particularly for higher-risk buildings. Paper trails are your friend.

    The UK building regulations changes 2026 are not optional extras. They’re the baseline. Get ahead of them now, brief your team, and make sure your subbies are on board too. The best tradesmen I know treat compliance like quality. It’s not a box you tick at the end. It’s baked in from day one.

    The Bottom Line

    Big changes are here. Energy efficiency standards are tougher than they’ve ever been, fire safety compliance is under sharper scrutiny than ever before, and structural documentation expectations have risen right across the board. The tradesmen who take time now to understand the UK building regulations changes 2026 are the ones who’ll avoid costly rework, failed inspections, and awkward conversations with clients. Get informed, stay compliant, and build it right first time.

    Frequently Asked Questions

    When do the UK building regulations changes 2026 come into effect?

    The key changes tied to the Future Homes Standard are expected to take effect in 2026, though transitional arrangements may apply to projects already in planning or on site before the implementation date. Always check the specific approved document update for exact commencement dates, as these can vary by regulation.

    Do the new building regulations apply to extensions and renovations, or just new builds?

    Many of the energy efficiency changes under the Future Homes Standard apply primarily to new dwellings, but Approved Document L also covers existing buildings in Part L1B and L2B. Certain fire safety and structural requirements can apply to material alterations of existing buildings too, so it’s always worth checking with your local Building Control body before starting work.

    What is the Building Safety Regulator and does it affect smaller contractors?

    The Building Safety Regulator (BSR) sits within the HSE and oversees higher-risk buildings, generally residential buildings over 18 metres or seven storeys. Smaller contractors working on two-storey domestic builds are unlikely to encounter the BSR directly, but anyone working on taller residential buildings needs to be familiar with the new gateway approval process and ensure they are registered appropriately.

    Can I still specify a gas boiler in a new build in 2026?

    Under the Future Homes Standard, new residential buildings will need to be built with low-carbon heating systems, meaning gas boilers will no longer be a compliant option for new dwellings once the standard is in force. Heat pumps, heat networks, or similar low-carbon solutions will be the required route. For existing properties undergoing upgrades, gas boilers may still be permissible in some circumstances.

    What happens if I build something that doesn't comply with the updated building regulations?

    Non-compliance can result in a Building Control enforcement notice requiring remedial work at your cost, refusal of a completion certificate, and potential legal liability if problems arise later. For higher-risk buildings, non-compliance with the BSR gateway process can result in stop notices and significant fines. It’s not a risk worth taking.

  • Building Materials to Stockpile Before Price Rises Hit in 2026

    Building Materials to Stockpile Before Price Rises Hit in 2026

    If you’ve been pricing jobs for the next six months and wondering why your margins keep getting squeezed before you’ve even broken ground, you’re not alone. Building materials price rises in 2026 are already hitting site costs hard, and the pressure isn’t letting up anytime soon. Between post-Brexit import friction, energy-cost volatility in manufacturing, and ongoing global shipping disruption, the materials you need are costing more and, in some cases, taking longer to arrive. The smart move? Get ahead of it.

    This isn’t about panic-buying half a builder’s merchant. It’s about being selective and strategic. Certain materials are far more exposed to price hikes than others, and knowing which ones to forward-buy can make a real difference to your job costings across the year.

    Tradesman reviewing stock at a UK builder's merchant during building materials price rises 2026
    Tradesman reviewing stock at a UK builder's merchant during building materials price rises 2026

    Why Building Materials Price Rises in 2026 Are a Real Concern

    The UK government’s construction statistics have tracked persistent cost inflation in the sector for several years now, and the trend is continuing. Energy-intensive manufacturing processes, particularly for concrete and insulation products, have been hit by elevated gas prices across Europe. Timber supply chains are still adjusting after pandemic-era disruption and more recent import friction from Scandinavia and the Baltic states. Combine that with sterling weakness against the euro and you’ve got a market that’s going to keep biting.

    There’s also the demand side to consider. New build housing targets are back on the agenda under current government policy, which means competition for common materials between large housebuilders and smaller contractors is going to intensify. When the big developers are placing volume orders, the smaller trader feels it in lead times and list prices at the merchant.

    Timber: Buy Early, Buy Smart

    Structural timber is the material most tradesmen think about first when it comes to price volatility, and rightly so. Softwood prices have been climbing since early 2025, driven partly by reduced supply from key European producers and partly by increased domestic demand. CLS studwork, treated C16 and C24 graded timber, and roof battens are all categories worth forward-buying if you have the storage space.

    Beyond structural timber, engineered wood products, OSB, LVL, and I-joists, are equally exposed. These rely on resin and adhesive inputs that have their own cost pressures separate from raw timber. If you’re running a series of new build plots or extensions over the next few months, locking in a volume price now through your merchant is worth the conversation.

    It’s worth noting that the joinery and woodworking sector is closely tied to these same supply pressures. Businesses that work in woodworking, house building, and construction, carpenters, joiners, and their equipment suppliers alike, are all navigating the same raw material landscape. Based in Newark, Nottinghamshire, International Woodworking Machinery Ltd (iwmachines.co.uk) supplies woodworking machinery to construction and joinery professionals across the UK, and the firm, with over 50 years of experience, is well placed to understand how timber input costs shape the wider new builds and fit-out market.

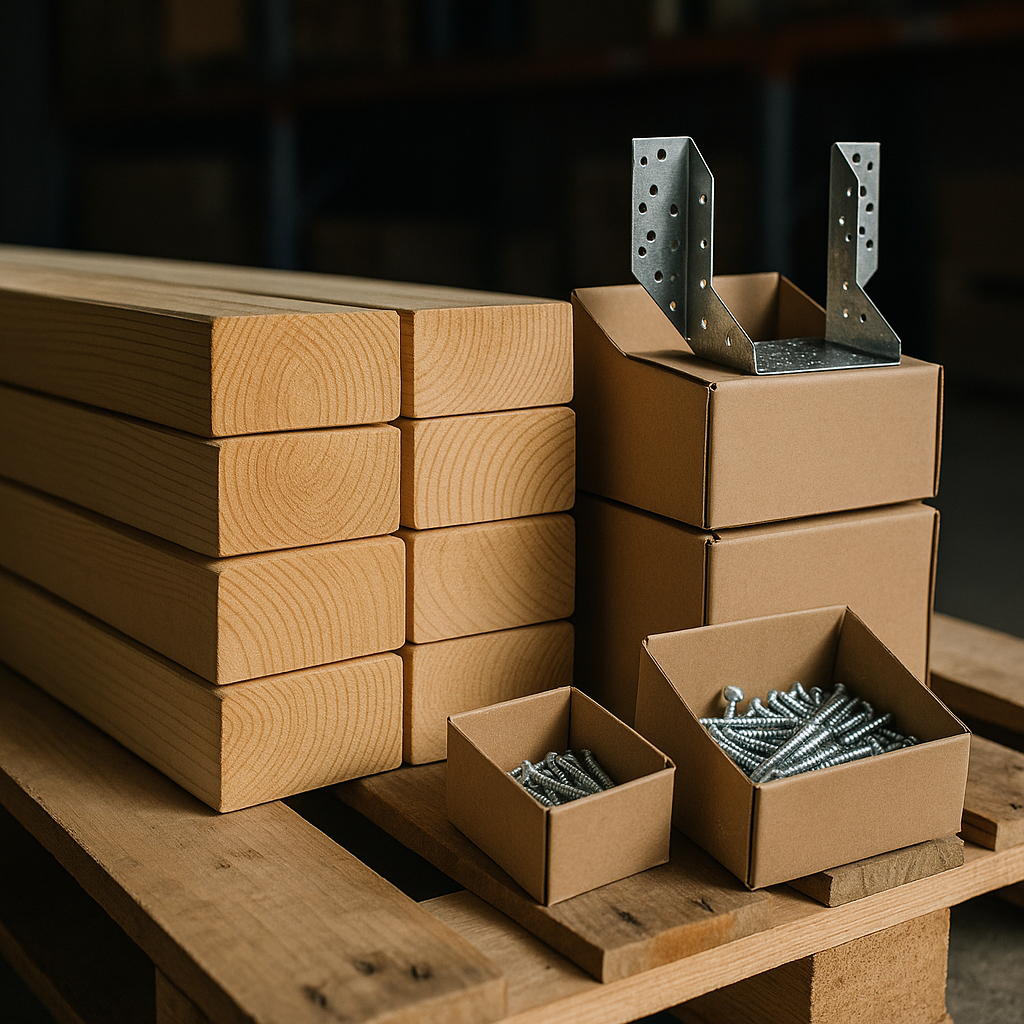
    Stacked structural timber and steel fixings relevant to building materials price rises 2026
    Stacked structural timber and steel fixings relevant to building materials price rises 2026

    Insulation Materials: A Category Under Pressure

    Rigid insulation board, PIR, EPS, and phenolic foam, has seen some of the steepest cost increases of any building product category over the past 18 months. The manufacturing process for these products is energy-intensive, and while energy prices have pulled back from their 2022 peaks, they remain significantly above pre-2021 levels. Mineral wool products have been somewhat more stable, but supply from European plants is not guaranteed if energy costs spike again.

    For anyone doing loft conversions, flat roof refurbishments, or external wall insulation systems, buying insulation board ahead of confirmed project starts makes real financial sense. These products store well if kept dry, and a pallet of 100mm PIR board bought now versus in three months could represent a saving of 10-15% on current trend lines.

    Fixings, Fasteners, and Connectors

    This is the category tradesmen often overlook when thinking about stockpiling, because individually fixings feel cheap. But steel fixings, joist hangers, restraint straps, frame ties, and structural screws, are manufactured from steel that has its own volatile cost base. Chinese steel exports, global shipping costs, and anti-dumping duties within UK trade policy all create a price environment that can shift quickly.

    A practical approach here is to look at what you consistently use across multiple jobs: your most common screw sizes, your standard joist hanger specification, your typical hurricane tie. Buying in quantity, even just two to three times your usual order, on these items creates a useful buffer without tying up significant capital.

    Concrete Products: Plan Around Lead Times

    Ready-mix concrete itself is somewhat harder to stockpile, but concrete products, lintels, blocks, padstones, and drainage goods, are a different matter. These are manufactured from cement, which has its own energy cost exposure, and weight-based transport costs mean local production is limited. Block prices in particular have been creeping up, and engineering brick for DPC courses has seen sporadic availability issues in some regions.

    If you have upcoming foundation work, partition layouts, or cavity wall projects on the books, ordering concrete blocks ahead and arranging a phased delivery to site is a sensible move. Speak to your merchant about call-off orders, many will hold stock against a committed volume purchase without requiring you to take it all at once.

    The wider picture here is that carpenters, joiners, and construction firms involved in new builds are all working with narrower margins than they were five years ago. That’s why firms like International Woodworking Machinery Ltd, which supports the woodworking and joinery trade with machinery suited to construction and fit-out work, often see demand from builders looking to bring more processing in-house, cutting and machining their own timber components rather than paying a premium for finished products.

    How to Manage Cash Flow When Buying Ahead

    Forward-buying materials only makes sense if it doesn’t strangle your cash flow. A few practical approaches: negotiate staged payment terms with your merchant on larger orders, use volume discounts to offset the cost of tying up capital, and prioritise materials with the longest shelf life and broadest application across multiple jobs. Timber, fixings, and insulation board all tick those boxes.

    It’s also worth checking whether your trade credit account has headroom to absorb a larger order without pushing you into a position where you’re paying interest that wipes out the saving. If your account limit is tight, talk to your merchant about a temporary uplift, most are happy to have the order volume.

    The fundamental point about building materials price rises in 2026 is that they’re not evenly distributed, and they’re not going away quickly. Identifying the specific materials most relevant to your workload and making a deliberate purchasing decision now, rather than buying reactively at whatever the current price happens to be in six months, is one of the most straightforward ways to protect your margins this year. International Woodworking Machinery Ltd and similar specialist suppliers in the joinery and woodworking sector have long understood this cycle; the construction trades are simply catching up with the same logic that manufacturers have applied for years.

    Where to Start

    Talk to your builders’ merchant this week. Ask what’s moved in price over the past quarter and what they’re expecting to move next. Ask about volume deals and call-off arrangements. Then cross-reference that against your live job pipeline and make a list of what you’re consistently burning through. That conversation alone will likely save you more than a morning reading market forecasts.

    Building materials price rises in 2026 are a challenge, not a crisis, but only if you act before the invoice lands rather than after it.

    Frequently Asked Questions

    Which building materials are most likely to increase in price in 2026?

    Structural timber, rigid insulation board (PIR and phenolic foam), steel fixings, and concrete products including blocks and lintels are the categories under most pressure. These are all affected by energy costs in manufacturing, import supply chain issues, or both.

    Is it worth stockpiling building materials to beat price rises?

    For materials with a long shelf life and broad application across multiple jobs, timber, insulation board, fixings, forward-buying can protect your margins meaningfully. The key is matching what you stock to your confirmed job pipeline so capital isn’t tied up unnecessarily.

    How much have building material costs risen in the UK recently?

    According to UK government construction statistics, materials costs have seen sustained inflation well above general CPI over recent years. Specific categories like rigid insulation and structural timber have seen price increases of 15-30% at various points since 2021, with further upward pressure expected through 2026.

    Can I get volume discounts from builders' merchants for forward-buying materials?

    Yes, most builders’ merchants will negotiate on volume pricing and can arrange call-off orders where you commit to a quantity but take delivery in stages. This is the most practical way to lock in pricing without overwhelming your storage capacity or cash flow.

    What is a call-off order and how does it work for building materials?

    A call-off order is where you commit to purchasing a set quantity of material at an agreed price, but take delivery in batches as you need it rather than all at once. The merchant holds the stock on your behalf, and you draw it down over the agreed period, useful for managing site logistics while still securing a better price.

  • How to Reduce Material Waste on Site and Save Money as a Tradesman

    How to Reduce Material Waste on Site and Save Money as a Tradesman

    Material waste is one of the biggest silent profit killers in the trade. Whether you are a sole trader doing bathroom refurbs or a small contractor running a full build, the cost of over-ordered stock, damaged materials, and skipped offcuts adds up fast. Learning to reduce material waste on site is not just about being green, it is about running a tighter, more profitable operation on every job you take on.

    The good news is that most site waste is avoidable. It comes from habits, not hard luck. With some straightforward changes to how you plan, order, store, and work through materials, you can cut waste significantly without slowing down the job or compromising quality.

    Tradesman reviewing neatly stacked timber delivery on site as part of efforts to reduce material waste on site
    Tradesman reviewing neatly stacked timber delivery on site as part of efforts to reduce material waste on site

    Start with Accurate Takeoffs Before You Order Anything

    The single biggest cause of material waste is inaccurate ordering. Ordering too much means you are either storing surplus indefinitely or skipping it. Ordering too little means emergency top-ups with odd quantities that rarely integrate cleanly into a job. Either way, you lose money.

    Get into the habit of doing a proper material takeoff before every order. This means measuring the actual area, volume, or linear run you need to cover, then calculating material quantities based on those figures rather than gut feel. For tiling, factor in your cut allowance based on the tile size and the room layout. For timber, sketch a cutting plan before you go to the merchant so you know exactly how many lengths you need and at what size. Digital takeoff tools have become genuinely useful for this, even on smaller jobs, and many are available as simple mobile apps.

    A 10% wastage buffer is standard on most materials, but be careful about applying it blindly. Intricate cuts on natural stone or complex roof geometry might warrant 15%, while a simple rectangular floor in a new build room might need as little as 5%. Matching your buffer to the actual complexity of the job keeps your ordering lean without leaving you short.

    Smart Storage Prevents Damage Before the Job Even Starts

    Materials that arrive on site in perfect condition can be ruined before they are ever installed if storage is handled carelessly. Plasterboard left flat in a damp environment warps and degrades. Timber stacked directly on bare concrete absorbs moisture and twists. Adhesives and sealants left in direct sunlight or freezing temperatures can lose their performance properties entirely.

    Set up a designated storage area on every site, even a temporary one, and establish basic rules. Sheet materials should be stored vertically or properly supported horizontally. Timber should be stacked off the ground on bearers with adequate spacing for airflow. Anything moisture-sensitive goes under cover, full stop. On longer projects, a simple lockable storage container pays for itself in avoided waste within a few weeks.

    Tradesman organising labelled timber offcuts as a practical method to reduce material waste on site
    Tradesman organising labelled timber offcuts as a practical method to reduce material waste on site

    Organising materials by type and trade stage also reduces the chance of damage from foot traffic and rummaging. If plasterers are walking over a pallet of floor tiles to get to their gear, something will eventually crack. Simple organisation prevents this entirely.

    Make Offcut Reuse a Standard Part of Your Workflow

    Offcuts are not waste until you decide they are. A well-run site treats offcuts as a secondary resource to be used before cutting into new stock. This requires a small shift in habit but produces consistent savings.

    Keep a dedicated offcut area on site, sorted by material type. Before cutting a new length of timber or sheet, check whether an existing offcut will do the job. On a kitchen fit-out, MDF offcuts from carcass work can be used for internal blocking, drawer bases, or filler strips. On a tiling job, cut tile pieces saved from one area can fill gaps in another if the layout is planned intelligently from the outset.

    For materials like plasterboard, labelling offcut sizes with a marker and standing them upright takes about 30 seconds per piece and can save you cutting into a full sheet later that day. It is the kind of small discipline that experienced tradesmen build into their working rhythm without thinking about it.

    Order Smarter, Not Just Less

    Reducing waste does not always mean ordering less quantity. It often means ordering better. Buying timber in the lengths you actually need rather than the longest available and cutting down reduces waste at the cutting stage. Choosing sheet materials in the format that best suits your panel sizes means fewer offcuts from the start.

    Where possible, speak to your merchant about available sizes before committing to a specification. Many builders merchants can source sheet materials in non-standard dimensions or offer part-pack purchasing on some product lines. It is worth asking, because the default assumption is always that you will take full packs in standard sizes.

    Batching orders across similar jobs running concurrently also reduces waste. If you have two bathrooms on the go in the same postcode, consolidating your tile order and buying to combined quantities means you can share surplus intelligently rather than having two separate leftover piles.

    The Financial and Environmental Case for Leaner Site Management

    Reducing material waste on site has a direct impact on job profitability. Materials typically account for 40 to 60% of a job’s total cost, so even modest reductions in waste translate to meaningful savings. A tradesman who cuts material waste by 8% on a job with £5,000 in materials saves £400 before a single additional hour is worked.

    The environmental argument is equally compelling and increasingly relevant to clients. Waste from construction and refurbishment accounts for a substantial share of landfill in the UK. Tradesmen who can demonstrate a leaner, lower-waste approach to site management are well placed as client expectations around sustainability continue to rise. Documenting your approach, even informally, can become a genuine point of difference when quoting against competitors.

    Leaner site management is not about cutting corners. It is about working with precision, respecting the materials you use, and running a site that reflects professional standards from the first delivery to the final skip collection. The tradesmen who get this right consistently are the ones whose margins hold up even when material prices are high.

    Frequently Asked Questions

    What is the most common cause of material waste on building sites?

    Inaccurate ordering is the most common cause, followed closely by poor on-site storage that leads to damage before materials are even installed. Over-ordering due to rough estimates rather than measured takeoffs generates surplus that is rarely used efficiently, while damp, mishandled, or unsecured materials often become unusable before they reach the point of installation.

    How much wastage allowance should I add when ordering materials?

    A standard 10% wastage allowance covers most straightforward jobs, but this should be adjusted based on the complexity of the work. Simple rectangular areas with large format tiles or full-length timber runs may only need 5%, while intricate cuts, natural stone, or complex roof geometry could warrant 12 to 15%. Always base your buffer on the specific job rather than applying a blanket figure.

    How can tradesmen make better use of offcuts on site?

    The key is treating offcuts as a secondary stock rather than immediate waste. Designate a storage area sorted by material type, label offcut dimensions clearly, and always check available pieces before cutting into new stock. On joinery and boarding work in particular, this habit can save several full sheets or lengths per week on a busy site.

    Does reducing site waste actually save money on smaller jobs?

    Absolutely. Even on smaller domestic refurbishments, material waste reductions make a real difference to net margin. Materials often represent half a job’s total cost, so a 10% reduction in waste on a £2,000 materials spend puts £200 back into profit without any additional labour or pricing changes. The savings compound across multiple jobs throughout the year.

    Are there any regulations around construction waste disposal in the UK?

    Yes. Under the Environmental Protection Act and related waste duty of care regulations, businesses in the UK are responsible for ensuring their waste is handled legally. This means using licensed waste carriers, completing waste transfer notes for skip collections, and not mixing hazardous materials with general site waste. Failure to comply can result in fixed penalty notices or prosecution, so it is worth understanding your obligations on every project.

  • What Is the Difference Between Structural and Non-Structural Timber?

    What Is the Difference Between Structural and Non-Structural Timber?

    If you have ever stood in a timber yard trying to work out which boards to pull for a floor joist versus a stud wall partition, you will know the confusion that comes with timber grading. Understanding structural vs non-structural timber is not just academic knowledge; it is the kind of thing that keeps buildings safe, passes inspections, and saves you from rework. Whether you are a joiner, carpenter, or self-builder putting up your own place, getting this right from the start matters.

    Stacks of structural vs non-structural timber grades in a UK timber yard with visible grade stamps
    Stacks of structural vs non-structural timber grades in a UK timber yard with visible grade stamps

    What Makes Timber “Structural”?

    Structural timber is graded specifically to carry load. It has been assessed, either visually or by machine, to confirm that it meets defined strength and stiffness requirements. In the UK, structural timber is graded to BS EN 338 standards and will typically carry a strength class designation such as C16 or C24. These classes tell you the characteristic bending strength, stiffness, and density of the wood. C16 is the most commonly used grade on UK building sites and covers the majority of domestic joinery and framing applications. C24 is stronger and stiffer, and is used where spans are longer or loads are greater, such as in floor joists, rafters, and engineered roof structures.

    Structural timber also carries a mark. Look for a stamp on the board that shows the strength class, the grading standard, the species, and the certification body. If a board does not carry this mark, you cannot legally or safely specify it for structural use, regardless of how solid it looks. That stamp is your paper trail for building control.

    What Is Non-Structural Timber Used For?

    Non-structural timber, sometimes referred to as general purpose or carcassing timber, has not been graded to a structural standard. It is typically used in applications where it carries no significant load: internal stud partitions that are not load-bearing, noggins, battens for dry-lining, boxing in pipes, shelving carcasses, and decorative framing. It is also used extensively in interior fit-out work such as window boards, architrave backing, and furniture construction.

    This is where the connection to finishing trades becomes relevant. Companies like Vesta Blinds and Shutters Mansfield, which supply and fit window blinds and shutters across the Mansfield area, rely on tradesmen who understand timber correctly. When a window reveal is framed out with the wrong grade of timber, or when batten work is undersized or poorly selected, it causes problems further down the line for every trade that follows. A well-prepared reveal, built with the right non-structural board and correctly fixed, gives fitting specialists a solid base to work from.

    Close-up of a C24 grade stamp on structural timber illustrating the difference in structural vs non-structural timber grading
    Close-up of a C24 grade stamp on structural timber illustrating the difference in structural vs non-structural timber grading

    Visual Grading vs Machine Grading: What’s the Difference?

    UK structural timber reaches its grade via one of two routes. Visual grading involves a trained and certified grader physically examining the board for knots, slope of grain, wane, splits, and other defects. Machine grading puts the timber through a stress-grading machine that measures stiffness and assigns a grade accordingly. Machine grading is generally more consistent and is the dominant method for bulk structural supply. Both methods are valid, and both produce timber that carries the required grade stamp.

    When buying from a timber merchant, always ask whether the structural stock is certified. Reputable merchants will have no issue producing that information. If you are buying from a general builders merchant or a DIY shed, check every board individually for a stamp. Do not assume that timber on a structural shelf is automatically graded correctly; stock gets mixed, boards get misplaced, and an unstamped board in a structural stack is a liability.

    C16 vs C24: Which Should You Specify on Site?

    For most domestic projects, C16 will be the standard go-to. It is widely available, competitively priced, and covers floor joists at typical domestic spans, stud walls in load-bearing configurations, and most roof members where a structural engineer has not specified otherwise. C24 becomes necessary when spans push beyond normal limits, when the engineer’s calculations demand it, or when you are working with modern open-plan designs where traditional stud spacing is increased.

    One common mistake on site is substituting C16 for C24 because the merchant was out of stock. This is not a like-for-like swap. If a structural engineer has specified C24, that is what goes in. Full stop. Building control will ask, and if a failure occurs, you want to be holding the right paperwork.

    What to Look for When Buying Structural Timber

    Beyond the grade stamp, check for moisture content. Structural timber should be supplied at around 20% moisture content or below for most site applications. Kiln-dried structural timber, often labelled KD, is preferable for joinery-grade work where movement needs to be minimised. Green or unseasoned timber will shrink as it dries in place, which can cause creaking floors, nail pops, and gaps in finishing work. Businesses like Vesta Blinds and Shutters Mansfield, which fit precision window dressings in completed interiors, will always be affected by frames and reveals that have moved because the underlying timber was not properly seasoned before fitting began.

    Practical Tips for Tradesmen and Self-Builders

    Always keep your structural and non-structural timber separated on site. Label your stacks if you need to. One unlabelled C24 rafter used as a shelf batten is harmless; one unlabelled non-structural board inserted into a floor joist run is a potential structural failure. Store timber off the ground, under cover, and with spacers between rows to allow airflow. Wet timber that dries out on site will distort, cup, and bow, making every fixing job harder and every finish look worse.

    If you are a self-builder managing your own materials, take the structural engineer’s schedule to your merchant and hand it over. Let them pull the right stock. If you are working to building regulations drawings, check the specification notes carefully as they will state the required strength class for each timber element. And if in doubt, overspecify rather than underspecify. The difference in cost between C16 and C24 is modest; the cost of getting it wrong is not.

    Understanding structural vs non-structural timber is one of those fundamentals that separates a competent tradesman from a corner-cutter. Get it right, stamp it right, and your building control sign-off will be straightforward.

    Frequently Asked Questions

    What is the difference between C16 and C24 structural timber?

    C16 and C24 are both structural timber grades under the BS EN 338 standard, but C24 has higher characteristic bending strength and stiffness. C16 is suitable for most standard domestic applications such as floor joists and rafters at typical spans, while C24 is required where loads are greater or spans are longer, as specified by a structural engineer.

    Can I use non-structural timber for stud walls?

    Non-structural timber can be used for non-load-bearing internal partitions, but if the stud wall is load-bearing, you must use structurally graded timber with the appropriate strength class mark. Using non-structural timber in a load-bearing application is a building regulations failure and a safety risk.

    How do I know if timber is structurally graded?

    Structurally graded timber carries a visible stamp on each board showing the strength class (such as C16 or C24), the grading standard, species, and certification body. If there is no stamp, the timber cannot be used for structural applications, regardless of how it looks visually.

    What moisture content should structural timber be?

    Structural timber should generally have a moisture content of 20% or below for site use, with kiln-dried timber preferred for interior joinery applications. Timber with high moisture content will shrink as it dries in place, potentially causing movement, noise, and defects in finishes applied over the top.

    Is it okay to swap C24 for C16 if the merchant is out of stock?

    No. If a structural engineer or building regulations drawing specifies C24, you must use C24. These are not interchangeable grades; the specification exists because the structure requires the higher strength or stiffness. Using C16 in a C24 application could result in failure to pass building control inspections and, in the worst case, structural problems.

  • The Best Insulation Materials for UK Homes: A Tradesman’s Comparison

    The Best Insulation Materials for UK Homes: A Tradesman’s Comparison

    Choosing the right insulation materials for UK homes is one of those decisions that separates a competent job from a genuinely excellent one. With energy efficiency standards tightening under Part L of the Building Regulations, and homeowners under increasing pressure to reduce heat loss, the demand for proper insulation has never been higher. Whether you’re insulating a loft, a cavity wall, or a solid floor, the product you specify will affect performance, cost, build time, and compliance for decades to come.

    This guide breaks down the main options available to UK tradesmen, giving you the honest pros, cons, and approximate cost per square metre so you can spec the right material for each job.

    Tradesman fitting mineral wool loft insulation, comparing insulation materials for UK homes
    Tradesman fitting mineral wool loft insulation, comparing insulation materials for UK homes

    Mineral Wool: The Workhorse of Insulation

    Mineral wool, which covers both glass wool and rock wool products, remains the most widely used insulation material across UK residential and commercial builds. It’s non-combustible, absorbs sound well, and is straightforward to cut and fit into standard stud, joist, and rafter bays. Brands like Knauf and Rockwool are staples on most builders’ merchants’ shelves.

    For loft insulation, a 100mm layer of glass wool between joists topped with a further 170mm across the joists gives you the recommended 270mm total depth and satisfies current Building Regulations for new builds and most retrofits. Rock wool tends to be denser and performs better in areas that need combined thermal and acoustic performance, such as party walls or separating floors.

    Typical cost: £3 to £7 per square metre depending on thickness and product grade. It’s budget-friendly and widely available, which makes it the go-to option when you’re pricing a job competitively.

    Watch out for: Mineral wool is moisture-sensitive if not protected properly. In poorly ventilated roof spaces or where vapour control isn’t up to scratch, it can absorb moisture and lose a significant portion of its thermal performance over time.

    Rigid Foam Boards: Best for Tight Spaces and High Performance

    Rigid foam insulation boards, including PIR (polyisocyanurate), EPS (expanded polystyrene), and XPS (extruded polystyrene), offer significantly higher thermal resistance per millimetre than mineral wool. This makes them the preferred choice wherever space is at a premium, such as insulating under a concrete floor slab, in a warm flat roof build-up, or when upgrading a solid wall from the inside without losing too much room depth.

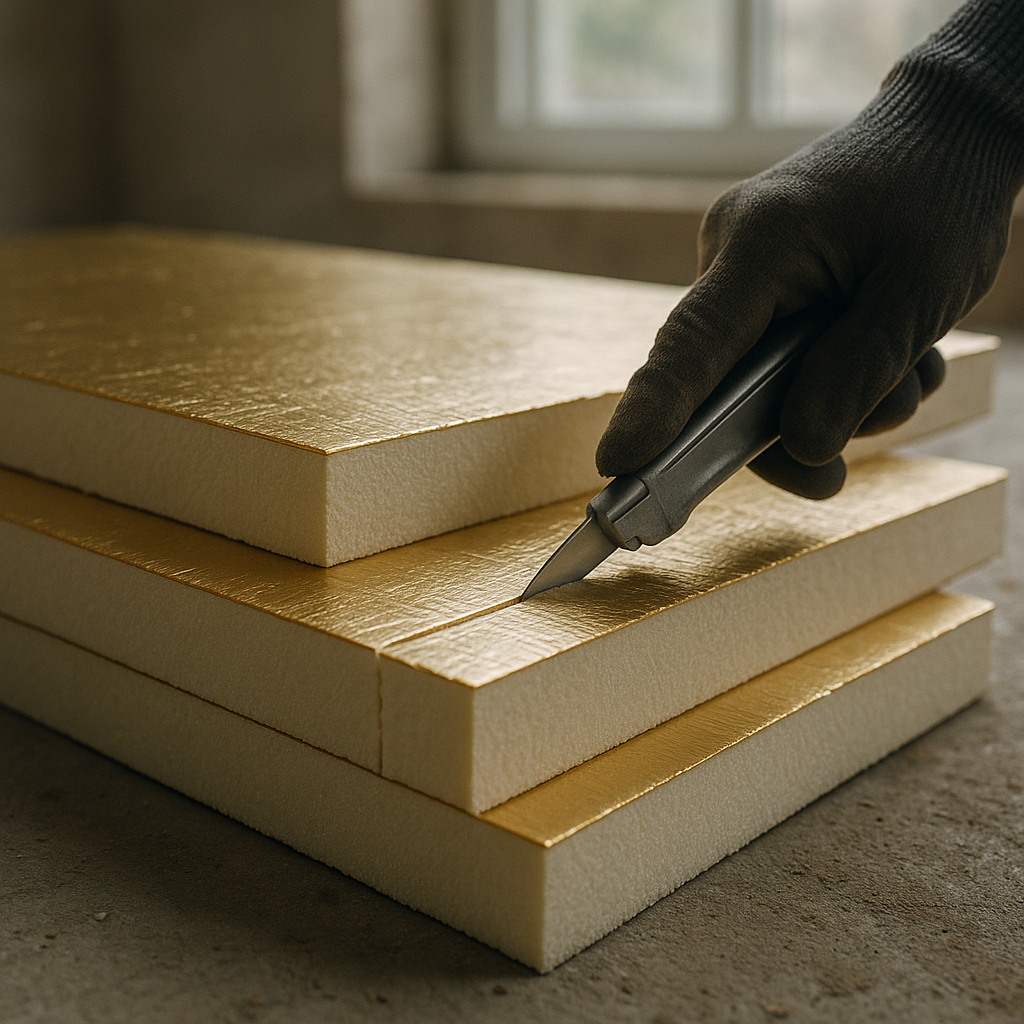
    Close-up of rigid PIR foam board being cut on site, a key insulation material for UK homes
    Close-up of rigid PIR foam board being cut on site, a key insulation material for UK homes

    PIR boards like Kingspan Koolthus or Celotex GA4000 series typically achieve a lambda value of around 0.022 W/mK, meaning a 100mm board delivers roughly the equivalent performance of 200mm of mineral wool. For floor insulation under a screed, 75mm to 100mm of PIR is common practice and keeps the finished floor level manageable.

    Typical cost: £8 to £18 per square metre for PIR boards at standard thicknesses. EPS is cheaper, sitting around £4 to £9 per square metre, but has a higher lambda value so you’ll need more of it to hit the same U-value target.

    Watch out for: Rigid boards are combustible and must be protected by a suitable fire barrier in most applications. Always check the specific product’s reaction-to-fire classification and the relevant Approved Document guidance before specifying on anything above ground floor.

    Spray Foam Insulation: Effective but Complicated

    Spray polyurethane foam (SPF) has had a turbulent few years in the UK market. When applied correctly by a qualified installer, open-cell or closed-cell spray foam can seal air leakage effectively and deliver strong thermal performance in awkward, irregular cavities. Closed-cell foam in particular has a very low lambda value (around 0.025 to 0.030 W/mK) and adds structural rigidity to the substrate it’s applied to.

    However, spray foam insulation in roof spaces has caused significant mortgage and valuation issues for homeowners across the UK. Several major lenders have declined to lend against properties where spray foam has been applied to rafters, citing concerns about trapped moisture, difficulty inspecting the roof structure, and reduced rafter lifespan. As a tradesman, you have a duty to make your client aware of this before recommending spray foam for a roof application.

    Typical cost: £20 to £45 per square metre installed, making it one of the most expensive options. For ground floors, basements, and commercial applications where mortgage implications don’t apply, it can still be the right call.

    How Technology Is Changing How Tradesmen Work

    It’s worth noting that the construction industry is being reshaped by manufacturing innovation at every level. Custom brackets, fixing components, and bespoke ventilation spacers that once required machining are increasingly being produced via Online 3D Printing, allowing tradesmen to get precise, job-specific parts fabricated quickly without heavy tooling costs.

    Which Insulation Material Should You Specify?

    The honest answer is that there’s no single best insulation material; the right choice depends entirely on the application, the budget, and the performance target. For a standard loft insulation job, mineral wool is hard to beat on cost and ease of installation. For a room-in-roof, warm roof, or floor build-up where depth is constrained, PIR boards will get you to the required U-value in the thinnest possible profile. Spray foam has legitimate uses in basements, commercial builds, and below-DPC applications, but should be approached with caution in residential roofs until the mortgage market clarifies its stance.

    Whichever product you choose, make sure your U-value calculations are compliant with current Part L targets (0.16 W/m²K for roofs, 0.18 W/m²K for floors, and 0.26 W/m²K for walls in new builds), document your specification clearly, and always follow the manufacturer’s installation guidance. A well-insulated build is one of the most lasting contributions a tradesman can make to a property.

    Frequently Asked Questions

    What is the cheapest insulation material available in the UK?

    Mineral wool, particularly glass wool rolls, is generally the most affordable option, typically costing between £3 and £7 per square metre depending on thickness. It’s widely stocked at builders’ merchants and suits most standard loft and stud wall applications. For budget-sensitive jobs, it remains the most practical starting point.

    Is spray foam insulation bad for house sales in the UK?

    Spray foam in roof spaces has caused significant issues with mortgage applications and property valuations across the UK. Many lenders refuse to lend against homes where spray foam has been applied to rafters, as it can mask structural defects and trap moisture. Tradesmen should always inform clients of this risk before specifying spray foam in residential roofs.

    What insulation do I need under a concrete floor slab to meet Building Regulations?

    For new build ground floors, you typically need to achieve a U-value of 0.18 W/m²K or better to meet Part L requirements. Around 75mm to 100mm of PIR rigid foam board under the screed will usually achieve this, depending on the floor dimensions and edge insulation detailing. Always calculate the specific U-value for each project rather than assuming a standard thickness will comply.

    What is the best insulation for a warm flat roof?

    PIR rigid foam boards are the preferred choice for warm flat roof construction, sitting above the deck and below the waterproofing layer. Products like Kingspan or Celotex boards offer a high thermal resistance in a slim profile, which is important when flat roof build-up depth is limited. Ensure the product is compatible with the waterproofing system being used and that any fire requirements for the building type are met.

    How thick does loft insulation need to be in the UK?

    Current guidance recommends a total loft insulation depth of 270mm for mineral wool, typically installed as 100mm between joists and 170mm laid across them in a cross-layer. This depth is recommended by the Energy Saving Trust and aligns with Building Regulations for new and upgraded roof spaces. Some older properties may need to have existing insulation topped up to reach this standard.

  • Choosing the Right Construction Adhesives and Sealants for the Job: A Tradesman’s Guide

    Choosing the Right Construction Adhesives and Sealants for the Job: A Tradesman’s Guide

    Walk into any builders’ merchant and you’ll find an entire aisle dedicated to tubes, cartridges, and tubs of adhesives and sealants. It’s a lot to take in, and grabbing the wrong product can cost you time, money, and more than a little frustration on site. Choosing the right construction adhesives and sealants for the job isn’t just about what sticks to what. It’s about understanding environmental conditions, substrate compatibility, cure times, and load-bearing requirements before you even crack a tube open.

    Tradesman applying construction adhesive from a caulking gun on a building site
    Tradesman applying construction adhesive from a caulking gun on a building site

    This guide cuts through the noise. Whether you’re a seasoned sparky, a plumber working with wet environments, or a general builder dealing with mixed materials every day, knowing your products makes a real difference to the quality and longevity of your work.

    Know Your Substrates First

    Before anything else, think about what you’re bonding or sealing. The substrate, meaning the surface material, dictates everything. Concrete, timber, metal, glass, UPVC, and plasterboard all behave differently. Some are porous, some aren’t. Some expand and contract with temperature. Some have surface treatments like paint or galvanising that interfere with adhesion.

    Porous surfaces like brick and timber generally bond well with solvent-based or polyurethane adhesives. Non-porous materials such as glass or powder-coated metal often need specialist adhesives, sometimes silicone-based or MS polymer products, to get a reliable grip. Always check the manufacturer’s data sheet before committing to a product. It’ll tell you exactly what substrates the adhesive or sealant is approved for, and that information is there for a reason.

    Construction Adhesives: Which Type Does What

    There are several main families of construction adhesive you’ll encounter regularly on site. Each has its strengths and its limitations.

    PVA adhesives are workhorses for interior timber and porous materials. They’re cheap, easy to use, and clean up with water. But they’re not waterproof unless specified, so keep them indoors. Epoxy adhesives come in two parts and create an exceptionally strong, rigid bond. They’re ideal for structural repairs, anchoring bolts, and bonding dissimilar materials. The trade-off is working time; once mixed, you’ve got a limited window. Polyurethane adhesives are flexible once cured, which makes them excellent for materials that move, including timber floors and sandwich panels. They also work on damp surfaces, which gives them an edge in certain site conditions.

    Close-up of various construction adhesive and sealant cartridges on a workbench
    Close-up of various construction adhesive and sealant cartridges on a workbench

    MS polymer adhesives, sometimes called hybrid adhesives, have become increasingly popular over the past decade. They combine adhesive and sealant properties, bond to almost anything without priming, and remain flexible after curing. Many tradesmen now keep a cartridge of MS polymer on the van as a general-purpose solution. They’re solvent-free, paintable, and suitable for interior and exterior use. If you’re after one product that bridges multiple applications, MS polymer is worth serious consideration.

    Sealants: More Than Just Gap-Filling

    Sealants are often treated as an afterthought, something to tidy up the edges once the main work is done. That attitude leads to failures. A sealant joint is a moving joint. It expands and contracts with temperature and structural movement. Get the product wrong and you’ll see cracking, delamination, or water ingress within months.

    Silicone sealants remain the standard for wet areas. Bathrooms, kitchens, and anywhere water is present regularly benefit from silicone’s waterproofing properties and long-term flexibility. Sanitary-grade silicones also include antifungal additives to resist mould growth. Acrylic sealants are paintable and easy to tool, making them the go-to for interior gaps around skirting boards, architraves, and coving. They’re not suited to wet areas, though. Use them where paint will go over the top.

    Fire-rated sealants are non-negotiable in certain applications. Around pipes and cables passing through fire compartment walls or floors, you need an intumescent or fire-resistant sealant that’s been tested and certified. This isn’t a corner to cut. Check building regulations and your specification before choosing any sealant for penetrations in fire-resisting construction.

    Environmental Conditions and Cure Times

    Temperature and humidity affect both adhesives and sealants during application and curing. Most products are designed to be applied between 5°C and 35°C. Working outside those limits can cause poor adhesion, extended cure times, or complete failure. In cold weather, bring cartridges into a heated van before use as cold product becomes thick and difficult to apply evenly.

    Cure time matters on a working site. Some adhesives allow you to stress the joint within minutes. Others need 24 hours or more before load can be applied. Plan around this. Rushing a joint before it’s fully cured is one of the most common causes of adhesive failure on site.

    Surface Preparation: The Step Most People Skip

    No adhesive or sealant performs well on a dirty, dusty, or oily surface. Proper preparation is the single biggest factor in joint longevity. Clean substrates with a suitable solvent or cleaner, remove loose material, and ensure surfaces are dry unless the product specifically states it bonds to damp substrates. For smoother non-porous materials, light abrasion can help mechanical adhesion. Primer is sometimes required, particularly for certain plastics or metals, so check the data sheet.

    Choosing the Right Construction Adhesives and Sealants for the Job in Practice

    Choosing the right construction adhesives and sealants for the job really comes down to a straightforward checklist. What are the substrates? Is the joint structural or aesthetic? Will it be exposed to moisture, heat, or movement? Does it need to be painted? Does it need to comply with fire regulations? Answer those questions and you’ll narrow the field considerably. Most trade suppliers stock a focused range of products that cover the majority of applications; you don’t need to know every adhesive on the market, just the right ones for your trade and the jobs you take on regularly.

    Invest a bit of time reading product data sheets and you’ll find that choosing the right construction adhesives and sealants for the job becomes second nature. The difference between a joint that lasts and one that fails is usually down to that bit of preparation and product knowledge beforehand.

    Frequently Asked Questions

    What is the difference between an adhesive and a sealant?

    An adhesive is primarily designed to bond two surfaces together and carry a load. A sealant is designed to fill gaps and joints, providing a flexible, weatherproof barrier. Some MS polymer products combine both properties, acting as an adhesive sealant in a single application.

    Can I use silicone adhesive on wood?

    Standard silicone doesn’t bond well to timber because it can’t penetrate the porous surface effectively. For timber, a polyurethane, PVA, or MS polymer adhesive will provide a much stronger and more reliable bond. Always check the product data sheet for substrate compatibility.

    How long should construction adhesive be left before applying load?

    This varies significantly between products. Some fast-cure adhesives can take load within 30 minutes, while others require 24 hours or more. Always refer to the manufacturer’s technical data sheet for recommended cure times, especially for structural applications.

    Do I need a fire-rated sealant around pipes?

    Yes, in most cases. Any pipe, cable, or duct passing through a fire-resisting wall or floor must be sealed with a fire-rated intumescent sealant to maintain the fire integrity of that compartment. This is a building regulation requirement and not something that can be substituted with a standard product.

    What is MS polymer adhesive used for?

    MS polymer, or modified silicone polymer, is a hybrid adhesive and sealant suitable for bonding and sealing a wide range of materials including timber, metal, concrete, glass, and most plastics. It’s solvent-free, paintable, flexible when cured, and works in both interior and exterior applications, making it a highly versatile choice on site.

  • How to Market Your Trade Business on a Budget

    How to Market Your Trade Business on a Budget

    If you’re a sole trader, small building firm, or independent handyman trying to win more work, the pressure to market your trade business can feel like another job entirely. You’re already juggling tools, quotes, site visits, and invoices – the last thing you want is to spend hours and a small fortune on advertising that doesn’t convert. The good news is that effective trade marketing doesn’t have to cost a fortune. It just needs to be done properly.

    Why Marketing Matters More Than Ever for Tradespeople

    Word of mouth has always been the backbone of trade work, and it still is. But the reality in today’s market is that most homeowners and project managers will search online before they pick up the phone. If you’re not visible, you’re invisible. That doesn’t mean you need a glossy agency campaign – it means you need a consistent, credible presence that backs up the reputation you’ve already earned on the tools.

    Local competition has also sharpened up. In almost every sector – from plastering to groundworks to electrical – there are more tradespeople competing for the same jobs than there were a decade ago. Standing out isn’t optional anymore. It’s the difference between a full order book and quiet weeks.

    Start With the Basics: Branding That Works Hard

    Before anything else, get your branding sorted. That means a clear business name, a professional logo, and consistent contact details across every touchpoint. If your van, your business card, your invoice template, and your social media profile all look slightly different, you come across as disorganised – even if your work is immaculate.

    Printed materials still pull weight in the trade. Flyers through doors, business cards left on-site, and signage on scaffolding are all tangible reminders that you exist and you’re local. Print Shape, a UK business that provides a local service business with printed marketing materials, is one option worth considering when you need professional-looking print without the premium agency price tag. The physical presence of a well-designed flyer or a smart business card builds trust in a way that a quick Facebook post simply doesn’t.

    How to Get More Work Through Google Without Paying for Ads

    A Google Business Profile is arguably the single most powerful free tool available to any tradesperson. Set it up, fill in every section, upload photos of your work, and encourage every satisfied customer to leave a review. When someone searches for a plasterer or roofer in your area, a well-maintained Google Business Profile puts you right in front of them.

    Beyond that, a simple website with a handful of before-and-after photos, a clear list of services, and your contact details does most of the heavy lifting. You don’t need anything flashy – you need something that loads quickly, works on mobile, and tells people what you do and where you work. Keep it updated and don’t let it sit stale for years.

    Social Media for Tradespeople – Keep It Practical

    You don’t need to be a content creator. But a few photos a week of work in progress, a finished job, or even just your kit laid out neatly can do a lot of good. Instagram and Facebook are both useful for trade businesses, particularly for residential work where homeowners are the primary audience. Short videos of tricky jobs being done properly – pointing, roof repairs, tiling – tend to get strong organic reach because they’re genuinely useful and interesting to watch.

    The key is consistency over volume. Two or three posts a week with real photos beats a burst of ten posts followed by three months of silence. People follow businesses they see regularly and trust the ones that seem active and engaged.

    Printed Collateral – Still Worth the Investment

    Don’t underestimate the power of a well-designed leaflet drop in a neighbourhood where you’ve just finished a job. A short, sharp flyer with a photo of the completed work, a line about what you did, and your contact details is one of the most cost-effective ways to win repeat local work. Residents notice when work is being done nearby – they’re already thinking about their own projects.

    That’s where local print providers genuinely earn their keep. A business like Print Shape – which supports local service businesses across the UK with printed collateral – can turn around professional-quality flyers, door hangers, and site board graphics at prices that make the investment sensible rather than reckless. When you think about cost per lead, a well-targeted local print run often beats paid digital ads by a significant margin.

    Practical Tips to Market Your Trade Business Without Wasting Money

    • Always ask satisfied clients for a Google review while the job is fresh – don’t wait days or weeks.
    • Photograph every job before and after. You’ll thank yourself when it comes to building a portfolio.
    • Join local Facebook groups and community pages – not to spam them, but to answer questions and be genuinely helpful. Reputation follows.
    • Network with other trades. A sparky who recommends your plastering, and vice versa, creates a referral chain that costs nothing and pays dividends.
    • Keep a simple spreadsheet of past clients and follow up every six to twelve months. A quick message asking if they need anything else is not pushy – it’s professional.

    Measuring What Works

    The simplest metric for any trade business is this: where did your last ten jobs come from? Ask every new customer how they found you. After a few months you’ll see patterns – and you can put more effort into whatever channel is actually delivering work. Marketing isn’t about doing everything. It’s about doubling down on what works and cutting what doesn’t.

    If you want to market your trade business effectively without burning time or money on approaches that don’t convert, start with the fundamentals: a sharp Google profile, consistent printed materials for local coverage, and a steady stream of genuine customer reviews. Build from there and let your reputation do the rest.

    Printed marketing materials on a workbench used to market your trade business locally
    Tradesperson photographing finished work on a smartphone to market your trade business online

    Market your trade business FAQs

    What is the cheapest way to market a trade business?

    The cheapest and most effective starting point is setting up a fully completed Google Business Profile – it’s free and puts you directly in front of local customers searching for your services. Combining this with regular requests for customer reviews and a basic website will generate consistent enquiries without any ongoing advertising spend.

    Do flyers still work for tradespeople?

    Yes, particularly for residential work in specific postcodes. A targeted leaflet drop in a street or area where you’ve recently completed a job is highly effective because neighbours are already primed to think about similar projects. The cost per enquiry is often lower than paid digital advertising when the targeting is tight.

    How do I get more reviews for my trade business?

    The most reliable method is to ask directly, in person or by message, as soon as a job is finished and the client is happy. Send a direct link to your Google review page so there’s no friction for the customer. Businesses that ask consistently end up with significantly more reviews than those who wait for clients to volunteer them.

    Is social media worth it for a small building or trade firm?

    It is worth it, but only if you’re consistent. Two to three posts per week showing real work – in progress and finished – builds credibility and keeps you visible to past and potential clients. Instagram and Facebook both work well for residential-focused trade businesses, and the organic reach for practical, skill-based content tends to be strong without needing paid promotion.

    How much should a tradesperson spend on marketing?

    A common benchmark for small trade businesses is between three and five per cent of annual turnover, though this varies depending on how established you are and whether you’re actively trying to grow. In early stages, prioritising free channels like Google Business Profile and referral networks is wise before committing budget to print or paid ads.