Author: Ethan Miller

  • Choosing the Right Commercial Flooring for Heavy Footfall Jobs

    Choosing the Right Commercial Flooring for Heavy Footfall Jobs

    When you are pricing or planning a job, picking the right commercial flooring for heavy footfall can make or break the project. The wrong choice will scuff, crack or curl in no time, and you are the one who gets the call-back. The right system will take years of abuse from boots, trolleys and chairs without kicking off.

    What makes flooring truly “heavy footfall” ready?

    Before you get into brands and finishes, think about what the floor is actually facing. Heavy use is not just people walking in and out. It is dragging pallets, office chairs on castors, cleaning machines, moisture at entrances, and constant dirt being ground in. Any commercial flooring for heavy footfall needs to handle three main things: impact, abrasion and moisture.

    Impact is about point loads and dropped tools. Abrasion is the daily wear from soles, grit and furniture. Moisture covers everything from mopping to wet umbrellas and muddy boots. If a product spec sheet does not clearly rate performance in these areas, it is probably not right for a busy commercial job.

    Best materials for commercial flooring for heavy footfall

    There is no one-size-fits-all answer, but a few materials come up again and again on tough jobs.

    Luxury vinyl tiles and safety vinyl

    LVT and commercial safety vinyl are workhorses. They are tough, relatively quick to lay, and available in wood, stone and abstract looks. Safety vinyl with a proper slip rating is ideal for entrances, corridors and back-of-house areas. Look for products with a thick wear layer and a decent warranty, and keep an eye on indentation resistance if there will be trolleys or shelving.

    Porcelain and ceramic tiles

    For wet areas, kitchens and some retail spaces, tiles are hard to beat. A good porcelain tile with a high slip rating and low water absorption will shrug off spills and heavy cleaning. The trade-off is that tiles are slower to install, need a solid substrate and good movement joints, and can be noisy underfoot. Get the prep wrong and you will be chasing cracked grout and loose tiles.

    Rubber and resilient sheet

    Rubber flooring and other resilient sheets are popular in gyms, education and healthcare. They are comfortable underfoot, quiet, and handle rolling loads well. They do need careful fitting and welding on seams, and the right adhesive for the site conditions. With these systems, substrate prep is everything – any lumps or ridges will telegraph straight through.

    Subfloor prep: where most failures start

    Even the best commercial flooring for heavy footfall will fail on a bad subfloor. Moisture testing is non-negotiable, especially on new slabs or refurb basements. If the client will not pay for testing, explain in writing what that means for warranty and risk.

    Make sure the substrate is level to the tolerance the flooring manufacturer calls for. Self-levelling compounds, primers and damp proof membranes are not the place to cut corners. Most call-backs on heavy traffic floors come from debonding, cracking or movement that started beneath the finish, not from the surface material itself.

    Balancing budget, speed and lifespan

    Clients often want a floor that looks high-end, installs overnight and costs next to nothing. Part of our job is managing those expectations. When you specify or recommend commercial flooring for heavy footfall, think in terms of lifecycle cost instead of only the material price per metre.

    A cheaper product that needs replacing in five years can cost more overall than a mid-range system that lasts twice as long with basic maintenance. Talk to clients about cleaning requirements, access for repairs and how easy it is to replace damaged sections without shutting down the whole space.

    Practical install tips from site

    On busy commercial jobs, coordination is key. Try to get a clear window where other trades are off the floor so you are not laying over fresh dust and debris. Protect finished areas immediately – corrugated board or temporary protection sheets save a lot of arguments later.


    Flooring installer fitting commercial flooring for heavy footfall in a retail unit
    High traffic building entrance using commercial flooring for heavy footfall

    Commercial flooring for heavy footfall FAQs

  • How To Move From Day Rate To Fixed Price Work Without Losing Money

    How To Move From Day Rate To Fixed Price Work Without Losing Money

    If you are used to day rates, moving to fixed price work can feel like a gamble. Get it wrong and you are working evenings and weekends for free. Get it right and you earn more, keep clients happy and have a steadier pipeline of jobs.

    When fixed price work makes sense

    Fixed price work suits jobs where you can clearly define the scope and there are fewer unknowns. Good examples include fitting a standard kitchen, decorating a couple of rooms, laying a patio in a clear back garden, or swapping a boiler like for like. The more repeatable the job, the easier it is to price.

    It is less suitable where you cannot see what you are dealing with, such as major refurbishments in old properties, hidden structural issues, or anything involving buried services. In those cases, you can still win the work, but you are better off using a mix of fixed prices for the known bits and day rates or provisional sums for the unknowns.

    A simple rule: if you can write a clear list of what is included and what is not on one side of A4, fixed pricing is probably realistic. If you are guessing, you should build in more protection or stick to time and materials.

    How to estimate time realistically

    The biggest risk with fixed price work is underestimating time. Start with how long the job would take you in the real world, not in a perfect world. Think about set up, moving materials, tea breaks, client chats, and clearing up.

    Break the job into stages: strip out, first fix, second fix, finishing, snagging. Estimate hours or days for each stage. Then compare that to similar jobs you have actually done. If you thought a bathroom would take five days but the last three all took seven, use seven as your base, not five.

    Once you have a realistic figure, add a buffer. Many tradesmen add 10 to 20 percent to cover minor delays like traffic, awkward access or waiting on other trades. Be honest with yourself – if you are always running over, your buffer is not big enough.

    Building materials and labour into fixed price work

    Materials can make or break your margin. Start with a full list: core materials, fixings, consumables, waste disposal and plant hire. Get current prices, then add a sensible percentage for increases and wastage. Ten percent is a common minimum, more if prices are volatile or the job is months away.

    For labour, multiply your realistic time estimate by your day rate, then add your overheads and profit. Overheads include fuel, insurance, tools, admin time and downtime between jobs. Profit is what is left after all that, not the same as your wage.

    Put it together as a simple build up: labour, materials, overheads and profit. If the final figure looks high, do not just chop it down. Recheck your assumptions. You are better off losing a job than winning it and working for nothing.

    How to build in contingency for unknowns

    Even with the best planning, surprises happen. To protect yourself, use clear wording and structured contingency. Common options are a general contingency percentage built into your price, provisional sums for specific risks, or exclusions for things you cannot see or control.

    For example, you might include a provisional sum for dealing with rotten joists or unknown pipework, making it clear that extra work will be charged once uncovered. You can also state that your price is based on what is visible at the survey and that any hidden defects are extra.

    Whatever approach you use, keep it simple and explain it in plain English to the client before they sign. Most reasonable people accept that you cannot price what you cannot see.

    Sample wording for quotes and variations

    Here is some sample wording you can adapt for your own quotes:

    Scope of works: “This fixed price covers the labour and materials listed above only. It is based on a standard installation with clear access and no hidden defects.”

    Builders on site estimating time and materials for fixed price work
    Self employed tradesperson calculating a quote for fixed price work at home

    Fixed price work FAQs

    How do I set my first price for fixed price work?

    Start by working out how long the job would take you on a day rate, then add a realistic buffer of 10 to 20 percent. Cost all materials with a bit on top for wastage and price rises, then add something for overheads and profit. Check that the final figure feels right for the market and for the risk you are taking. If the margin is too thin, adjust the scope or be prepared to say no.

    What if a client wants fixed price work on a job full of unknowns?

    In that situation, protect yourself by splitting the job. Offer fixed prices for the parts you can clearly see and define, and use provisional sums or day rates for the risky areas. Explain that you cannot sensibly fix a price for hidden issues until you open things up. Most clients understand this if you explain it clearly before work starts.

    How can I explain contingency on fixed price work to customers?

    Keep the language simple and honest. Tell them your price includes a small allowance for minor issues, but that serious hidden problems are not covered and will be priced separately. Put this in writing in your quote, use headings like Hidden Issues or Exclusions, and talk it through with them so there are no surprises later.

  • What Is ACS Certification In Construction And Do You Really Need It?

    What Is ACS Certification In Construction And Do You Really Need It?

    If you work on the tools for a living, you have probably heard people talking about ACS certification in construction, usually when gas work or site compliance comes up. It can sound like yet another bit of red tape, but understanding where ACS fits in can save you a lot of hassle, keep you legal and help you win better jobs.

    What is ACS certification in construction?

    At its core, ACS certification in construction is about proving competence, especially for gas work. ACS stands for Accredited Certification Scheme. It is the route most engineers use to show they are properly trained and assessed to work on gas appliances and pipework in homes and commercial buildings.

    You complete training, then sit practical and theory assessments at an approved centre. Pass those and you get ACS certificates for the specific elements you are qualified in, like domestic boilers, cookers or commercial pipework. Those certificates are what you use to register with the Gas Safe Register and stay on the right side of the law.

    Who actually needs ACS certification?

    If you are doing any gas work as part of your trade, ACS is not optional. It is the recognised route to prove you know what you are doing. That includes:

    • Heating engineers fitting or servicing boilers and cylinders
    • Plumbers who touch gas pipework, meters or gas-fired kit
    • Maintenance teams in commercial buildings with gas plant
    • General builders who take on refurb jobs involving gas moves

    Even if you are mainly a chippy, brickie or decorator, if you are running a small firm and taking on full refurbs, you need someone on the team or on your books who holds valid ACS certificates for the gas side of the job.

    Why ACS matters for your business and reputation

    From a business point of view, ACS certification in construction is about more than just ticking a compliance box. Clients, main contractors and insurers are all getting stricter about paperwork. If you cannot show current ACS certificates and Gas Safe registration for gas work, you can be kicked off site or refused payment for that part of the job.

    On top of that, if something goes wrong – a leak, a fire, a carbon monoxide incident – the first thing investigators look at is whether the work was done by a properly certified engineer. Without ACS, you are hanging your whole business and personal liability out to dry.

    On the positive side, being able to show solid qualifications, including ACS, is a selling point. It reassures domestic customers, helps you pass pre-qualification checks with bigger contractors and separates you from the “man with a van” who cuts corners.

    How ACS fits with other site training and schemes

    ACS sits alongside other construction training and cards rather than replacing them. You might have CSCS for site access, PASMA for towers or IPAF for access platforms. ACS covers gas competence specifically. Employers and main contractors increasingly want a full package: trade skills, health and safety cards and the right certifications for any specialist work.

    Many tradesmen top up their skills at dedicated training providers to keep up with the latest standards and technology. Providers like ACS offer structured routes to keep your cards and certificates up to date as regulations and best practice move on.

    Staying current and planning your renewals

    ACS certificates have an expiry date, usually every few years. Leaving it until the last minute is a fast way to find yourself unable to legally work on gas, just when a big job lands. It is worth keeping a simple spreadsheet or diary reminder with all your key dates: ACS, Gas Safe, CSCS, first aid and any other tickets you rely on.

    Renewal is normally a reassessment, not starting from scratch, but you should still give yourself time to revise, especially if you do not see certain types of kit every day. Turning up prepared keeps the stress levels down and means you are less likely to fail on something basic.

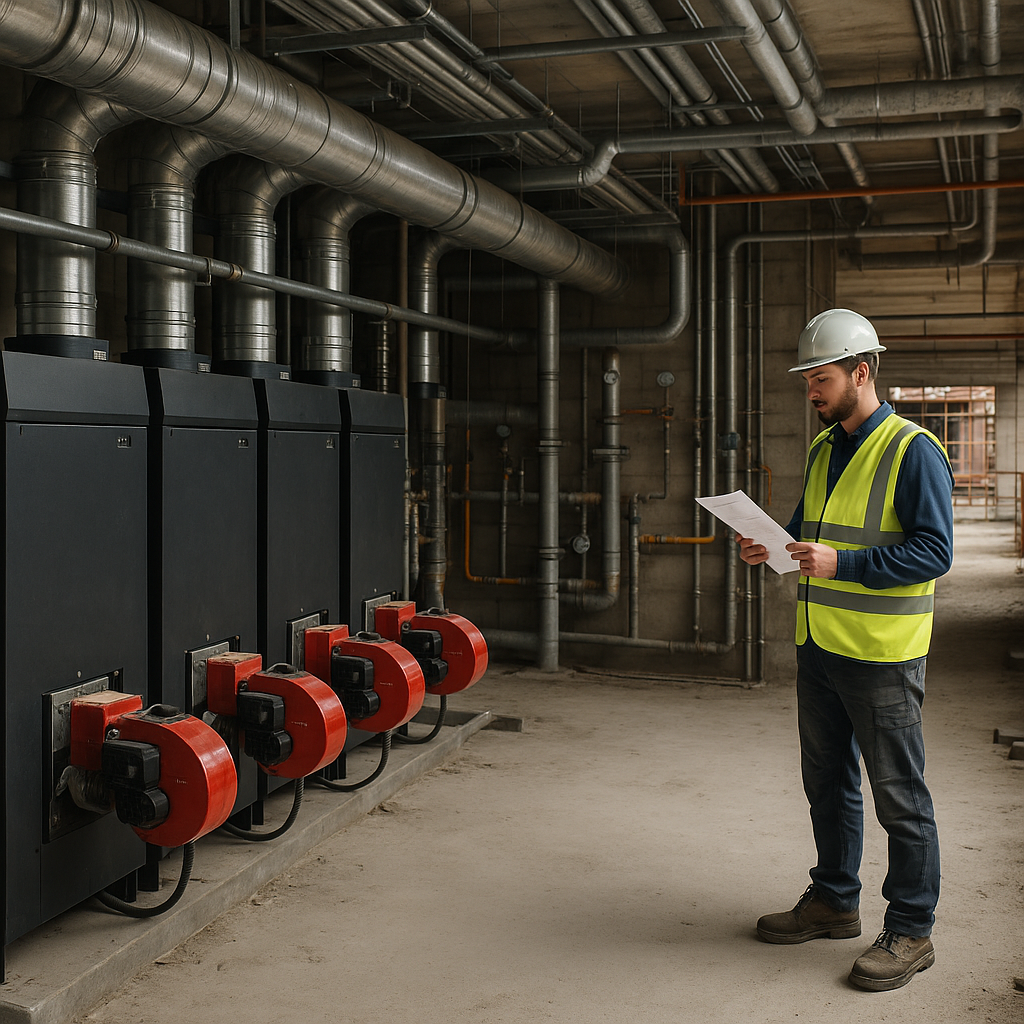
    Tradesmen discussing gas safety and ACS certification in construction on site
    Builder planning renewals for ACS certification in construction alongside other site cards

    ACS certification in construction FAQs

    Do I need ACS certification to work on gas as a plumber or heating engineer?

    Yes. If you install, service or repair gas appliances or pipework, you need ACS certification to prove your competence. It is the recognised route that allows you to register with Gas Safe and legally carry out gas work in homes and commercial buildings. Working on gas without the right certification can lead to prosecution, invalid insurance and serious safety risks.

    How often does ACS certification need to be renewed?

    ACS certificates are time limited and typically need renewing every few years. You should check the expiry dates on your individual certificates and plan your reassessments well in advance so you do not end up unable to work legally. Renewal is usually a reassessment of your knowledge and practical skills, so it helps to revise and make sure you are up to date with current standards.

    Is ACS certification in construction only for gas engineers?

    ACS is mainly focused on gas competence, so it is essential for gas engineers, heating engineers and plumbers who work on gas systems. However, it also affects builders and multi-trade firms that take on refurbishments or commercial projects involving gas. Even if you are not a gas specialist yourself, you need someone on your team or subcontracted who holds valid ACS certification in construction for any gas elements of the job.

  • How To Choose A Joinery Supplier That Will Not Let You Down On Site

    How To Choose A Joinery Supplier That Will Not Let You Down On Site

    When you are juggling deadlines, other trades and picky clients, a reliable joinery supplier can make or break a job. Doors that turn up late, frames that are out of square or stair parts that do not match the drawings all cost you time, money and reputation.

    Whether you are a one man band or running a crew, it pays to be picky about who makes your doors, windows, staircases and built in units. Here is what to look for so your next joinery order turns up right first time and goes in without drama.

    What makes a reliable joinery supplier?

    A reliable joinery supplier is not just the cheapest quote on the email. You are looking for a shop that understands site work, keeps its word and builds for real world conditions, not just the showroom. The best ones tend to have a few things in common:

    • Clear, honest lead times and good communication
    • Proper technical drawings and sign off before production
    • Consistent machining and finishing quality
    • Decent packaging and labelling so you can find parts quickly on site
    • Aftercare if something is not quite right

    Outfits like Gascoyne Joinery, and other established workshops, win repeat work because they behave like part of the team, not just a supplier firing out invoices.

    Questions to ask before you place an order

    If you want a reliable joinery supplier, you have to quiz them a bit up front. A five minute call before you send drawings can save days of grief later.

    Good questions include:

    • What is your real lead time right now? Not the brochure number, the honest one. Ask if that includes finishing and glazing if you need it.
    • What information do you need from me? A solid supplier will send a checklist – dimensions, opening directions, ironmongery, site conditions, finish type and so on.
    • How do you handle variations? Jobs change. Find out how they deal with tweaks after sign off and what that does to time and price.
    • Can you show recent similar work? Photos, references or even a quick tour of the workshop can tell you a lot.

    If they cannot answer these clearly, they are unlikely to be the partner you want on a tight programme.

    Material choices that survive real site conditions

    A reliable joinery supplier will talk materials with you, not just nod and price whatever is on the sketch. The timber and sheet goods you pick will decide how well the job holds up once the heating goes on and the client starts living with it.

    Key points to cover are:

    • Moisture resistance for bathroom cabinets, utility rooms and external doors – ask about suitable species, treatments and sealers.
    • Stability for wide doors and panels – how they are constructed to reduce warping and cupping.
    • Finish compatibility if you or a decorator are painting or staining on site – primers, top coats and drying times.
    • Fire and acoustic ratings where building control is involved – get the paperwork agreed early.

    The right supplier will push back if you are about to specify something that will swell, split or look rough after a year. That kind of honesty is worth paying for.

    Practical details that save you time on site

    On a busy job, the small details show you are dealing with a truly reliable joinery supplier. Ask how they handle:

    • Labelling – clear room numbers and positions on each item so your fitter is not guessing.
    • Ironmongery prep – hinges, locks and keeps cut in where possible to keep site chisel work to a minimum.
    • Tolerance and scribing – do they allow for uneven walls and floors, or are you left rebuilding everything with packers and fillers.
    • Delivery and unloading – kerbside only or will they help get kit safely inside and stacked flat.

    These are the things that turn a delivery into a quick install instead of a two day headache.

    Building long term relationships with your joiner

    Once you have found a reliable joinery supplier, treat them as part of your outfit. Share your programme early, give them clean drawings, and be upfront if the client is wobbly on design so they can allow for changes.

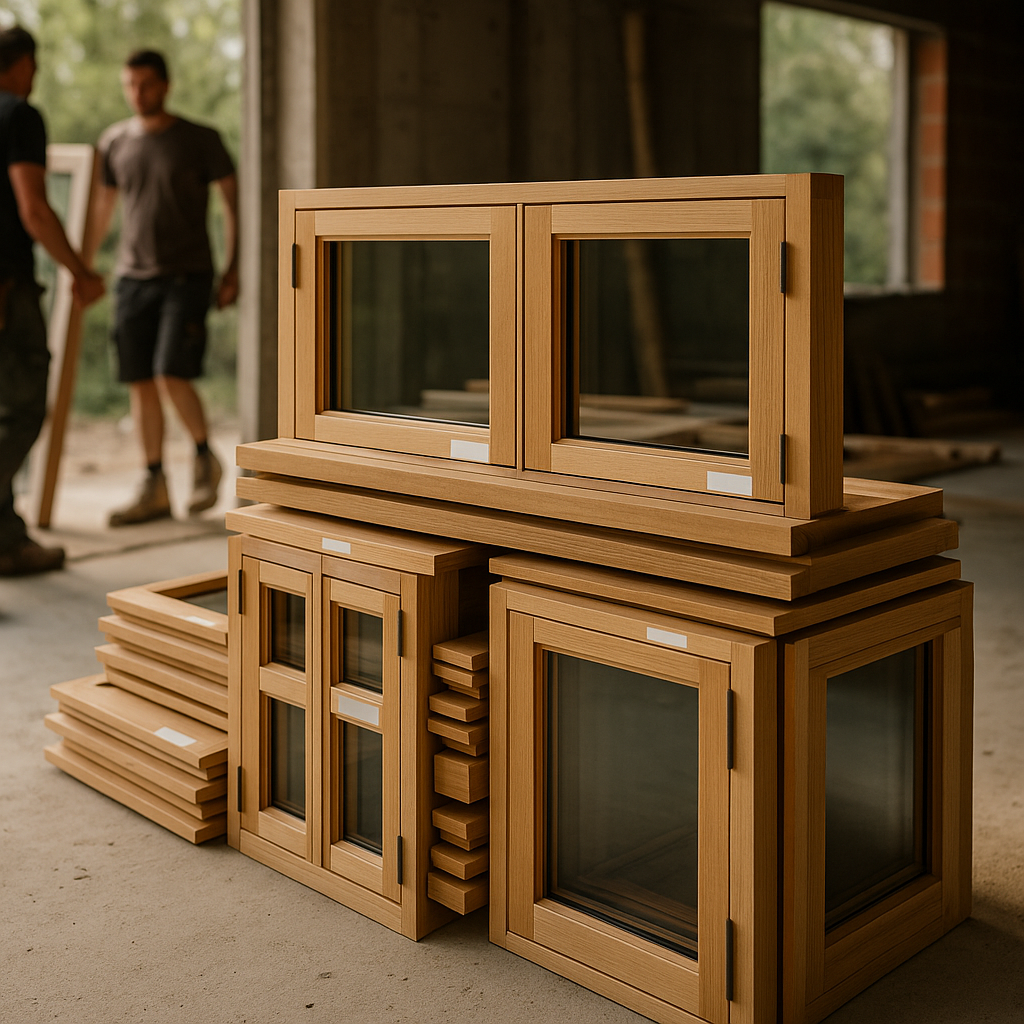
    Neatly labelled timber windows and doors delivered by a reliable joinery supplier on a building site
    Busy joinery workshop team producing components for a reliable joinery supplier

    Reliable joinery supplier FAQs

    How do I know if a joinery shop will be a reliable joinery supplier?

    Look for clear communication, realistic lead times and proper drawings for sign off. Ask for examples of similar work and speak to other trades who have used them. A reliable joinery supplier will be open about capacity, ask detailed questions about the job and be willing to push back if your specification is likely to cause problems on site.

    Should price be the main factor when choosing a reliable joinery supplier?

    Price matters, but it should not be the only factor. Cheap joinery that turns up late, does not fit or fails after a year will cost you more in call backs and lost reputation. A reliable joinery supplier will not always be the lowest price, but they will save you money through fewer snags, faster installs and happier clients.

    What information should I give a reliable joinery supplier before they start work?

    Provide accurate dimensions, clear drawings, opening directions, finish requirements, site conditions and any building control requirements. Share your programme dates and any known risks, such as late plastering or other trades in the way. The more detail you give a reliable joinery supplier up front, the better chance you have of everything fitting first time.

  • How To Win More Local Building Work In A Slower Market

    How To Win More Local Building Work In A Slower Market

    If you are trying to win more local building work right now, you are not on your own. Enquiries slow down, prices of materials keep creeping up, and it can feel like everyone is fighting for the same few jobs. The good news is there are solid, practical ways to stand out without throwing silly money at advertising.

    Get the basics right to win more local building work

    Before you blame the market, make sure your foundations are sorted. When a homeowner or site manager checks you out, they want quick answers to a few simple questions: can you do the job, can they trust you, and can you start when they need you.

    Start with the easy wins:

    • Answer your phone or call back quickly. A missed call is often a missed job.
    • Clear voicemail with your name, trade and when you will call back.
    • Professional email address with your business name, not a random nickname.
    • Simple job sheets so you do not double book or forget to quote.

    These sound basic, but plenty of lads lose work because they look disorganised before they even price the job.

    Use your existing customers to win more local building work

    Your best source of new work is usually the people you have already worked for. They know how you operate, they have seen the finish, and they are often happy to recommend you if you make it easy for them.

    Try this simple routine:

    • At the end of a job, walk the client through everything you have done and tidy up properly.
    • Ask if they know anyone else who needs work doing and leave a couple of cards.
    • In a month, send a quick text checking they are still happy with the work.

    That follow up text keeps your name in their head without being pushy. Over time, this drip feed of referrals can fill a big chunk of your diary, especially for smaller domestic jobs.

    Make your online presence work as hard as your tools

    Even on small local jobs, people will usually search your name online before they say yes. You do not need anything fancy, but you do need something that proves you are real and reliable.

    Focus on three main areas:

    • Simple website that says what you do, where you work, shows photos of recent jobs and gives clear contact details.
    • Google Business Profile with your address area, opening hours, photos and reviews.
    • Social proof on one platform you will actually use, such as Facebook or Instagram.

    If tech is not your thing, there are digital agencies like dijitul that help tradesmen get the basics set up properly, so you can crack on with the actual work while they deal with the online side.

    Quote smarter, not just cheaper

    When the market is tight, it is tempting to slash your prices. That might fill a few gaps, but it also eats your profit and burns you out. To genuinely win more local building work, you need to quote in a way that builds trust and shows value.

    Practical tips for better quotes:

    • Break costs down into labour, materials and any extras, so clients can see where the money goes.
    • Give clear timeframes with start and finish estimates, plus what could delay things.
    • Put it in writing so there is no confusion later on.
    • Offer options at different price points, such as standard and premium finishes.

    People rarely choose purely on price. They choose the builder they feel most confident in. A clear, tidy quote often beats a scribble on the back of a receipt, even if you are slightly dearer.

    Build a local network that feeds you work

    Other trades and local businesses can be a steady pipeline of jobs if you treat them well. Sparkies, plumbers, roofers, tilers, kitchen fitters and joiners all come across work that needs a reliable builder or handyman.

    Ways to build that network:

    Handyman presenting a clear quote to a client to win more local building work
    Builder capturing job photos for a website to win more local building work

    Win more local building work FAQs

    How can I win more local building work without cutting my prices too much?

    Focus on looking more professional rather than just cheaper. Answer calls quickly, give clear written quotes, break down your costs, show photos of previous jobs and collect reviews from happy customers. Most clients will pay a bit more for someone they trust to turn up, do a tidy job and finish on time.

    Is a website really necessary for a small building or handyman business?

    You do not need anything complicated, but a basic website helps people check you are genuine before they hire you. A simple site with your services, areas you cover, photos of recent work and clear contact details can make the difference between someone calling you or the next name they find online.

    What is the best way to get more referrals for local building work?

    Finish each job properly, walk the client through what you have done and ask directly if they know anyone else who needs work. Leave a couple of business cards and follow up with a quick text a few weeks later to check they are still happy. Over time, this simple habit can bring in a steady stream of referral jobs.

  • Keeping Cash Flow Healthy For Tradesmen When Material Prices Rise

    Keeping Cash Flow Healthy For Tradesmen When Material Prices Rise

    If you are on the tools every day, cash flow management for tradesmen can be the difference between sleeping at night or wondering how you will pay the merchants in the morning. With material prices creeping up and customers taking longer to pay, you need a simple, no-nonsense system that protects your time and money.

    Why cash flow management for tradesmen matters now

    Most small building firms and one man bands do not go under because they are bad at the job. They struggle because money goes out long before it comes back in. You are paying for fuel, labour, materials and insurance while waiting weeks for the customer to settle up. When prices are rising, that gap gets even more painful, so tightening up how and when you get paid is essential.

    Set clear deposits before you lift a tool

    A proper deposit is your first line of defence. It shows the customer is serious and stops you from funding their job out of your own pocket. For smaller jobs, many trades aim for a 30 to 50 percent deposit, enough to cover materials and some labour. For bigger projects, you might take a lower initial deposit but back it up with strong staged payments.

    Make it clear in writing that no materials are ordered and no dates are locked in until the deposit hits your account. This avoids awkward conversations later and keeps your schedule for customers who are ready to commit.

    Use staged payments to keep work and money in sync

    Staged payments are a key part of cash flow management for tradesmen because they stop you from being thousands out of pocket at any one time. Break the job into clear phases that make sense on site. For example, for an extension you might use:

    • Deposit to secure booking and materials
    • Stage 1 payment on completion of foundations
    • Stage 2 payment when structure and roof are complete
    • Stage 3 payment after first fix
    • Final balance on completion and snagging

    Each stage should be tied to visible, agreed milestones. That way the customer can see what they are paying for, and you are not waiting until the end of the job to see your profit.

    Write simple, clear contracts that back you up

    You do not need a law degree, but you do need something in writing. A basic contract or job agreement should cover the scope of work, what is included and excluded, payment schedule, how variations are handled, and what happens if the customer delays or cancels. Keeping it in plain English builds trust and avoids misunderstandings.

    Make sure the customer signs or confirms in writing before you start. Even a simple digital sign off on a quote can save arguments later if the job changes or they query a bill.

    Set firm late payment policies and stick to them

    Good customers will not be offended by clear rules. Include your payment terms on every quote and invoice, for example payment due within 7 or 14 days. State what happens if payment is late, such as interest charges or pausing work until the account is up to date.

    If a staged payment is overdue, do not keep pushing on with the job hoping it will sort itself out. Pause work politely but firmly until payment is made. This keeps the risk on the customer, not on your shoulders.

    Use simple software to keep on top of the numbers

    You do not need complicated systems, but a bit of basic tech can make cash flow management for tradesmen much easier. Simple invoicing apps can send quotes, take deposits, set up staged payments and chase overdue bills automatically. Many will also let customers pay by card or bank transfer in a couple of clicks, which often speeds things up.

    Even a basic spreadsheet that tracks jobs, invoices sent, amounts paid and what is outstanding can help you spot problems early. If you can see at a glance which jobs are dragging on without payment, you can chase them before they become a crisis.

    Tradesmen planning staged payments as part of cash flow management for tradesmen
    Handyman using simple software for better cash flow management for tradesmen

    Cash flow management for tradesmen FAQs

    What is a fair deposit for small building jobs?

    For most small domestic jobs, many tradesmen take a 30 to 50 percent deposit to cover materials and some labour. The exact figure depends on the size of the job and how much you need to spend upfront. Whatever you choose, make it clear in your quote and terms that work and ordering of materials will not start until the deposit has cleared.

    How can I handle customers who delay payment?

    Protect yourself before you start by using written contracts, clear staged payments and firm payment terms. If a payment is late, pause work politely but firmly until the account is brought up to date. Follow up with reminders, keep records of all communication, and do not let one slow payer put your whole cash flow at risk.

    Do I need accounting software to manage cash flow?

    You do not have to use full accounting software, but some form of simple system really helps. An invoicing app or a well organised spreadsheet can track quotes, deposits, staged payments and overdue invoices. The easier it is to see who owes you what, the quicker you can act to keep your cash flow healthy.

  • Managing Asbestos Waste On Construction Sites: A Practical Guide

    Managing Asbestos Waste On Construction Sites: A Practical Guide

    If you work with old housing stock, farm buildings or commercial refurbs, asbestos waste management is something you cannot ignore. The regs keep tightening, the fines are getting steeper and, at the end of the day, it is your crew breathing the dust if things go wrong.

    Why asbestos waste management matters on site

    Plenty of older roofs, soffits, gutters, flues and wall panels still contain asbestos. Once you start cutting, breaking or stripping those materials, you are into controlled waste territory. Poor asbestos waste management does not just risk a slap on the wrist – it can shut a job down, hit you with clean up bills and leave you personally on the hook if someone gets ill years down the line.

    On top of that, neighbours are more clued up than ever. One photo of dusty sheets going in a skip and you can expect a visit from the council or the HSE. Doing it right protects your lads, your reputation and your future work.

    Spotting likely asbestos before the strip out

    Before you touch anything on an older building, assume asbestos until proven otherwise. Common suspects include cement roof sheets, soffits and fascia boards, old flue pipes, water tanks and some floor tiles and adhesives. If you are planning demolition or heavy refurbishment, you should have an asbestos survey in your hand before the first hammer swings.

    Where asbestos is confirmed, get a clear plan in place: what is being removed, by who, and how the waste will be double bagged, labelled, stored and taken off site. Treat that plan as seriously as you treat your RAMS.

    Practical steps for safe asbestos waste management

    Once you know you are dealing with asbestos, the way you handle every offcut and broken piece matters. Here are the basics most trades can follow for lower risk materials, always within the limits of the law and any licence requirements:

    • Keep materials as whole as possible – avoid smashing or snapping sheets.
    • Use hand tools or low speed equipment to reduce dust.
    • Damp down materials before and during removal.
    • Bag small pieces immediately, do not leave piles lying around.
    • Use the right PPE and disposable overalls, and take them off before breaks.

    Waste should go straight into UN approved asbestos bags or wrapped in 1000 gauge polythene. Double bag or double wrap, tape all edges and label clearly. Do not mix asbestos waste with general rubble – that is how you end up contaminating a whole skip.

    Storing and transporting asbestos waste from site

    Even once it is bagged, asbestos waste is still a controlled material. You need a secure, signed area on site where bags and wrapped sections are stacked carefully, not thrown. Keep them off sharp edges and away from vehicle routes so they are not torn open by accident.

    Only registered carriers can legally move asbestos waste. That means you either use a licensed waste contractor or, if you are doing it yourself, you need the correct registrations and paperwork. Every load should be covered by a consignment note so there is a clear trail from your site to a licensed disposal facility.

    For jobs involving roof sheets, soffits or gutters, it often makes sense to bring in a specialist for the removal and transport, particularly where fragile access or height work is involved. Services such as asbestos gutter removal can take a big chunk of the risk off your hands.

    Training your team to handle asbestos waste correctly

    The best paperwork in the world will not help if the labourers bagging up the waste have never been shown how to do it properly. Everyone who might touch asbestos materials, even just for loading bags, needs task specific training.

    Run toolbox talks that cover what asbestos looks like, how to avoid breaking it, the right way to bag and label, and what to do if a bag splits or a sheet gets smashed. Make it clear that shortcuts are not acceptable – one lazy move can put the whole gang at risk.

    Secure on site storage area with labelled bags used for asbestos waste management
    Site manager briefing tradesmen on asbestos waste management procedures beside a skip

    Asbestos waste management FAQs

    Who is responsible for asbestos waste management on a building site?

    Responsibility usually sits with the main contractor or duty holder in charge of the project. They must ensure asbestos is identified, removed by competent people where required, and that all asbestos waste is packaged, stored, transported and disposed of legally. Subcontractors still have duties to follow the site plan, use the correct PPE and handle waste exactly as instructed.

    Can I put asbestos waste in a normal skip?

    No, asbestos waste must never go in a standard mixed waste skip. It is classed as hazardous and has to be double bagged or wrapped, clearly labelled and taken by a registered carrier to a licensed disposal facility. Mixing asbestos with general rubble can contaminate the whole load and lead to serious legal and clean up costs.

    Do I need training to handle asbestos waste on site?

    Yes, anyone who may disturb or handle asbestos materials or waste should have appropriate training. For lower risk materials this might be asbestos awareness plus task specific instruction on safe handling and bagging. For higher risk work, more in depth training and, in some cases, a licensed contractor are required. Proper training helps protect workers and keeps the project compliant.

  • Green building materials on real jobs: what actually works?

    Green building materials on real jobs: what actually works?

    If you are on the tools every day, you will have noticed more clients asking about green building materials. Eco this, sustainable that, and plenty of marketing fluff in between. The question is simple: which products actually make a difference, and which ones just make the spec sheet look pretty?

    What do we mean by green building materials?

    Before you can price or recommend anything, it helps to know what people are really asking for. When clients talk about green building materials, they usually mean one or more of the following:

    • Lower impact on the environment during manufacture or transport
    • Healthier to live with in the finished building
    • Better energy performance or durability over the long term
    • Less waste heading to skip and landfill

    On site, that translates into different choices for paint, timber, aggregates, insulation, plasters and concrete mixes. Some are a straightforward swap, others need a bit more skill and planning.

    Low VOC paints: worth the switch?

    Low VOC paints are one of the easiest green swaps you can make. VOCs are the solvents that give off that heavy paint smell and can cause headaches, irritation and long cure times. Modern low VOC and water based paints have come a long way. The good ones now cover well, dry fast and are much nicer to work with in tight, poorly ventilated rooms.

    The key is not to grab the cheapest tin with a green leaf on the label. Look for reputable trade brands with clear VOC ratings and check coverage figures. For most domestic and light commercial jobs, low VOC paints are a genuine improvement for both the client and the lads on site breathing it in all day.

    FSC timber and responsible sourcing

    Timber is often the first thing switched when clients ask for green building materials. FSC or similar certification means the timber has come from responsibly managed forests. On site, it cuts, fixes and finishes just like standard stock, so there is no change to your working methods.

    The main differences are cost and availability. Some sizes and species might need a bit more lead time. For structural work and visible joinery, FSC timber is a solid, practical option that can be backed up with paperwork for architects and building control when they ask.

    Recycled aggregates and hardcore

    Recycled aggregates are becoming standard on many groundworks jobs. Crushed concrete and brick, properly graded and certified, performs well for sub bases, backfill and some structural layers. It keeps demolition waste out of landfill and reduces the amount of virgin stone being quarried.

    What matters is quality control. Always check certificates, grading and any restrictions on use. For driveways, patios, footpaths and many slab bases, recycled aggregate is a simple, cost effective green choice. For heavily loaded structural work, follow the engineer’s spec and do not guess.

    Natural insulation: where it makes sense

    Natural insulation like sheep’s wool, wood fibre and cellulose is getting more popular, especially on older properties and high end refurbs. The big advantages are breathability, moisture management and comfort. These materials can help keep traditional walls dry and reduce condensation risk.

    They are usually more expensive than mineral wool and can be bulkier for the same U value, so you need to plan your build-ups carefully. They shine in roofs, timber frame walls and internal insulation on solid walls where breathability is important. For basic loft top-ups where cost is king, standard mineral wool still does the job.

    Lime plasters and breathable finishes

    Lime plasters and renders are not new, but they are back in demand as part of the shift towards greener, more breathable systems. Lime allows moisture to move through walls, which is ideal for solid masonry and heritage work. It can help prevent damp problems that modern cement based products sometimes trap in.

    The trade-off is that lime needs more skill and patience. It cures slower, can be more temperamental with temperature and humidity, and usually costs more in labour. When used in the right setting – old stone, brick or cob, or where a breathable build-up is designed – it is a genuinely better choice. On standard blockwork with cement based systems all around it, the benefits are limited.

    Decorator applying low VOC paint as part of using green building materials on an interior job
    Builder installing natural insulation as one of several green building materials in a timber stud wall

    Green building materials FAQs

    Are green building materials always more expensive?

    Not always. Some green building materials, like recycled aggregates or certain low VOC paints, can be cost neutral or even cheaper than traditional options. Others, such as natural insulation or lime plasters, usually cost more in both materials and labour. The trick is to match the product to the job: use the higher cost options where their benefits genuinely matter, and stick with proven standard materials where the gains would be minimal.

    Do I need special training to use lime plasters and natural insulation?

    You do not need formal qualifications, but some training or mentoring is strongly recommended before you take on full jobs with lime plasters or natural insulation systems. They handle differently to cement based products and standard fibreglass, with different curing times, fixings and detailing. Many manufacturers and suppliers offer short courses or on site support, which can save a lot of rework and callbacks later.

    How can I explain green building options clearly to clients?

    Keep it simple and practical. Explain what each option does for them: better indoor air, less damp risk, lower energy bills or a smaller environmental footprint. Use clear examples, such as swapping to low VOC paint in bedrooms or choosing FSC timber for visible joinery. Be honest about cost and any changes to programme, and back up your advice with product data sheets or supplier info so clients feel confident in the choices you are recommending.

  • Fire safety regulations for external walls: what trades need to know

    Fire safety regulations for external walls: what trades need to know

    If you are on site on high rise flats or big resi blocks, you cannot ignore the latest fire safety regulations for external walls. The rules around cladding, insulation and fixings have tightened, and it is your ticket on the line if the wrong materials go up.

    Why fire safety regulations for external walls have changed

    After several major high rise fires in the UK, investigations showed how some external wall systems helped flames race up the outside of buildings. Combustible cladding, insulation and poorly detailed cavities all played a part. The response has been tougher building rules, especially on multi storey residential jobs.

    For most taller residential buildings, the external wall is now treated as a full fire risk zone, not just a weather skin. That means every part of the build up is under the microscope: board, insulation, membranes, fixings, brackets and sealants.

    Key height triggers and building types

    The strictest rules hit multi storey residential buildings. The exact wording shifts over time, but as a working guide you will see the tightest limits on:

    • Blocks of flats and similar residential buildings over 11 metres
    • Even tougher requirements once you are over 18 metres
    • Student accommodation, care homes and hospitals treated like resi in many cases

    On these jobs, you should assume the external wall build up will need non combustible or very limited combustibility materials unless the drawings and spec clearly say otherwise.

    What ‘reaction to fire’ ratings actually mean

    Most product data sheets now shout about “reaction to fire” ratings. These are European classes from A1 down to F. In short:

    • A1 – Fully non combustible, will not contribute to a fire
    • A2 – Almost non combustible, very limited contribution
    • B to D – Increasingly combustible, can contribute to fire spread
    • E and F – Poor or untested performance

    On higher residential blocks, the usual rule is that external wall components exposed in a fire must be A2-s1,d0 or better, and often A1 is preferred. The extra letters cover smoke (s1 is low smoke) and flaming droplets (d0 means no droplets). When you check a product, look for that full code, not just the headline letter.

    Materials now restricted on multi storey residential jobs

    Under the tighter fire safety regulations for external walls, several common materials are now heavily restricted or banned on taller residential blocks:

    • Combustible cladding panels – Many aluminium composite panels with plastic cores are out, unless they meet the top ratings
    • Plastic based insulation – PIR, PUR and EPS are usually not allowed in the main external wall build up on higher resi, except in very specific, tested systems
    • Combustible membranes – Standard breather membranes or sarking felt may not meet the rating needed unless they are specially tested
    • Timber cladding – Often restricted or completely banned on taller resi blocks, unless used in limited, clearly defined areas

    None of this means these materials are useless. They are still common on low rise, industrial or commercial jobs. But on multi storey residential, you must assume they are a problem unless the spec and fire engineer say otherwise.

    Typical compliant materials and build ups

    On taller residential jobs, you are more likely to see:

    • Non combustible cladding such as solid aluminium, steel or fibre cement meeting A2 or A1 ratings
    • Mineral wool or stone wool insulation with A1 reaction to fire
    • Non combustible cavity barriers and fire stops at floor slabs and around openings
    • Metal support systems and brackets with tested fire performance

    These systems can be slower to handle and heavier to fix than the old plastic based options, so you need to allow for more labour, extra fixings and careful setting out.

    Practical checks for trades on site

    The fire safety regulations for external walls live in long documents, but your day to day checks are simple:

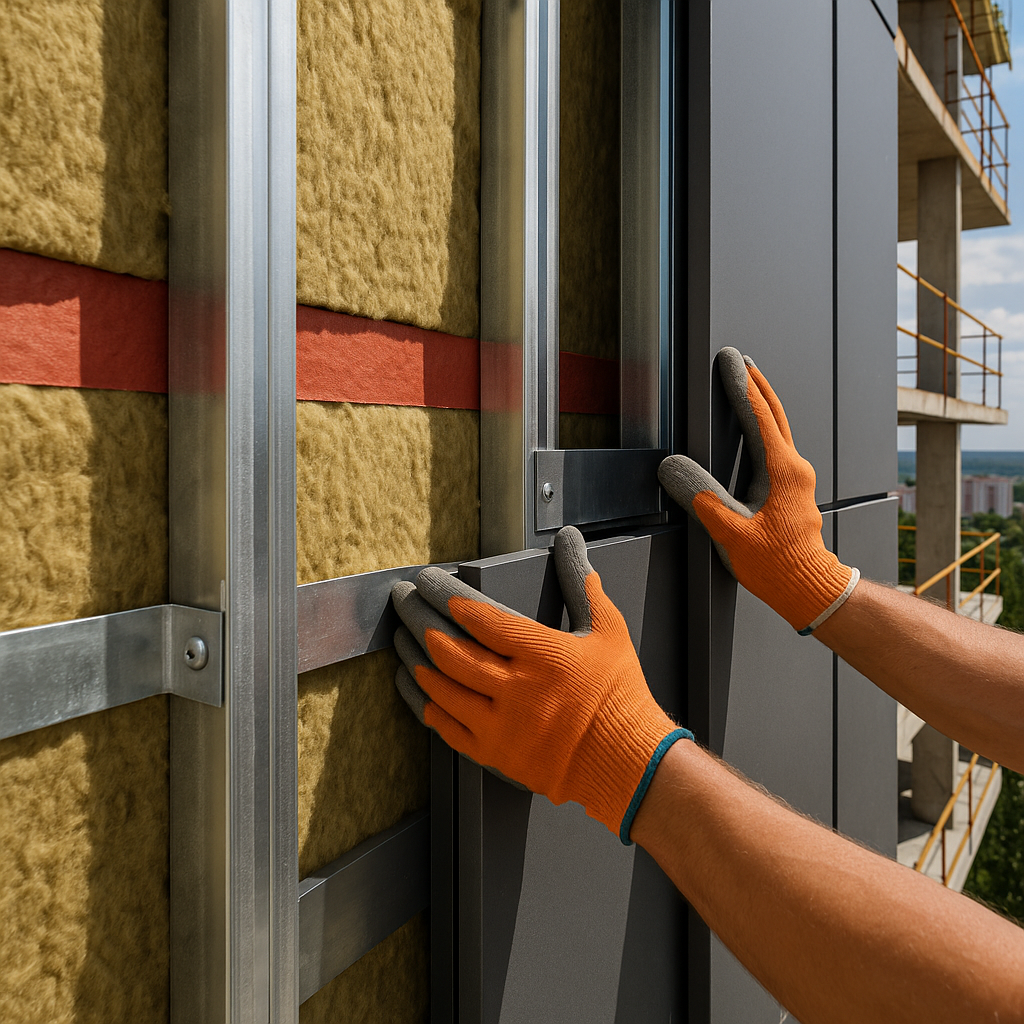
    Detail of mineral wool insulation and cavity barriers complying with fire safety regulations for external walls on a high rise project
    Site team checking drawings to ensure cladding and insulation meet fire safety regulations for external walls on a residential building

    Fire safety regulations for external walls FAQs

    Which materials are usually allowed on high rise residential external walls?

    On high rise residential jobs the safest bet is non combustible products. That normally means mineral wool or stone wool insulation, metal or fibre cement cladding with A1 or A2-s1,d0 ratings, and non combustible cavity barriers and fixings. Always check the drawings and fire strategy before ordering materials.

    Can I still use PIR or EPS insulation on taller residential buildings?

    Plastic based insulations such as PIR, PUR and EPS are heavily restricted on taller residential blocks. They may only be allowed as part of a specifically tested system with full fire engineering sign off. Never assume they are acceptable just because they were used on past jobs. Check the specification and fire performance data every time.

    How do I check if a cladding product meets the fire requirements?

    Look for the reaction to fire classification on the product data sheet, for example A1 or A2-s1,d0. Make sure the rating matches or exceeds what is called for in the drawings and building regulations for that building height and use. If the rating is missing or unclear, do not install the product until the designer or site manager confirms it is suitable.